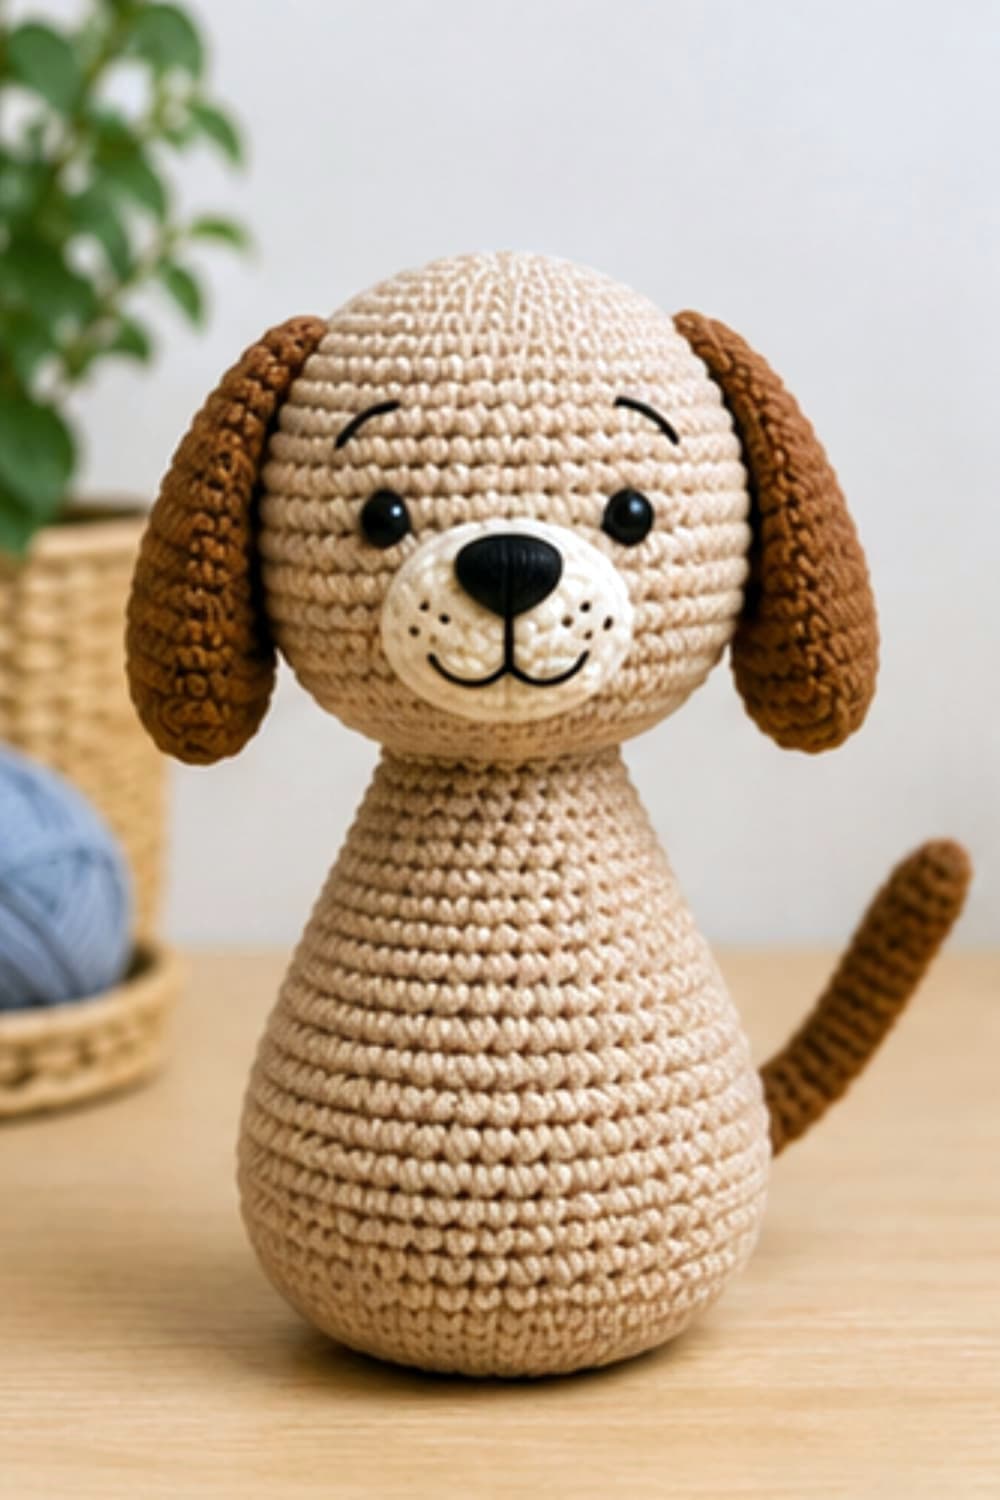
Looking for your next project? This **amigurumi dog pattern** helps you crochet a cute plush puppy step by step. Perfect for intermediate makers, this free tutorial uses soft chenille yarn to create a beautiful decorative piece for any room. With detailed instructions, clear stitch guides, and expert assembly tips, you will love bringing this adorable stuffed animal to life.
Welcome to Your Next Crochet Adventure
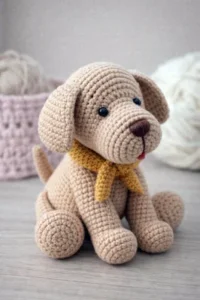
Discover the joy of bringing a loyal little companion to life with this comprehensive **amigurumi dog pattern**. Designed with love, this step-by-step tutorial guides you through creating an adorable, high-quality plush puppy from the comfort of your home. Whether you want to craft a heartwarming handmade gift, decorate a cozy nursery shelf, or simply sharpen your intermediate crochet skills, this free guide delivers clear instructions and expert tips for a flawless finish. Grab your favorite soft chenille yarn, prepare your fiberfill, and let’s start stitching this delightful, huggable masterpiece together!
Project Size
The finished amigurumi puppy measures approximately **22 cm tall**, although the final size may vary depending on the yarn weight, the type of stuffing used, and the tension of each crocheter. Its compact design and stable base make it an ideal piece for decorating shelves, desks, or children’s rooms.
Difficulty Level
**Intermediate**
This pattern is designed for people who have already mastered the basic amigurumi techniques, such as the magic ring, increases, invisible decreases, and seaming. The instructions are detailed and easy to follow, so it can also be made by beginners with basic knowledge who wish to take on a slightly more elaborate project.
Estimated Crochet Time
Completing this amigurumi dog requires approximately **8 to 12 hours of work**, depending on your experience, crocheting speed, and the time dedicated to assembly and final details, such as embroidering the facial expression.
Materials List
To crochet this project you will need the following materials:
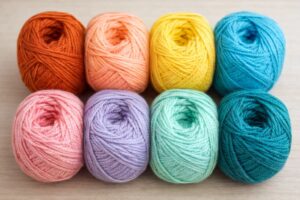
* Chenille or velvet yarn in **sand or light beige** (main color).
* Chenille or velvet yarn in **chocolate brown** (ears and tail).
* Chenille or velvet yarn in **white** (snout).
* **4 mm** crochet hook or the size recommended for the chosen yarn.
* A pair of **12 mm** black safety eyes.
* **16 mm** black safety nose (or black yarn to embroider it).
* Fiberfill for stuffing.
* Yarn needle to sew the pieces and hide the yarn tails.
* Stitch marker.
* Scissors.
* Straight pins (optional, to hold the pieces during assembly).
* Pipe cleaners or thin plastic-coated wire (optional, to shape the tail).
* Cosmetic blush or soft pastel (optional, to add color to the cheeks).
Useful guide for crochet tools
Stitch Guide and Abbreviations
* **MR:** Magic Ring. *How to do it:* Cross the yarn over your fingers forming an “X”, insert the hook under the first strand and pull the second strand forward, make a chain to secure.
* **sc:** Single crochet. *How:* Insert the hook into the stitch of the previous round, yarn over and pull up a loop (you have two loops on your hook), yarn over again and pull through both loops.
* **inc:** Increase. It means to crochet two single crochets exactly in the same stitch of the previous round to expand the piece.
* **dec:** Invisible decrease. *How:* Insert the hook catching only the front loop of the first stitch, then catch the front loop of the next stitch (you have two front loops on your hook), yarn over and pull through those first two loops, yarn over and pull through the remaining two loops.
* **[ ] x N:** Repeat the instructions inside the brackets the number of times indicated by N.
* **( )**: The number at the end in parentheses indicates the total number of stitches you should have upon finishing that round. **Always count them before moving forward!**
Section 1: Body (From bottom to top)
The body is crocheted in a single piece, starting from the base. Its shape is rounded at the bottom and narrows gradually to form a long and elegant neck. Use the main color (sand/light beige) throughout this entire section.
* **Round 1:** Start with a 6 sc MR. Place the stitch marker in the last stitch. (6)
* **Round 2:** Crochet 1 inc in each stitch. (12)
* **Round 3:** [1 sc, 1 inc] × 6. (18)
* **Round 4:** [2 sc, 1 inc] × 6. (24)
* **Round 5:** [3 sc, 1 inc] × 6. (30)
* **Round 6:** [4 sc, 1 inc] × 6. (36)
* **Round 7:** [5 sc, 1 inc] × 6. (42)
* **Round 8:** [6 sc, 1 inc] × 6. (48)
* **Round 9:** [7 sc, 1 inc] × 6. (54)
* **Round 10:** [8 sc, 1 inc] × 6. (60)
Base of the body
* **Rounds 11 to 14 (4 rounds):** Crochet 1 sc in each stitch. Do not make any increases or decreases. These rounds form the rounded base of the body. (60)
Tapering of the body
* **Round 15:** [8 sc, 1 dec] × 6. (54)
* **Round 16:** 1 sc in each stitch. (54)
* **Round 17:** [7 sc, 1 dec] × 6. (48)
* **Round 18:** 1 sc in each stitch. (48)
* **Round 19:** [6 sc, 1 dec] × 6. (42)
* **Round 20:** 1 sc in each stitch. (42)
* **Round 21:** [5 sc, 1 dec] × 6. (36)
* **Round 22:** 1 sc in each stitch. (36)
**When to start stuffing:** Starting from this round, begin introducing fiberfill in small amounts. Distribute it evenly, pressing down especially on the lower part to maintain the rounded shape of the body.
* **Round 23:** [4 sc, 1 dec] × 6. (30)
* **Round 24:** 1 sc in each stitch. (30)
* **Round 25:** [3 sc, 1 dec] × 6. (24)
* **Round 26:** 1 sc in each stitch. (24)
* **Round 27:** [2 sc, 1 dec] × 6. (18)
* **Rounds 28 to 31 (4 rounds):** Crochet 1 sc in each stitch. These rounds form the dog’s neck. (18)
**Optional weight:** If you want the amigurumi to stand more stably when placed on a surface, before completing the stuffing, place a small bag with plastic pellets, washed pebbles, or a metal disc in the center of the base. Then finish stuffing the body firmly.
**Final stuffing:** Complete stuffing the neck, making sure it stays firm but without distorting its cylindrical shape.
**How to close:** Fasten off leaving approximately 30 cm of yarn to sew the head to the neck later. Secure the last stitch and set the piece aside.
Section 2: Head
The head is crocheted separately using the main color (sand/light beige). Its shape is a slightly flattened sphere, with good lateral volume and a base that fits comfortably onto the 18-stitch neck.
* **Round 1:** Start with a 6 sc MR. Place the stitch marker. (6)
* **Round 2:** Crochet 1 inc in each stitch. (12)
* **Round 3:** [1 sc, 1 inc] × 6. (18)
* **Round 4:** [2 sc, 1 inc] × 6. (24)
* **Round 5:** [3 sc, 1 inc] × 6. (30)
* **Round 6:** [4 sc, 1 inc] × 6. (36)
* **Round 7:** [5 sc, 1 inc] × 6. (42)
* **Round 8:** [6 sc, 1 inc] × 6. (48)
* **Round 9:** [7 sc, 1 inc] × 6. (54)
* **Round 10:** [8 sc, 1 inc] × 6. (60)
Central part of the head
* **Rounds 11 to 17 (7 rounds):** Crochet 1 sc in each stitch without making any increases or decreases. These rounds form the main volume of the head. (60)
**When to place the safety eyes:** If you are using safety eyes, place them between rounds **14 and 15**, spaced **10 visible stitches** apart. Check that both are aligned before securing the safety washers.
Closing the head
* **Round 18:** [8 sc, 1 dec] × 6. (54)
* **Round 19:** [7 sc, 1 dec] × 6. (48)
* **Round 20:** [6 sc, 1 dec] × 6. (42)
* **Round 21:** [5 sc, 1 dec] × 6. (36)
* **Round 22:** [4 sc, 1 dec] × 6. (30)
**When to stuff:** Begin stuffing the head firmly starting from this round. Add small amounts of stuffing as you go to maintain a perfectly rounded shape and prevent any sagging.
* **Round 23:** [3 sc, 1 dec] × 6. (24)
* **Round 24:** [2 sc, 1 dec] × 6. (18)
* **Round 25:** [1 sc, 1 dec] × 6. (12)
* **Round 26:** 6 dec. (6)
**How to close:** Fasten off leaving about 15 cm of yarn. Using a yarn needle, weave it through the front loops of the 6 remaining stitches, pull gently to close the hole completely, and hide the yarn tail inside the head.
Section 3: Snout
The snout is crocheted separately in white or a very light cream color. It has an oval shape and is slightly padded, protruding from the center of the face.
* **Round 1:** Chain 6. Start crocheting in the second chain from the hook: 4 sc, 3 sc in the last chain. Continue along the opposite side of the foundation chain: 3 sc and 2 sc in the last chain. (12)
* **Round 2:** 2 inc, 3 sc, 3 inc, 3 sc, 2 inc. (18)
* **Round 3:** [1 sc, 1 inc], 3 sc, [1 sc, 1 inc] × 3, 3 sc, [1 sc, 1 inc] × 2. (24)
* **Rounds 4 and 5:** Crochet 1 sc in each stitch without making any increases or decreases. (24)
**How to stuff it:** Before closing the seam, introduce a small amount of fiberfill. The stuffing should be light, just enough for the snout to protrude without losing its oval shape.
**How to close:** Finish with 1 slip stitch, fasten off leaving approximately 40 cm of yarn for sewing.
Placement
Center the snout between the eyes, so that its upper edge sits approximately between rounds **15 and 16** of the head. The lower part should reach around round **22**. Secure it with straight pins first before sewing it on permanently.
Nose and Embroidery
Place a black safety nose in the top center of the snout before stuffing it, or embroider it later with black yarn. From the base of the nose, embroider a short vertical line and then a slightly curved smile to both sides, as in the photograph. Add the small whisker spots using short stitches or French knots on both sides of the mouth.
Section 4: Ears (Make 2 pieces)
The ears are crocheted separately in chocolate brown color. They are three-dimensional, slightly cylindrical pieces without stuffing, which are later gently flattened at the base when sewn to the head to achieve their natural drape.
* **Round 1:** Start with a 6 sc MR. (6)
* **Round 2:** Crochet 1 inc in each stitch. (12)
* **Round 3:** [1 sc, 1 inc] × 6. (18)
* **Round 4:** [2 sc, 1 inc] × 6. (24)
Body of the ear
* **Rounds 5 to 8 (4 rounds):** Crochet 1 sc in each stitch. (24)
Shaping the tip
* **Round 9:** [6 sc, 1 dec] × 3. (21)
* **Round 10:** 1 sc in each stitch. (21)
* **Round 11:** [5 sc, 1 dec] × 3. (18)
* **Round 12:** 1 sc in each stitch. (18)
* **Round 13:** [4 sc, 1 dec] × 3. (15)
* **Round 14:** 1 sc in each stitch. (15)
* **Round 15:** [3 sc, 1 dec] × 3. (12)
**Do not stuff.** The ear must remain flexible so that it drapes naturally.
**How to close:** Fasten off leaving about 35 cm of yarn for sewing. Lightly flatten only the opening of the base and sew it directly to the head. It is not necessary to close the opening before sewing.
Placement
Sew each ear approximately between rounds **8 and 14** of the head, symmetrically spaced. Before fixing them permanently, lightly flatten the base with your fingers so that the ear falls toward the sides, just as seen in the photograph.
Section 5: Tail
Crocheted in dark brown/chocolate color.
* **Round 1:** 6 sc MR. (6)
* **Round 2:** [1 sc, 1 inc] x 3. (9)
* **Rounds 3 to 18 (16 rounds total):** Crochet 1 sc in each stitch. (9)
* **How to close:** If you want it to stand upright as in the image, introduce a bit of stuffing (very lightly) at the base or a moldable pipe cleaner. Close by flattening the last round and crocheting through both layers or leaving the stitches open. Leave a long yarn tail to sew to the body.
Section 6: Assembly and Final Details
1. **Snout to the head:** Place the white snout centered just below the midline of the eyes. Fill it lightly with fiberfill as you sew so that it maintains its volume.
2. **Head to the body:** Use the 18 stitches of the top opening of the body. Fit them centered over the lower base of the head and sew firmly using concentric stitches. Secure the knot to prevent tilting.
You can tilt it slightly to make it look cuter or friendlier.
3. **Ears:** Sew them to the sides of the head, approximately between rounds 5 and 7 from the start of the top MR. They should drape naturally toward the sides.
4. **Tail:** Fix it to the lower back part of the body, between rounds 12 and 14, pointing upward.
5. **Expression:** With thin black embroidery thread, make curved eyebrows above the eyes to replicate the cute expression from the photograph.
To give the final and professional touch to the pattern of the puppy from **perrito amigurumi decorativo.jpg**, we will detail the specific techniques for embroidery, eye sculpting/indentation, and aesthetic finishes. These details are the secret to moving from a flat doll to one with the cute and neat expression seen in the image.
Section 7: Design Details and Facial Expression
The small details are what bring personality to the amigurumi. In this section, we will do the eye sculpting, the embroidery of the nose, mouth, eyebrows, and freckles to reproduce the sweet expression of the model.
1. Eye Sculpting (Indentation)
Perform this step once the head is firmly sewn to the body and before embroidering the eyebrows.
How to do it
1. Thread a long needle with the same yarn used to crochet the head (beige).
2. Insert the needle through the back of the neck and bring it out next to the outer edge of the left eye.
3. Reinsert the needle through the inner edge of the same eye and bring it out again through the back of the neck.
4. Without cutting the yarn, repeat exactly the same procedure with the right eye using the same strand.
5. Pull both ends of the yarn little by little until both eyes are slightly indented and at the same depth.
6. Tie a firm knot at the back of the neck and hide the yarn tails inside the body.
**Tip:** Tighten the yarn gradually and compare both eyes before tying the final knot. A gentle indentation produces a much more natural expression.
2. Nose
If you are using a safety nose, place it before completely sewing the snout.
If you prefer to embroider it:
1. Use black embroidery thread.
2. Make several horizontal passes over the top center of the snout until forming a slightly oval nose.
3. Add a few vertical stitches to give it some volume and a uniform finish.
The nose must be perfectly centered relative to the eyes and the snout.
3. Mouth Embroidery
With thin black thread:
1. From the bottom center of the nose, embroider a straight vertical line approximately two rounds in length.
2. From the bottom end of that line, embroider two short, soft curves, one to each side, forming a classic puppy smile.
The curves should be subtle and symmetrical, without forming a pronounced “W”.
4. Eyebrow Embroidery
The eyebrows provide much of the puppy’s expression.
**Location:** Approximately **2 rounds above the eyes**.
How to embroider them
1. Insert the needle from a hidden area of the head.
2. Bring it out at the point where the eyebrow will begin.
3. Embroider a short line that is slightly arched and slanted toward the outside.
4. Repeat the same process on the opposite side, ensuring that both eyebrows have the same length and angle.
**Tip:** Before fixing the stitches permanently, look at the face from the front to verify that both eyebrows convey a balanced expression.
5. Snout Freckles
The small black specks complete the puppy’s expression.
**Location:** On both sides of the snout, slightly above the smile line.
How to make them (French Knot)
1. Bring the needle out with black thread at the point where the freckle will go.
2. Wrap the thread twice around the needle.
3. Reinsert the needle very close to the exit point, keeping the thread slightly taut.
4. Pull slowly until forming a small knot.
Make **three small freckles on each side**, ensuring they are not perfectly aligned for a more natural finish.
6. Cheek Blush (Optional)
To reproduce the finish of the reference model, you can apply a light blush over both cheeks.
With a small brush, apply a very small amount of cosmetic blush, soft pastel, or powder textile pigment, and blend it gently with circular motions.
This detail adds warmth and considerably softens the expression of the face without altering the crochet stitches.
Section 8: Quality Control and Textured Finish
* **Invisible Seams:** When sewing the ears and the snout, always use the technique of catching one loop from the body and one loop from the piece to be sewn, stitch by stitch. Upon finishing each seam, tie a flat knot close to the fabric, sink the needle into the inside of the doll, and bring the thread out through any other distant spot before cutting it flush. This way, the thread retracts and the fastening is completely hidden inside the fiberfill.
* **Visual Symmetry:** Before making the final stitches on the ears, use colored straight pins to position them on the head. Look at it from the front, in profile, and from above to ensure they are at the same distance from the eyes.
* **Texture and Consistency:** When using a classic yarn like acrylic cashmilon, the rounds must stay compact (without the stitches opening up or the white fiberfill showing through). If you notice that the stitches are a bit loose, it is recommended for your next project to go down a third or half a size in crochet hook size to maintain the structural firmness that supports the head without the need for internal supports.
Happy Crocheting and Beautiful Finishes
Congratulations on completing your brand-new handmade companion! By following this detailed **amigurumi dog pattern**, you have turned simple stitches into a charming, expressive plush puppy full of unique personality. We hope you enjoyed every step of the process, from the initial magic ring to those final, delicate facial expressions and custom design details. Don’t forget to share your finished project on Instagram and tag your photos so we can admire your beautiful work. Stay tuned for more free tutorials, keep experimenting with new textures, and happy stitching until our next creative adventure together!

Spanish version of this same pattern
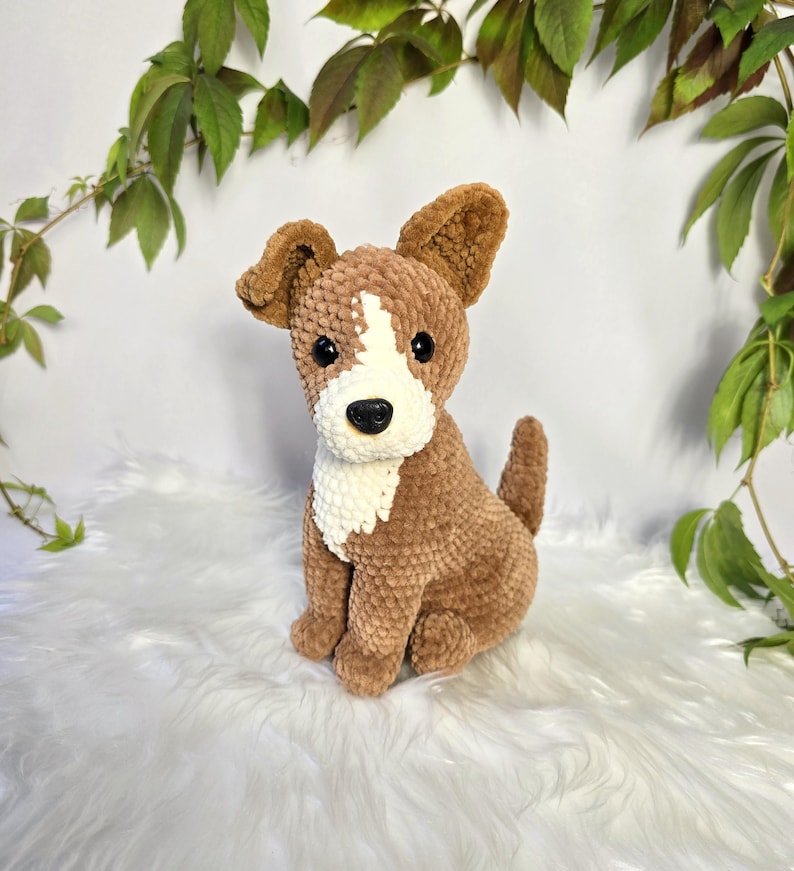
Here’s a pattern for knitting another little dog
Video tutorial for crocheting another amigurumi dog design
Pattern found on Etsy to knit this adorable little dog
Affiliate Disclosure:
This post contains affiliate links. If you purchase through them, I may earn a small commission at no extra cost to you. Thank you for supporting my work!
Este artículo contiene enlaces de afiliado, lo que significa que si comprás desde aquí, recibimos una pequeña comisión sin costo extra para vos. ¡Gracias por apoyar nuestro trabajo!
Discover more crochet patterns, free downloads, and premium PDFs on Ko-fi.