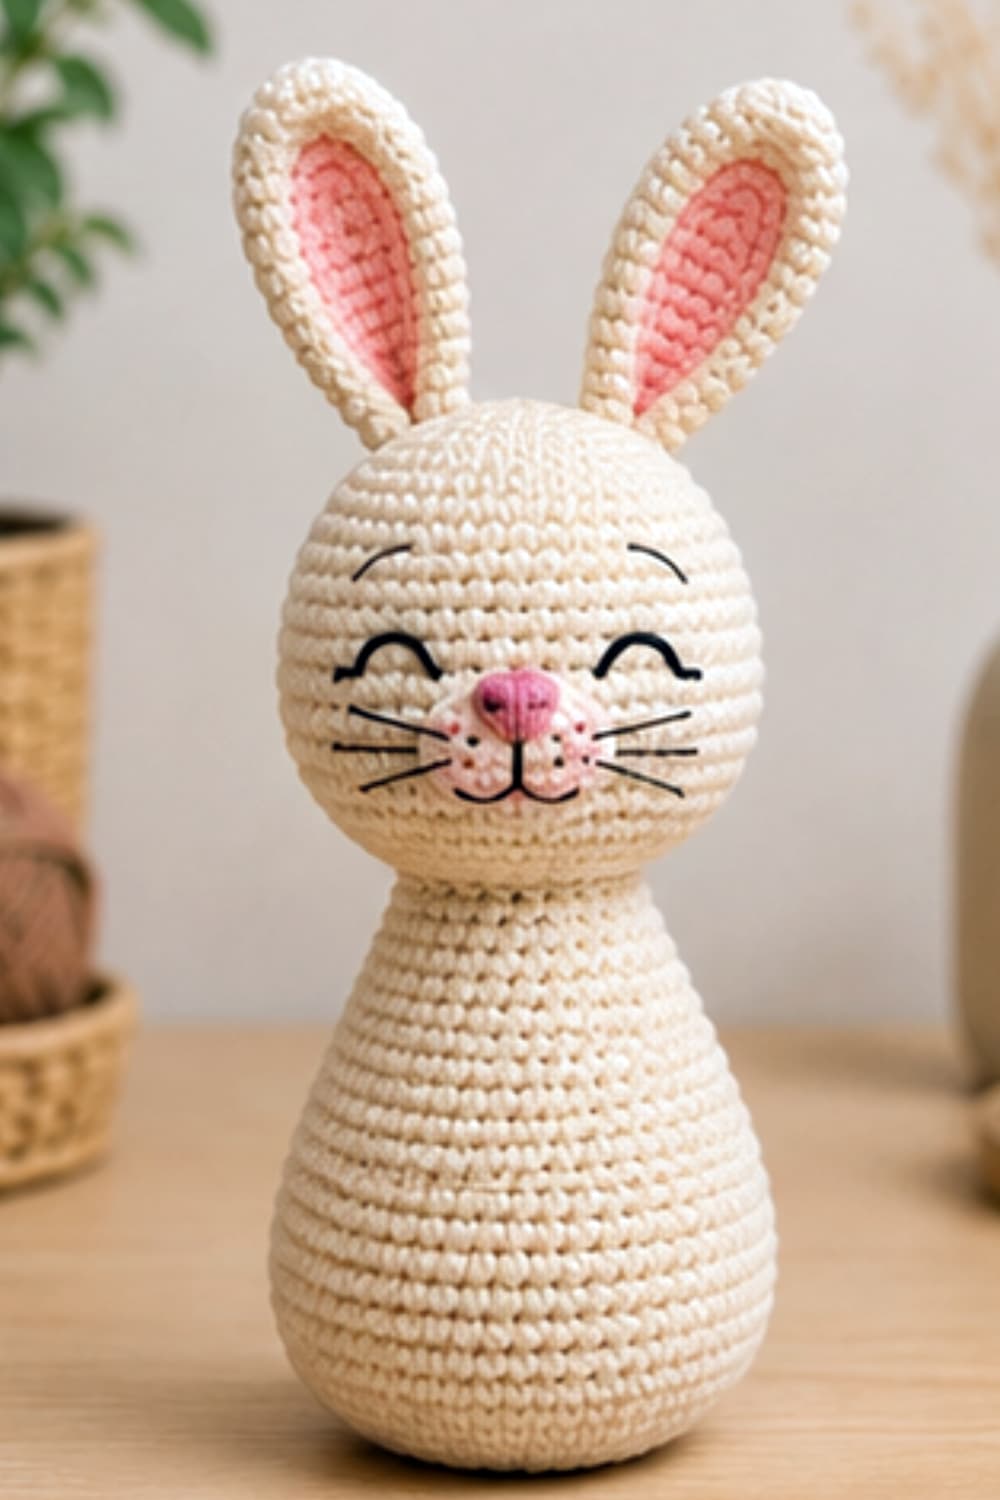
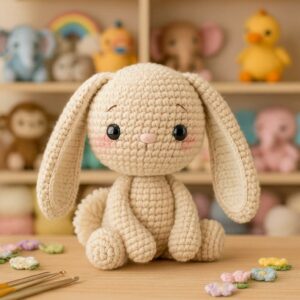
**Amigurumi bunny pattern**: Learn how to crochet a cute rabbit with this free, beginner-friendly step-by-step tutorial. This comprehensive guide features a seamless one-piece head and body design, making it the perfect DIY project for crafters looking to practice basic stitches. Follow our detailed instructions, complete with clear abbreviations and essential assembly tips, to create an adorable, high-quality handmade plush toy that everyone will love.
Welcome to Your Next Crochet Adventure
**Amigurumi bunny pattern** lovers, welcome! Whether you are a passionate crafter or a beginner stepping into the wonderful world of handmade toys, this comprehensive guide is designed just for you. Crocheting is more than a hobby; it is a relaxing journey where basic stitches transform into adorable characters full of personality. This specific project features a seamless, clever construction that minimizes sewing, allowing you to focus on the joy of watching your sweet rabbit come to life row by row. Grab your favorite hook, settle into a cozy spot, and let’s start creating together!📏 Project Size
The finished amigurumi rabbit measures approximately **20 cm (approx. 8 inches) in height**, including the ears. The final size may vary slightly depending on the yarn weight, the hook size used, and your tension while crocheting.
⭐ Difficulty Level
**Beginner – Intermediate**
This pattern is designed for people who already know the basic crochet stitches and want to start their journey into the world of amigurumi. Each section includes detailed explanations on how, when, and where to make each stitch, making the process easy even if it is your first project of this kind.
⏱️ Estimated Crochet Time
The approximate time to complete this amigurumi rabbit is **8 to 12 hours**, depending on your experience and crochet pace. If this is your first amigurumi, it is recommended to work without rushing to enjoy the process and achieve a neat finish.
📋 Abbreviations and Basic Concepts Guide
Before starting, it is essential to clarify what each instruction means to leave no room for doubt:
* **MR (Magic Ring):** A technique to start a round piece of crochet without leaving a hole in the center. The yarn is wrapped around the fingers, a loop is pulled up, and the indicated stitches are crocheted inside that adjustable loop before pulling the short tail to close it tightly.
* **sc (Single Crochet):** Insert the hook into the stitch of the previous round, yarn over, pull up a loop (2 loops on the hook), yarn over again, and pull through both loops.
* **inc (Increase):** Crochet **two** single crochets exactly into the same stitch of the previous round. This is used to widen the piece.
* **dec (Invisible Decrease):** To prevent gaps, insert the hook picking up only the **front loop** of the first stitch, then the **front loop** of the second stitch, yarn over and pull through those two loops, yarn over again and complete the stitch. This is used to narrow or close the piece.
* **R (Round):** Each of the circular rows of the piece. We will work in a **continuous spiral** (without closing the rounds with a slip stitch). **Always use a stitch marker on the first stitch of each round!**
* **[ … ] x N:** Repeat the sequence inside the brackets as many times as indicated by “N”.
* **(Nº):** The number at the end of each round indicates the total count of stitches you should end up with for that row. Count them at the end of each round!
🧶 Suggested Materials
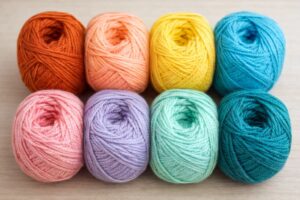
* Main yarn: Ecru / light beige color.
* Secondary yarn: Pink (for the center of the ears and embroidering the nose).
* Detail yarn: Black or dark brown (for embroidering the eyes, eyebrows, and whiskers).
* Crochet hook suitable for the yarn (e.g., 2.5 mm or 3 mm). The stitches must be tight so that the stuffing does not show.
* Polyester fiberfill (stuffing).
* Stitch marker, tapestry needle, and scissors.
Useful tools guide for crocheting
Step-by-Step Pattern: Body and Head (One piece)
We start from the base of the body with the ecru color.
Body Base (Bell shape)
We want a wide and stable base that tapers gradually toward the neck.
* **R1:** Crochet 6 sc into a MR. (6)
* *How:* Make the ring, cast on the 6 single crochets, and pull the short tail to close it. Do not close the round; the first stitch of R2 is crocheted directly into the first stitch of R1.
* **R2:** [1 inc] in each stitch of the previous round x 6. (12)
* *Where:* Crochet two single crochets into each of the 6 stitches of the previous round.
* **R3:** [1 sc, 1 inc] x 6. (18)
* *How:* Crochet one single crochet into the first stitch and two single crochets into the next. Repeat this sequence throughout the entire round.
* **R4:** [2 sc, 1 inc] x 6. (24)
* **R5:** [3 sc, 1 inc] x 6. (30)
* **R6:** [4 sc, 1 inc] x 6. (36)
* **R7:** [5 sc, 1 inc] x 6. (42)
* **R8:** [6 sc, 1 inc] x 6. (48)
* **R9:** [7 sc, 1 inc] x 6. (54)
* **R10 to R13 (4 rounds in total):** Crochet 1 sc in each stitch of the previous round. (54)
* *Note:* The piece will begin to curve, forming the widest part of the body.
Body Decreases (Toward the neck)
* **R14:** [7 sc, 1 dec] x 6. (48)
* **R15:** Crochet 1 sc in each stitch. (48)
* **R16:** [6 sc, 1 dec] x 6. (42)
* **R17:** Crochet 1 sc in each stitch. (42)
* **R18:** [5 sc, 1 dec] x 6. (36)
* **R19:** Crochet 1 sc in each stitch. (36)
* **R20:** [4 sc, 1 dec] x 6. (30)
* **R21:** Crochet 1 sc in each stitch. (30)
* **R22:** [3 sc, 1 dec] x 6. (24)
* *Time to stuff:* Start inserting polyester fiberfill firmly from the base. Distribute it with your fingers to maintain a rounded shape, but lightly mold the bottom part to get a flat base that allows the bunny to stand on its own.
Transition to the Head (The neck)
* **R23:** [2 sc, 1 dec] x 6. (18)
* **R24:** Crochet 1 sc in each stitch. (18)
* **R25:** Crochet 1 sc in each stitch. (18)
* *Important:* Add a small amount of stuffing inside the neck and compact it with the back of the crochet hook. This will help support the head and prevent it from tilting to the sides.
Expansion of the Head
The head is formed as a sphere that starts directly from the neck.
* **R26:** [2 sc, 1 inc] x 6. (24)
* **R27:** [3 sc, 1 inc] x 6. (30)
* **R28:** [4 sc, 1 inc] x 6. (36)
* **R29:** [5 sc, 1 inc] x 6. (42)
* **R30:** [6 sc, 1 inc] x 6. (48)
* **R31:** [7 sc, 1 inc] x 6. (54)
* **R32 to R40 (9 rounds in total):** Crochet 1 sc in each stitch. (54)
* *Note:* These straight rounds form the sphere of the head and provide the space to embroider the eyes, muzzle, and whiskers.
Closing the Head
* **R41:** [7 sc, 1 dec] x 6. (48)
* **R42:** Crochet 1 sc in each stitch. (48)
* **R43:** [6 sc, 1 dec] x 6. (42)
* **R44:** Crochet 1 sc in each stitch. (42)
* **R45:** [5 sc, 1 dec] x 6. (36)
* **R46:** [4 sc, 1 dec] x 6. (30)
* **R47:** [3 sc, 1 dec] x 6. (24)
* *Final stuffing:* Finish stuffing the head completely. Distribute the fiberfill toward the sides to maintain a perfectly rounded shape.
* **R48:** [2 sc, 1 dec] x 6. (18)
* **R49:** [1 sc, 1 dec] x 6. (12)
* **R50:** 6 dec. (6)
* *How to close:* Cut the yarn leaving about 15 cm (approx. 6 inches). Thread a tapestry needle and pass it only through the front loops of the 6 remaining stitches. Pull gently to close the hole, make an invisible knot, and hide the yarn tail inside the head.
Ears (Make 2)
Each ear is made of **two pieces**: an outer piece in ecru color, crocheted in rounds (spiral), and an inner piece in pink color, crocheted in rows (flat). Once finished, the pink piece is sewn onto one of the sides of the outer ear, and finally, the base is folded before attaching it to the head.
Outer Part (Ecru Color)
The outer piece is crocheted **in a continuous spiral**, starting from the tip of the ear. Do not close the rounds; continue crocheting directly into the first stitch of the previous round.
Tip of the ear
* **R1:** Crochet **4 chains**.
* *How:* Start crocheting in the second chain from the hook. Make 2 sc, then crochet 3 sc into the last chain to turn to the opposite side. Continue crocheting 1 sc along the other side of the chain, and finish with 2 sc into the last chain. (8)
* **R2:** Crochet increases evenly distributed until you have **12 stitches**. (12)
* **R3:** Crochet increases evenly distributed until you have **16 stitches**. (16)
* **R4:** Crochet increases evenly distributed until you have **20 stitches**. (20)
* **R5:** Crochet increases evenly distributed until you have **24 stitches**. (24)
* **R6:** Crochet increases evenly distributed until you have **27 stitches**. (27)
* **R7:** Crochet increases evenly distributed until you have **30 stitches**. (30)
* *Tip:* Distribute the increases evenly around the entire round. This will allow the ear to maintain an oval and symmetrical shape.
Body of the ear
* **R8 to R16 (9 rounds in total):** Crochet 1 sc in each stitch of the previous round. (30)
* *How:* As you progress, you will notice that the piece begins to form a small tube. Do not add stuffing. Every now and then, gently flatten it with your fingers to check that it keeps an oval shape and is not completely round.
* **Fasten off:** Cut the yarn, leaving approximately 30 cm (approx. 12 inches) for assembly.
Inner Part (Pink Color)
The inner piece is crocheted **in rows (flat)**, starting on a foundation chain. This piece represents the pink inside of the ear.
* **Foundation chain:** Chain 10.
* **R1:** Starting in the second chain from the hook:
* 8 sc.
* 3 sc in the last chain.
* Continue along the opposite side of the foundation chain.
* 7 sc.
* 2 sc in the last chain. (20)
* *How:* The stitches crocheted at the ends allow the piece to take on an oval shape, similar to a small sole.
* **R2:**
* 1 increase.
* 7 sc.
* 3 increases.
* 7 sc.
* 2 increases. (26)
* *Where:* Make all the increases in the curves at the ends. Do not increase on the long sides, as they must remain straight.
* **R3:**
* Crochet 1 sc in each stitch of the previous round. (26)
* **Fasten off:** Cut the yarn, leaving a long tail for sewing.
Assembly of the Ear
1. Gently flatten the outer ear with your fingers.
2. Place the pink piece on only one side of the ear, ensuring it is perfectly centered.
3. Check that an even border of the ecru color remains visible around the entire pink piece.
4. Secure the piece with pins or markers if you find it necessary.
5. Using a tapestry needle, sew only the edge of the pink piece using small, invisible stitches.
6. Once the sewing is finished, pinch the base of the ear by folding it slightly toward the center and make two or three stitches to maintain that shape.
7. Finally, sew the ear to the head. Place it slightly tilted toward the outside, just as seen in the model, to achieve a more natural expression.
The Muzzle (Ecru Color)
The muzzle is a small oval piece that is sewn onto the front of the head to give volume to the face.
Crocheting the Muzzle
* **Foundation chain:** Chain 6.
* **R1:** Starting in the second chain from the hook:
* 4 sc.
* 3 sc in the last chain.
* Continue along the opposite side of the foundation chain.
* 3 sc.
* 1 increase in the last chain. (12)
* *How:* The increases made at both ends allow the piece to take on an oval shape. Do not close the round; continue crocheting in a spiral.
* **R2:**
* 1 increase.
* 3 sc.
* 3 consecutive increases over the curve at the end.
* 3 sc.
* 2 consecutive increases over the curve at the opposite end. (18)
* *Where:* All increases must be made only on the curves of the oval. The sides must remain straight to maintain the shape of the muzzle.
* **R3:**
* Crochet 1 sc in each stitch of the previous round. (18)
* **Fasten off:** Cut the yarn, leaving a long tail to sew the muzzle to the head.
🎨 Face Assembly and Embroidery
The charm of this bunny depends mainly on a good distribution of its facial features. Before permanently sewing each piece, pin or mark them in place to check that everything is centered and symmetrical.
1. Embroidering the nose
Before sewing the muzzle to the head, embroider a small pink nose on the upper and centered part of the muzzle.
* *How:* Fill in the nose with horizontal stitches until you get a soft and rounded shape. Next, using black yarn, embroider a small vertical line coming down from the center of the nose toward the middle of the muzzle.
2. Placing the muzzle
Position the muzzle on the lower front part of the head.
* *Where:* It should be centered, leaving enough space above to embroider the eyes and below so that it does not encroach on the neck area. Before finishing sewing it, insert a small amount of polyester fiberfill to give it a slight relief. Continue sewing until the piece is completely closed.
3. Embroidering the eyes
With fine black yarn, embroider two small, slightly downward-curved arcs to represent closed eyes.
* *How:* Ensure that both eyes are the same length and at the same height. A small misalignment can change the bunny’s expression.
4. Embroidering the whiskers
With black yarn, embroider two small lines on each side of the muzzle.
* *How:* Make them short and slightly tilted outward to maintain a delicate expression.
5. Cheeks
With pink yarn or a little bit of craft blush, apply a soft touch of color on both sides of the muzzle. Do it subtly to achieve a natural finish.
6. Placing the ears
Before sewing them permanently, position both ears on top of the head using pins or markers. Look at them from the front and verify that:
* both have the same tilt;
* they are at the same height;
* the separation between them is even;
* they are aligned with the eyes.
When you are satisfied with the bunny’s expression, sew each ear with firm stitches all around the base.
Happy Crocheting and Sweet Success
Congratulations on completing your beautiful handmade rabbit! Bringing an amigurumi character to life takes patience, dedication, and love, and you should be incredibly proud of your work. Every stitch you made contributed to creating a unique companion with a wonderful personality. If this was your first project, we hope it sparks a long-lasting love for this beautiful craft; if you are an experienced crafter, we hope it brought a touch of joy to your routine. Don’t forget to share your finished bunny with our community—we absolutely love seeing your creativity shine. Until our next crochet journey together, happy stitching!

Spanish version of this pattern
Here’s another rabbit pattern to knit
Video tutorial for crocheting another amigurumi rabbit design
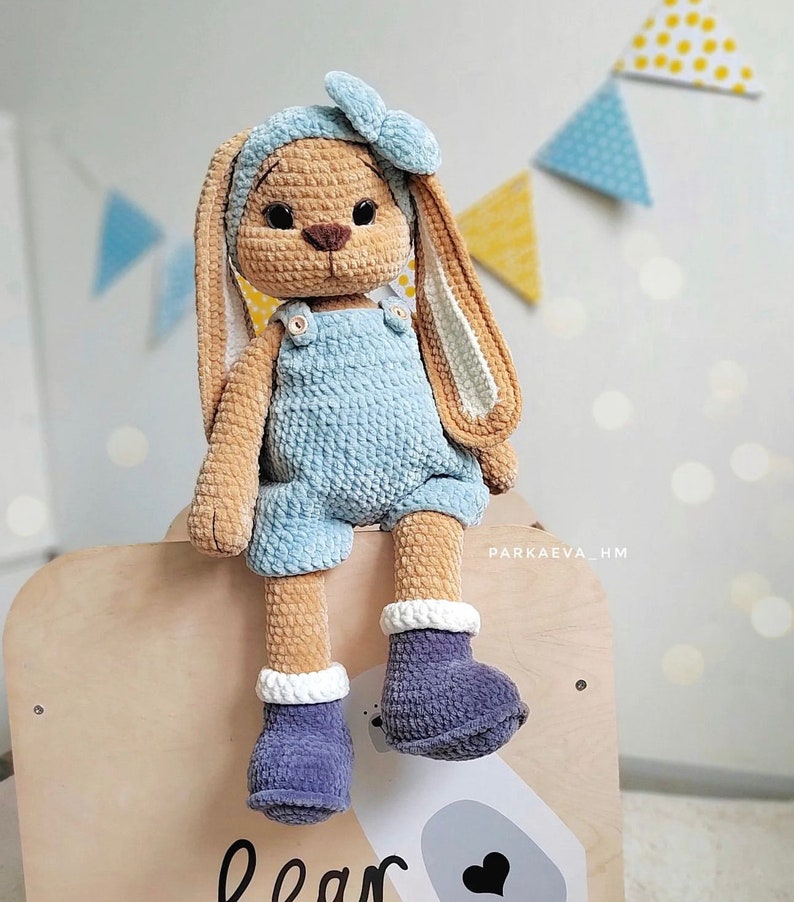
Pattern found on Etsy to knit this cute bunny
Affiliate Disclosure:
This post contains affiliate links. If you purchase through them, I may earn a small commission at no extra cost to you. Thank you for supporting my work!
Este artículo contiene enlaces de afiliado, lo que significa que si comprás desde aquí, recibimos una pequeña comisión sin costo extra para vos. ¡Gracias por apoyar nuestro trabajo!
Discover more crochet patterns, free downloads, and premium PDFs on Ko-fi.