
The amigurumi archer doll crochet pattern is a creative project designed for intermediate crocheters who want to craft a detailed fantasy character. Featuring chibi proportions, textured clothing, and accessories like boots and a quiver, this pattern brings personality and storytelling into every stitch. The structured design includes a head cavity and reinforced neck system for stability and balance, ensuring a durable, display-ready doll. You’ll practice shaping, assembly, and advanced techniques while creating a unique handmade piece. Perfect for gifting, decorating, or selling, this archer amigurumi doll combines charm, technique, and imaginative design in one rewarding project.
A Character That Tells a Story
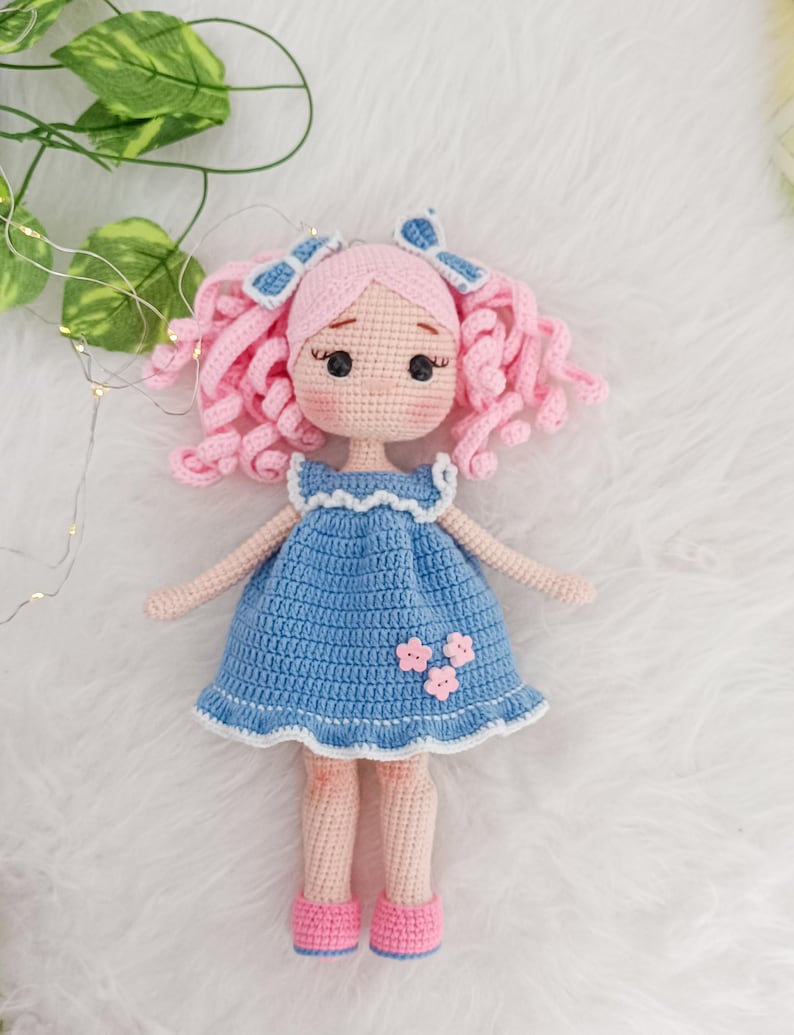
The **Amigurumi Archer Doll Crochet Pattern** was designed to create more than just a cute figure — it brings a small fantasy character to life in yarn form. Inspired by classic storybook heroines and woodland adventurers, this doll combines chibi proportions with realistic clothing details, making it both adorable and expressive. The rounded boots, structured dress, and detailed quiver give the project personality while still keeping the construction accessible for experienced crocheters.
Balanced Construction and Stability
One of the most important features of this pattern is its internal structure. The head cavity and spine neck system work together to keep the doll stable and upright without wobbling. This allows the finished piece to be displayed confidently on a shelf, desk, or nursery. Even with a large head and stylized proportions, the doll maintains proper balance and durability over time.
A Rewarding Intermediate Project
This pattern is ideal for intermediate crocheters who want to step beyond basic amigurumi spheres. You will practice shaping, joining pieces cleanly, working in back loops, and creating textured elements like curls and clothing layers. By the end of the project, you won’t just have a doll — you’ll have a handcrafted character full of charm and personality.
—
Finished Size
• Approx. 27–28 cm (10.6–11 in)
Yarn
• Sport weight #2 cotton or cotton-blend (50 g ≈ 125 m / 137 yd, matte finish)
Hook
• 2.25 mm crochet hook
Eyes
• 12 mm safety eyes — blue (or black)
Gauge
20 sc × 20 rounds ≈ 8 × 8 cm (3.1 × 3.1 in) worked in spiral
Skill Level
Intermediate
—
Materials (approximate yardage by color)
• Skin / light beige: 28 g
• Deep teal green (dress): 45 g
• Mustard gold (edging/trim): 12 g
• Copper orange (hair): 35 g
• Medium brown (boots, belt, bow, quiver): 22 g
• Dark brown (laces, details): 6 g
• Black and pale pink embroidery thread (≤1 g)
• Polyester fiberfill stuffing
• 2 mini buckles (optional)
• Thin wire or cord for bowstring (optional)
Guide to useful tools for crocheting
—
Abbreviations (US Terms)
sc = single crochet
inc = increase (2 sc in same stitch)
dec = invisible decrease (sc2tog)
sl st = slip stitch
ch = chain
hdc = half double crochet
dc = double crochet
fpdc = front post double crochet
FLO = front loop only
BLO = back loop only
MR = magic ring
—
1) HEAD (skin tone)
Work in continuous rounds (spiral).
Rnd 1: MR 6
Rnd 2: inc ×6 = 12
Rnd 3: (sc, inc) ×6 = 18
Rnd 4: (2 sc, inc) ×6 = 24
Rnd 5: (3 sc, inc) ×6 = 30
Rnd 6: (4 sc, inc) ×6 = 36
Rnd 7: (5 sc, inc) ×6 = 42
Rnd 8: (6 sc, inc) ×6 = 48
Rnd 9–17: 48 sc
**Correct eye placement**
Between **Rnd 14–15**
Spacing: **8–9 sts**
Rnd 18: (6 sc, dec) ×6 = 42
Rnd 19: (5 sc, dec) ×6 = 36
Rnd 20: (4 sc, dec) ×6 = 30
Rnd 21: (3 sc, dec) ×6 = 24
Rnd 22: (2 sc, dec) ×6 = 18
👉 **STOP HERE**
DO NOT close.
Work Rnds 23–27 with the 18 sc, then fold this section inward into the head.
Stuff only the upper area (forehead and cheeks).
The lower folded section remains hollow → this is the **head cavity**.
—
2) SPINE NECK (worked on the BODY)
This is the key to preventing the head from wobbling.
—
3) BOOTS AND LEGS (x2) — TRUE CHIBI PROPORTION
Rounded medieval boot
Rnd 1: MR 6
Rnd 2: inc ×6 = 12
Rnd 3: (sc, inc) ×6 = 18
Rnd 4: (2 sc, inc) ×6 = 24
Rnd 5: BLO 24 sc
Rnd 6: 24 sc ← (IMPORTANT: creates the instep)
Rnd 7: (10 sc, dec) ×2 = 22
Rnd 8: 22 sc
Change to skin color
Rnd 9: 16 sc (4 decreases evenly distributed)
Short leg
Rnd 10–20: 16 sc ← (previously 17 rounds, now 11)
Fasten off first leg.
Do NOT cut yarn on second leg.
—
4) HIP JOIN
Join with 4 ch
16 + 4 + 16 + 4 = 40
Rnd 1: 40 sc
Rnd 2: (8 sc, dec) ×4 = 36
Rnd 3: 36 sc
Rnd 4: (7 sc, dec) ×4 = 32
Rnd 5: 32 sc
Rnd 6: (6 sc, dec) ×4 = 28
Rnd 7: (5 sc, dec) ×4 = 24
👉 here the stylized torso begins
—
5) TORSO + SPINE NECK
Rnd 8–9: 24 sc
**Empire waist (high bust line)**
Rnd 10: (4 sc, dec) ×4 = 20
Rnd 11: 20 sc
Rnd 12: (3 sc, dec) ×4 = 16
Rnd 13: 16 sc
SPINE NECK
Rnd 14: 16 sc in BLO
Rnd 15: (sc, dec) ×5 + 1 sc = 11
Rnd 16–19: 11 sc
Stuff VERY firmly (extremely important).
Do not close.
—
6) HEAD–BODY JOIN (cavity system)
1. Insert the neck inside the head
2. It must fit exactly into the 18 sts cavity
3. Align the nose to the center
4. Sew:
**1 head stitch to 1 neck stitch, using Rnd 22**
This creates:
✔ rigid neck
✔ stable head
✔ no wobbling
✔ invisible seam
(PRO OPTION: insert a wrapped wooden skewer inside the neck before sewing)
—
7) ARMS (x2)
Rnd 1: MR 6
Rnd 2: 12
Rnd 3–5: 12 sc
Rnd 6: (4 sc, dec) ×2 = 10
Sleeve
Rnd 7: BLO 10 sc
Rnd 8–13: 10 sc
Lightly stuff and close flat.
Sew just below the start of the dress.
—
8) DRESS (TRUE EMPIRE WAIST)
The dress does NOT start at the waist.
Attach green yarn to **Rnd 6 of the torso**
Rnd 1: (sc, inc) ×10 = 30
Rnd 2: 30 sc
Rnd 3: (2 sc, inc) ×10 = 40
Rnd 4: 40 sc
Rnd 5: (3 sc, inc) ×10 = 50
Rnd 6: 50 sc
Rnd 7: (4 sc, inc) ×10 = 60
Rnd 8–15: 60 sc
Gold edging
1 round gold sc
1 round *[ch2, skip 1 st, sc]*
—
9) HAIR (REALISTIC CURLS)
Cap same as head up to 48 sts.
Then 3 straight rounds.
Curls
For each strand:
ch 20
**4 sc in each chain**
sl st to the cap
Make 40–45 strands.
You will obtain spiral curls.
If you want softer waves instead of tight curls:
work **2 sc in each chain**.
—
10) QUIVER
Work in spiral with brown yarn.
Rnd 1: MR 6
Rnd 2: inc ×6 = 12
Rnd 3: 12 sc ← base stabilization round (mandatory)
Rnd 4: (1 sc, inc) ×6 = 18
Rnd 5: 18 sc
Rnd 6: (2 sc, inc) ×6 = 24
Rnd 7–11: 24 sc
Do not stuff.
Rigid top edge
Rnd 12: BLO 24 sc
Rnd 13: 24 very tight sl st
—
Finishing Details That Make the Difference
As you complete the **Amigurumi Archer Doll Crochet Pattern**, the final assembly is where the character truly comes to life. Taking your time with embroidery, hair placement, and alignment of the head will greatly influence the expression of the doll. Small adjustments — slightly angling the eyes, shaping the cheeks with stuffing, or positioning the curls — can completely change her personality, allowing every maker to create a unique version.
A Piece Made to Display and Treasure
Thanks to the reinforced neck structure and balanced body shaping, this doll is designed not only to be cute but also durable. It can safely stand as nursery décor, a collector’s display piece, or a handmade gift. The textured dress, gold edging, and miniature accessories add a handcrafted look that photographs beautifully and makes the finished project especially satisfying to showcase or share online.
Your Creativity Continues Here
The **Amigurumi Archer Doll Crochet Pattern** is also a wonderful base for customization. You can change dress colors, create seasonal outfits, add a cape, or even transform the character into a different fantasy role such as a ranger, elf, or princess. Once you understand the structure, you’ll be able to design your own variations — and that is when amigurumi becomes not just a craft, but true creative storytelling.
A Note to Crocheters 💛
We truly hope you enjoy making this project as much as we enjoyed designing it. Every amigurumi pattern is a creative journey, and sometimes along the way you may notice a step that feels confusing, a stitch count that seems off, or a detail that could be explained more clearly. If that happens, please don’t hesitate to share it in the comments.
Your feedback helps us improve the pattern for everyone. Even the smallest observation can make a big difference for another crocheter who will make this doll in the future. Our goal is to keep this a friendly and supportive space where we can learn together and grow as makers.
If you crochet your own version of the doll, we would also love to see it! Feel free to share photos, color variations, or personal touches you added. Each handmade piece becomes unique, and seeing your creations is one of the most rewarding parts of publishing patterns.
Thank you for being part of this creative community and for helping handmade art continue to thrive.

Spanish version of this pattern
Here’s another pattern for a gothic doll
Video tutorial for crocheting another amigurumi doll design
Another pattern for a beautiful amigurumi doll found on Etsy
Affiliate Disclosure
Some of the links included in this pattern and on this website may be affiliate links. This means that, at no additional cost to you, we may earn a small commission if you choose to make a purchase through those links.
We only recommend tools, yarns, and materials that we genuinely use, test, or believe will be helpful for your crochet projects. These commissions help support the time, effort, and resources required to design, write, and share free crochet patterns with the community.
Your support allows us to continue creating tutorials, improving patterns, and providing new content. Thank you for helping us keep handmade creativity growing!
Discover more crochet patterns, free downloads, and premium PDFs on Ko-fi.