
The amigurumi doll with ruffles crochet pattern is a sophisticated project designed for crocheters who want to elevate their skills with texture, structure, and professional finishing techniques. This elegant doll features a tiered ruffle skirt created using BLO and FLO methods, resulting in a beautiful fairytale silhouette with balanced volume and movement. Advanced structural support, including an internal neck spike, ensures long-lasting stability and prevents head wobble. Perfect for intermediate to advanced makers, this amigurumi doll is ideal for collectors, gifts, or selling online. A refined crochet project that combines artistry, durability, and detailed craftsmanship in every stitch.
Amigurumi Doll with Ruffles: A Masterclass in Texture
Welcome to a world where tradition meets professional craftsmanship. This pattern is more than just a set of instructions; it is an invitation to elevate your crochet artistry. Whether you are looking to refine your color changes or master the art of tiered construction, this project provides the perfect canvas for your growth.
The Beauty of the Tiered Design
The centerpiece of this creation is undoubtedly the “Amigurumi doll with ruffles” aesthetic. By utilizing strategic **Back Loop Only (BLO)** and **Front Loop Only (FLO)** techniques, we create a structured torso that serves as the foundation for a voluminous, three-layered skirt.
This architectural approach ensures that each ruffle flows naturally, giving the doll a classic, “fairytale” silhouette that stands out in any collection.
Professional Finishes and Stability
Beyond the visual charm, this pattern focuses on structural integrity. From the **internal neck spike**—designed to prevent the dreaded “wobbly head”—to the **strand-by-strand hair insertion**, every detail is curated for a high-end finish.
As you work through the sections, you will learn how to balance firm stuffing with delicate embroidery, ensuring your finished doll is not only beautiful but durable enough to be cherished for years to come. Happy crocheting!
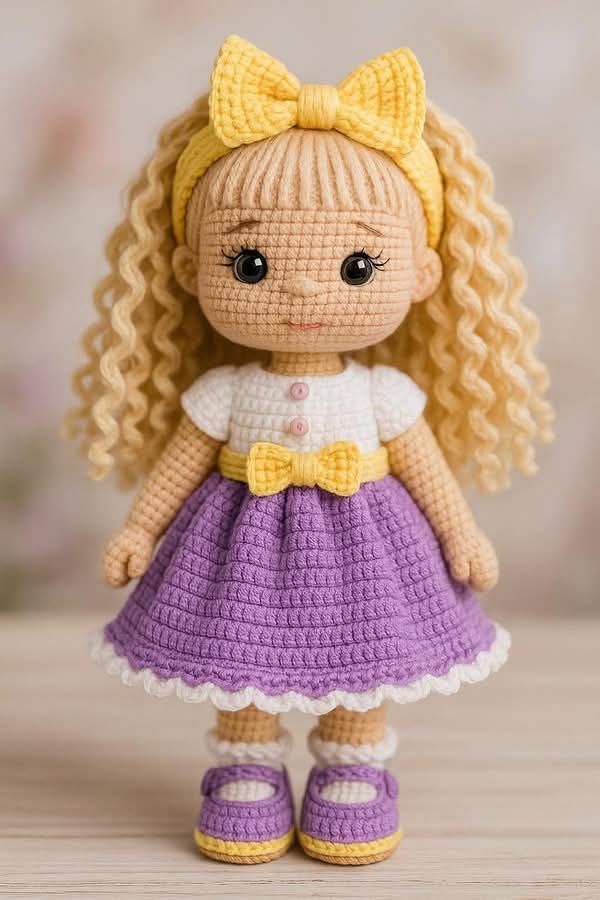
Step-by-step crochet PDF pattern with colorwork and full assembly guide.
Project Details
**Finished Size:** Approximately 32 cm tall, using the recommended materials. (Size may vary slightly depending on your personal tension).
**Difficulty Level:** Intermediate. Requires knowledge of color changes, spiral crochet, relief stitches (BLO/FLO), and assembly of parts. Ideal for those looking to take a professional leap in their finishing techniques!
**Estimated Time:** Between 10 and 12 hours of crocheting, depending on your pace. It is a perfect project to enjoy during a quiet weekend in the workshop.
Materials List
* **Yarn:** Medium weight cotton (or your preference) in colors: Skin, Orange (dress), White (socks/details), Brown/Terracotta (shoes), and scrap amounts of Pink or Yellow for the flowers.
* **Hair:** Wool or thick cotton yarn in copper or redhead color (for the strand-by-strand insertion technique).
* **Crochet Hook:** 2.5 mm or 3.0 mm (depending on your tension).
* **Eyes:** One pair of 8 mm or 10 mm safety eyes.
* **Stuffing:** High-quality polyester fiberfill (remember to stuff firmly for stability).
* **Extras:** Yarn needle, scissors, stitch marker, pins, and a bit of blush for the cheeks.
* **Optional:** A thick silicone/hot glue stick for internal neck support.
> **Guide to useful crochet tools**
Stitch Abbreviations
* **MR:** Magic Ring
* **ch:** Chain
* **sc:** Single Crochet
* **hdc:** Half Double Crochet
* **dc:** Double Crochet
* **sl st:** Slip Stitch
* **inc:** Increase (2 stitches in the same stitch)
* **dec:** Decrease (close 2 stitches together)
* **BLO:** Back Loop Only
* **FLO:** Front Loop Only
* **rep:** Repeat the sequence
1. The Shoes (Base piece for stability)
**Color:** Dark Brown / Terracotta.
**Note for beginners:** We are going to crochet around a foundation chain (in an oval). This creates a flat sole. Always use a stitch marker in the first stitch of every round.
* **R1:** Crochet **7 chains**. Start in the second chain from the hook:
* 5 sc, 3 sc in the last chain (to turn the corner).
* Working along the other side of the chain: 4 sc, 1 inc in the last stitch. **(Total: 14 sc)**
* **R2:** 1 inc, 4 sc, 3 inc, 4 sc, 2 inc. **(Total: 20 sc)**
* **R3:** 1 sc, 1 inc, 4 sc, (1 sc, 1 inc) ×3, 4 sc, (1 sc, 1 inc) ×2. **(Total: 26 sc)**
* **R4:** 2 sc, 1 inc, 4 sc, (2 sc, 1 inc) ×3, 4 sc, (2 sc, 1 inc) ×2. **(Total: 32 sc)**
> **Workshop Tip:** At this point, you can cut an insole out of rigid plastic or thick felt in the shape of this sole. This will help your doll stand up perfectly.
* **R5:** **BLO** (Back Loop Only) 32 sc.
* *How?* Insert the hook only into the loop furthest from you. This creates a “step” that separates the sole from the body of the shoe.
* **R6 – R7:** 32 sc in both loops (normal stitches).
* **R8 (Toe decreases):** 10 sc, 6 dec in a row, 10 sc. **(Total: 26 sc)** * *Where?* The decreases must be exactly at the front of the shoe. If they are not centered, adjust the first 10 sc (do 9 or 11) so that the 6 closures sit on the “toe” area.
* **R9:** 8 sc, 5 dec in a row, 8 sc. **(Total: 21 sc)**
* **R10:** 21 sc. (Close with a slip stitch).
2. The Shoe Strap (Mary Jane Style)
This strap is decorative and is crocheted directly onto the finished shoe. To keep it symmetrical, let’s identify the sides.
* **Placement:** With the shoe facing you (the toe pointing forward), identify the outer side (the side that faces away from the body). Join the yarn of the same color by counting 5 stitches from the center of the heel toward the front.
* **Crocheting:** Ch 12 (this amount may vary; check that the chain crosses the instep comfortably to the other side without being too tight).
* **Fastening:** You have two options depending on the finish you want:
* **Option A (Fixed):** Attach the strap to the opposite side with 1 slip stitch, cut the yarn, and fasten off, hiding the tail inside.
* **Option B (With button):** Work back by crocheting 11 sc along the chains to give the strap more body. Sew the end to the opposite side and add a small button or embroider a French knot in yellow/gold to simulate the buckle seen in the photo.
3. Transition to the Sock
To achieve the effect in the photo, where the white sock appears to be inside the brown shoe, we will do a clean color change.
* **The Change:** Do not cut the brown yarn yet. In the last stitch of R10, before closing the single crochet (when you have two loops on the hook), close the stitch with the white color. Now, cut the brown yarn and tie a knot on the inside.
* **R11 (Positioning):** Crochet the 21 sc of this round picking up **only the back loops (BLO)** of the brown stitches.
* *Why?* This creates a defined edge on the shoe and makes the white sock start one millimeter inward, giving the footwear depth.
* **Result:** Upon finishing this round, you will see a brown line surrounding the base of the sock.
4. The Legs (Continuing in White and Skin)
**Color:** White and Skin.
**Note on stuffing:** Stuff the foot and ankle very firmly so it supports the weight of the body. As you move up the leg (skin color), use medium stuffing; this allows the doll to have more natural movement at the joints.
**The Sock (White)** Continue from R11 in white (which had 21 stitches):
* **R12:** 21 sc.
* **R13 (Ankle adjustment):** (5 sc, 1 dec) × 3. **(Total: 18 sc)** * *Why?* We reduce the width slightly so the leg looks thinner as it comes out of the shoe.
* **R14 (Guide for the ruffle):** BLO 18 sc.
* *Important:* Crochet this round taking only the back loop. This leaves the front loop (FLO) free on the outside. Mark it with a piece of colored yarn, as we will crochet the “ruffle” or lace of the sock there later.
**Change to Skin Color** Before closing the last stitch of R14 with white, make an invisible color change to skin color (just as you did for the shoe).
* **R15 – R34:** 18 sc in each round. **(Total: 20 rounds in skin color).** * This gives us a leg length of about 11-12 cm, respecting the “long legs” proportion of the image.
5. The Sock Ruffle (Lace)
To ensure an impeccable finish, we will crochet this detail now while the leg is separate. It is much more comfortable than doing it at the end once the doll is assembled.
* **Position:** Hold the leg with the foot pointing toward you (upside down).
* **Joining:** Attach the white yarn to any front loop (FLO) that we left free in R14.
* **Crocheting the ruffle:** (Ch 3, 1 slip stitch in the next stitch) repeat all the way around until the 18 stitches are completed.
* **Result:** This creates a delicate white wave that falls over the edge of the shoe, exactly as seen in the photo.
* **Closing:** Cut the yarn and hide the tails inside the leg using a yarn needle.
6. Preparation for Joining
At this point, you have two finished legs with 18 stitches each. Now we are going to position them so the shoes face forward.
* **Leg 1 (Left):** Upon finishing R34, work a slip stitch (sl st), cut the yarn leaving about 10 cm, and fasten off.
* **Identification:** Flatten the leg using the toe of the shoe as a guide. Place a stitch marker exactly in the center of the inner side (the side that faces the other leg).
* **Leg 2 (Right):** Crochet the 34 rounds, but **DO NOT** cut the yarn. This is the leg from which we will continue crocheting toward the body.
**Positioning Adjustment for Leg 2:** To ensure the join is exact, the hook must be at the inner side of this leg:
1. Flatten Leg 2, ensuring the shoe faces forward.
2. Crochet any extra single crochets needed (usually between 2 and 4 sc) until you reach the center of the inner side.
3. Once there, do not close the stitch; the chains to join the two pieces will start from this spot.
> **Workshop Tip:** Before moving on, put the two legs together. The markers on the inner sides should touch, and the feet should be parallel. If one foot points outward, frog or add a stitch to Leg 2 until they are aligned.
7. Joining the Legs and Torso with Ruffle Guides
In this section, we will join the legs and prepare the “tracks” (free front loops) where we will later attach the three levels of the orange skirt. For the skirt to have the same tiered volume as the photo, the torso design must be precise with its decreases.
**The Join (3-Chain Bridge)**
* **R1:** Starting from Leg 2, **ch 3**. Join to Leg 1 with 1 sc in the marked stitch on the inner side.
* Crochet 17 sc around Leg 1 + 3 sc along one side of the chains + 18 sc around Leg 2 + 3 sc along the other side of the chains. **(Total: 42 sc)**
* **R2 – R4:** 42 sc in each round (3 straight rounds to add height to the hips).
**Ruffle Guide 1 (Bottom)**
* **R5:** **BLO** 42 sc.
* *Note:* Leave the front loops (FLO) free on the outside; the first ruffle will go here.
**Transition and Ruffle Guide 2 (Middle)**
* **R6:** 42 sc.
* **R7 (Decrease):** (5 sc, 1 dec) × 6. **(Total: 36 sc)**
* **R8:** **BLO** 36 sc.
* *Note:* Leave the front loops (FLO) free for the second ruffle.
**Transition and Ruffle Guide 3 (Top/Waist)**
* **R9:** 36 sc.
* **R10:** **BLO** 36 sc.
* *Note:* This is the final guide for the ruffles. By finishing with **36 stitches**, we ensure the skirt has a wide base with plenty of flare, just like in the image.
> **Workshop Tip:** After finishing R10, place different colored yarn scraps in each of the 3 lines of free loops (FLO). This will make it much easier when it’s time to crochet the orange skirt, so you won’t have to “hunt” for the stitches within the fabric.
8. The Chest and Dress Stripes
**Colors:** Orange and Skin.
To keep the stripes looking straight and perfect, we will perform simple color changes. Remember to close the last stitch of the previous round with the new color.
* **R11 (Orange):** (4 sc, 1 dec) x 6. **(Total: 30 sc)**
* **R12 (Orange):** 30 sc. (This completes the first orange stripe).
* **R13 (Skin):** 30 sc.
* **R14 (Skin):** 30 sc. (This is the skin-colored space between the two stripes).
* **R15 (Orange):** 30 sc.
* **R16 (Orange):** 30 sc. (This completes the second orange stripe).
* **R17 (Skin):** Closing the chest. (3 sc, 1 dec) x 6. **(Total: 24 sc)**
* **R18 (Skin):** Closing the shoulders. (2 sc, 1 dec) x 6. **(Total: 18 sc)**
* **R19 (Skin):** 18 sc. This is the base of our neck.
9. The Neck and Stability System (The Spike)
**Color:** Skin.
Now we will crochet a fundamental piece: the spike. This is an extension of the neck that will later be tucked inside the head so the doll is firm and sturdy.
* **R20:** Narrowing the neck. (4 sc, 1 dec) x 3. **(Total: 15 sc)**
**The Neck (The visible part)**
* **R21 to R23:** 15 sc in each of these 3 rounds. This is the “real” neck that will remain visible between the body and the head.
**The Spike (The internal part)**
* **R24 to R29:** 15 sc in each of these 6 rounds. These rounds form the “spike.” Do not worry if it looks very long; it needs to be this way to insert into the head cavity so it doesn’t wobble.
> **Workshop Tip:** Before closing, stuff these 9 rounds of the neck and spike very, very firmly. If you have a piece of thick silicone/hot glue stick or a plastic support, you can insert it now to make the neck unbreakable.
10. The Arms (Make 2)
**Colors:** Skin and Orange.
Remember to stuff only the hand and the lower part of the arm so they don’t look “stiff” when sewn on.
**The Hand (Skin Color)**
* **R1:** MR of 6 sc.
* **R2:** 6 inc. **(Total: 12 sc)**
* **R3 to R6:** 12 sc in each of these 4 rounds.
* **R7:** Shaping the wrist. (2 sc, 1 dec) x 3. **(Total: 9 sc)**
**The Arm and Sleeve (Skin and Orange Color)**
* **R8 to R12:** 5 rounds of 9 sc in skin color.
* **R13 (Change to Orange):** To start the sleeve, (2 sc, 1 inc) x 3. **(Total: 12 sc)**
* **R14 (Orange):** **BLO** 12 sc.
* *Note:* Leave the front loop free to make the white ruffle later, just like on the sock.
* **R15 to R25:** 11 rounds of 12 sc each.
**Closing**
* **R26:** Flatten the top of the arm and close it by crocheting 6 sc through both sides.
* Leave a long tail to sew to the body at the height of round 18.
11. The Three Dress Ruffles (Circular Flare)
**Color:** Orange.
To give the dress that “princess” volume seen in the image, we will crochet three independent ruffles onto the loops we left free on the body (R5, R8, and R10). Use this same 6-round sequence for each ruffle to ensure a consistent circular flare:
**Ruffle Sequence:**
* **R1 (In the free loop):** (1 dc, 1 dc inc) across the entire round.
* **R2:** 1 dc in each stitch (no increases).
* **R3:** (2 dc, 1 dc inc) across the entire round.
* **R4:** 1 dc in each stitch (no increases).
* **R5:** (3 dc, 1 dc inc) across the entire round.
* **R6:** 1 dc in each stitch (no increases).
**Where to attach each ruffle:**
* **Bottom Ruffle:** Start in the free loops of **R5** of the body.
* **Middle Ruffle:** Start in the free loops of **R8** of the body.
* **Top Ruffle (Waist):** Start in the free loops of **R10** of the body.
> **Workshop Tip:** I recommend starting with the bottom ruffle (R5) and working your way up to the waist. This way, the fabric you’ve already finished won’t get in your way as you move on to the next. The result of the three layers with this flare will be incredible!
12. The Dress Straps
**Color:** Orange.
To complete our doll’s outfit, we will crochet two simple straps. We will attach them directly onto the second orange stripe we crocheted on the chest (round 15 or 16).
**Instructions for each strap (Make 2):**
* **Joining:** Find the front of the chest and count about 4 or 5 stitches from the center toward the side. Join the orange yarn to the top of the stripe.
* **Chaining:** Crochet a foundation chain of 15 to 18 chains (this will depend on how “snug” you want the strap to fit over the shoulder; test it on your doll).
* **Working Back:** Crochet a row of single crochet (sc) back down the chain so the strap has a bit of thickness and doesn’t curl.
* **Fastening:** Cross the strap over the shoulder and secure it with a slip stitch to the back, at the same height where you started in the front.
> **Workshop Tip:** If you want the dress to look more decorative, you can sew a small bead or a yarn “button” where the strap meets the chest. It adds a beautiful haberdashery detail!
13. The Head and Stability Cavity
**Color:** Skin.
We will crochet the head starting from the top. It is very important that the stuffing is firm, but leave the central space open for the cavity we will create at the end.
**The Crown and Face**
* **R1:** MR of 6 sc.
* **R2:** 6 inc. **(Total: 12 sc)**
* **R3:** (1 sc, 1 inc) x 6. **(Total: 18 sc)**
* **R4:** (2 sc, 1 inc) x 6. **(Total: 24 sc)**
* **R5:** (3 sc, 1 inc) x 6. **(Total: 30 sc)**
* **R6:** (4 sc, 1 inc) x 6. **(Total: 36 sc)**
* **R7:** (5 sc, 1 inc) x 6. **(Total: 42 sc)**
* **R8:** (6 sc, 1 inc) x 6. **(Total: 48 sc)**
* **R9 to R18:** Crochet these 10 rounds without increases (48 sc in each).
* *Note:* This is where we will place the safety eyes between rounds 14 and 15.
* **R19:** Start closing. (6 sc, 1 dec) x 6. **(Total: 42 sc)**
* **R20:** (5 sc, 1 dec) x 6. **(Total: 36 sc)**
* **R21:** (4 sc, 1 dec) x 6. **(Total: 30 sc)**
* **R22:** (3 sc, 1 dec) x 6. **(Total: 24 sc)**
* **R23:** (2 sc, 1 dec) x 6. **(Total: 18 sc)**
* **Attention!** We have reached the base of the head with 18 stitches.
**The Internal Cavity (The inward “hole”)** Do not cut the yarn. Now we are going to create the piece that hides inside the head.
* **R24:** **BLO** 18 sc around. This will create an “edge” that helps us fold the piece inward later.
* **R25 to R30:** Crochet these 6 rounds with 18 sc each.
> **Workshop Tip:** Once you finish round 30, push those last 6 rounds into the interior of the head (like tucking one sock inside another). You will see a perfect 18-stitch hole form. This is where we will fit the neck “spike” later.
14. Facial Details
Facial details are what take a project from a simple object to having its own personality. The key here is symmetry.
**Materials:** Safety eyes (8 or 10 mm), embroidery thread (black, brown, and pink), yarn needle.
1. **Safety Eyes:**
* **Placement:** If you haven’t placed them yet, put them between rounds 14 and 15 of the head.
* **Distance:** Leave about 8 or 9 stitches between them so the face looks open and sweet.
* **Workshop Tip:** Before snapping the backings on, ensure they are well-centered relative to the body.
2. **Embroidering Lashes and Brows:**
* **Lashes:** With fine black thread, embroider two small diagonal lines outward at the edge of each eye. This creates a more “awake” look.
* **Brows:** Go up about 2 or 3 rounds above the eyes. Embroider two thin, slanted lines (in soft brown) spanning 2 or 3 stitches wide. Don’t make them too dark to keep the expression soft.
3. **The Nose:**
* **Placement:** Exactly one round below the eyes, centered between them.
* **How-to:** Make 3 or 4 passes with the same skin-colored yarn used for the head, spanning only 2 stitches wide. You will see a very natural little bump form.
4. **Blush (The Cheeks):**
* **The Final Touch:** For that “rag doll” effect, use a bit of real blush or a soft pink colored pencil. Apply it with a dry brush right under the eyes in the cheek area. It completely changes the face!
15. The Ears (Make 2)
**Color:** Skin.
The ears are crocheted in a single step. They do not need stuffing; they are just a flat detail that adds tenderness to the face.
* **R1:** In a **magic ring**, crochet: **ch 1** (to start) and then **6 half double crochet (hdc)** into the ring.
* **Closing:** Do not close the ring into a full circle. Pull the tail so it forms a **”half-moon”** or semicircle.
* **Finishing:** Cut the yarn leaving about 15 cm (6 inches) to sew.
**Where to place them?**
* **Height:** They should be aligned with the eyes, approximately between **rounds 14 and 16** of the head.
* **Distance:** Place them about **5 or 6 stitches** away from each eye toward the sides.
16. The Hair: Insertion Technique (Strand by Strand)
**Material:** Thick yarn (wool or cotton with a heavier weight than the body).
To achieve the natural effect from the image, we won’t crochet a separate piece. We will insert the hair directly into the stitches of the head, like adding fringe to a scarf.
**Preparing the Strands:**
* Find a piece of cardboard or a book measuring 25 to 30 cm (this defines the hair length).
* Wrap the thick yarn around the cardboard many times.
* Cut the yarn at only one end. You will have many strands about 50-60 cm long (when folded in half, the hair will be 25-30 cm).
**How to insert the hair (Step-by-step):**
Work from the crown downward, following a spiral or circles:
* **Step 1:** Insert the crochet hook through a stitch on the head.
* **Step 2:** Fold a strand of hair in half to form a loop.
* **Step 3:** Catch that loop with the hook and pull it through the stitch. An “eyelet” or loop will form.
* **Step 4:** Pull the two loose ends of the yarn through that loop and tug firmly so the knot sits against the head.
**Distribution:**
* **The Crown:** Insert a strand in every stitch so the “scalp” doesn’t show.
* **Sides and Nape:** You can skip a stitch or a row in between so the hair doesn’t have excessive volume and is easier to manage.
* **The Front:** Define a “parting line” (middle or side) and insert strands there more carefully for a perfect drape around the face.
17. The Final Touch: Two Flowers for the Hair
**Colors:** Soft pink, white, or yellow.
To finish our doll, we will crochet just two flowers. These will act as the “clip” that holds the hair to the side.
**Instructions for the 2 Flowers:**
* **R1:** In a magic ring, we will crochet 5 petals as follows:
* Repeat 5 times: (**ch 2, 2 dc, ch 2, 1 sl st**) into the ring.
* **Closing:** Pull the starting tail firmly so the center closes completely and the petals are tightly packed.
* **Finishing:** Cut the yarn leaving about 15 cm to sew comfortably.
* **Placement:** Place the first flower above the ear, securing several strands of the thick hair. Place the second flower the same way on the other side.
* **Fastening:** Sew the flowers through both the hair and the head fabric. This will keep the hairstyle “swept” to the side permanently.
> **Workshop Tip:** To make the center of the flower pop like a professional piece, you can embroider a small French knot in a contrasting color right in the middle. It’s the detail that makes the difference!
Amigurumi Doll with Ruffles: Bringing Your Creation to Life
Congratulations on completing your project! Seeing your **Amigurumi doll with ruffles** come together—from the sturdy foundation of the Mary Jane shoes to the final placement of the hair flowers—is a testament to your patience and skill. This doll is not just a toy; it is a labor of love that showcases your ability to handle complex textures and structural challenges.
Reflections on Your Craft
Throughout this journey, you have mastered more than just basic stitches. You have successfully navigated color transitions, managed tiered layers for maximum volume, and implemented a stability system that ensures your doll remains a professional-grade piece. The beauty of the “strand-by-strand” hair and the delicate embroidered gaze gives your creation a soul that sets it apart from mass-produced items.
The Joy of the Handmade
As you tuck the final loose threads away and blush those rosy cheeks, take a moment to appreciate the unique character you’ve built. Whether this doll is destined to be a centerpiece in your own collection or a heartfelt gift for someone special, it carries the warmth of the hours you spent at your workbench. We hope this pattern has inspired you to keep exploring the endless possibilities of crochet. Until the next stitch, keep creating magic!
🧶 A Little Note to My Fellow Makers
I’ve poured a lot of love and care into every stitch of this **Amigurumi doll with ruffles** pattern to make sure it’s as clear and helpful as possible.
However, as any crocheter knows, sometimes a sneaky little typo or a confusing instruction can slip through the “mesh” of even the best designs!
Let’s Perfect This Together!
If you happen to spot an error, find a stitch count that doesn’t quite add up, or simply feel that a specific step could be explained more clearly, **please let me know in the comments below.** I truly value your feedback and your keen eyes. By sharing your discoveries, you’re not just helping me improve the pattern—you’re helping our entire community of makers have a smooth, frustration-free experience. I’m always here to listen and update the instructions so we can keep creating magic together.
**Happy hooking, and thank you for being part of this creative journey!**
Love Crochet? Learn New Skills Today 👉 Explore beginner-friendly crochet courses
Spanish version of this same pattern
Here’s another pattern for crocheting a cute little amigurumi doll
video tutorial for knitting another doll design
A pattern found on Etsy for crocheting a wonderful little amigurumi doll
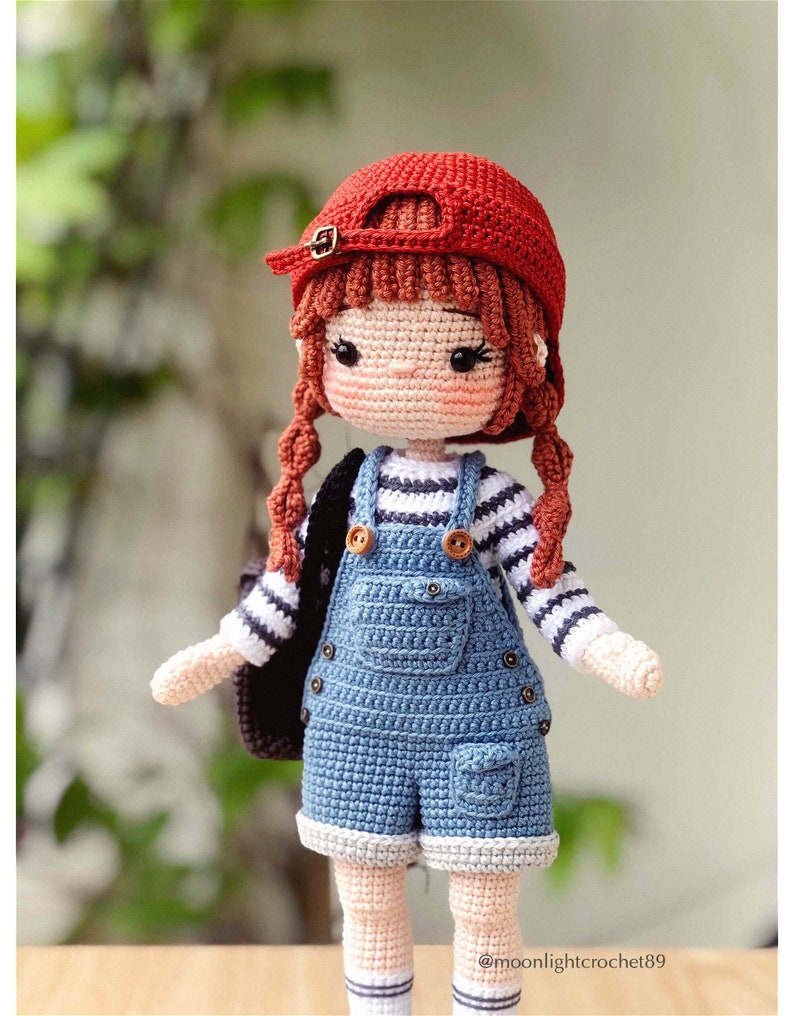
Affiliate Disclosure:
This post contains affiliate links. If you purchase through them, I may earn a small commission at no extra cost to you. Thank you for supporting my work!
Discover more crochet patterns, free downloads, and premium PDFs on Ko-fi.