Looking for the perfect **crochet cat pattern**? This versatile, beginner-friendly PDF guide lets you craft a charming decorative amigurumi with two stability options: a flat base or a fun, weighted wobble design. The seamless, no-sew construction makes it a quick project, perfect for customizing into five popular breeds like Siamese, calico, or tabby. Grab your 2.5 mm hook and start crocheting your next favorite handmade cat today!
Two Base Options for Your Crochet Cat Pattern
Before starting to crochet the body, you must choose between **two types of bases**, both designed to provide stability to the cat once finished.
**Option A** creates a flat base that allows the amigurumi to stand firmly on any surface.
**Option B** incorporates a rounded base with a counterweight, achieving a cute rocking effect that makes the cat gently return to its upright position when moved.
Regardless of the option you choose, both versions continue with exactly the same pattern, so only the first rounds of the base will change. Later on, you will also discover how to customize your cat with different color combinations to create versions such as the Siamese, Russian Blue, black, tabby, or calico cat, always using this same base structure.
Prepare your materials, choose your preferred crochet hook, and let’s begin to build, step by step, this charming decorative crocheted cat.
Project size
* **Approximate height:** 18 to 20 cm (using medium-weight cotton yarn and a 2.5 mm crochet hook).
* **Approximate width:** 8 to 10 cm.
* **Design:** Decorative cat crocheted in a single main piece, with separate ears and tail.
* **Variants included:** Orange tabby, Russian Blue, Siamese, black with cream details, and calico.
Difficulty level
**Beginner – Intermediate**
This pattern has been especially designed for crocheters who want to start in the world of amigurumis. Each section explains in detail **how, when, and where** to perform each step, facilitating the learning of basic techniques such as increases, invisible decreases, color changes, and assembly of the pieces.
Estimated crocheting time
The execution time will depend on the experience of each person.
* **Beginners:** 8 to 12 hours.
* **Intermediate level:** 5 to 7 hours.
* **Experienced crocheters:** 3 to 5 hours.
If you decide to make any of the versions with color changes, such as the calico cat, the crocheting time may increase slightly.
Material list
* Cotton yarn for amigurumi (main color according to the chosen design).

* Scrap yarn in complementary colors for details and color changes.
* **2.5 mm** crochet hook.
* Stitch marker.
* Yarn needle.
* Scissors.
* Polyester fiberfill for stuffing.
* Safety eyes (optional) or yarn to embroider them.
* Weight for the base (metal washers, stainless steel discs, glass pebbles, or stainless steel ball bearings, depending on the chosen version).
* Thick pipe cleaner or plastic-coated wire (optional, only if you wish to shape the tail).
Useful tools guide for crocheting
Stitch abbreviations
* **ch:** chain.
* **MR:** magic ring.
* **sc:** single crochet.
* **hdc:** half double crochet.
* **dc:** double crochet.
* **sl st:** slip stitch.
* **inc:** increase (2 single crochets in the same stitch).
* **dec:** invisible decrease.
* **BLO:** crochet through back loop only.
* **FLO:** crochet through front loop only.
* **(…) × n:** repeat the indicated sequence the specified number of times.
PART 1: THE CAT’S BASE AND COUNTERWEIGHT
The entire body of the cat will be crocheted **from the bottom up**, starting with the base. This first section is one of the most important of the project, as here we will build the support that will allow the cat to remain stable once finished.
Before starting to crochet, you must choose between **two base options**:
* **Option A: Stable Base (Flat).** This is the recommended alternative for most crocheters. The cat will stand completely firm on any surface.
* **Option B: Rocking Base (Wobble Toy Type).** It incorporates a special counterweight that allows the cat to gently rock and return to its upright position on its own.
**Important:** Both options continue with exactly the same pattern. The only difference is found in the way the base is constructed.
📌 Before starting: Preparation of the Counterweight
To achieve a stable and durable cat, we will place a small counterweight inside the base.
What materials can I use?
It is recommended to use water-resistant materials that do not rust, for example:
* Stainless steel washers.
* Stainless steel ball bearings.
* Solid glass pebbles.
* Stainless steel pellets.
What materials should I avoid?
Do not use materials that can deteriorate over time or during washing, such as:
* Sand.
* Rice.
* Lentils or other seeds.
* Salt.
* Metals that can rust.
How to prepare the counterweight?
Place the chosen weight inside a small bag made of cloth or strong tulle and close it firmly with a few stitches. This way it will stay grouped together and will not shift inside the amigurumi.
When to place the counterweight?
Do not insert it yet. First, we will construct the base and place it when the diameter is sufficient to handle it comfortably.
⭐ Option A: Stable Base
This version creates a completely flat base that allows the cat to stand firmly on any surface.
**Color:** Main color of the cat.
**Tools:** 2.5 mm crochet hook and stitch marker.
Round 1: Start of the Base
**How:** Make a magic ring.
**When:** It will be the beginning of the entire project.
**Where:** Crochet inside the magic ring.
1. Make a magic ring.
2. Crochet **6 single crochets (sc)** inside the ring.
3. Close the ring by gently pulling the short tail.
**What you should observe:** The six stitches must be completely closed, without leaving a visible hole in the center.
**Final count:** 6 sc.
Round 2: First Increase Block
**How:** We will continue working in a continuous spiral.
**When:** Place the marker in the first stitch of this round.
**Where:** Work on each of the stitches from the previous round.
* Crochet **1 increase (inc)** in each of the 6 stitches.
**What you should observe:** The piece will begin to form a small, completely flat circle.
**Final count:** 12 sc.
Round 3: Expansion of the Base
* Repeat the sequence **(1 sc, 1 increase)** around the entire round.
**What you should observe:** The circle will continue to grow without forming folds.
**Final count:** 18 sc.
Round 4
* Repeat the sequence **(2 sc, 1 increase)** around the entire round.
**What you should observe:** The base must remain perfectly flat. If it begins to curl upward, verify that the number of stitches is correct.
**Final count:** 24 sc.
Round 5
**Step by step:**
* Repeat the sequence **(3 sc, 1 increase)** throughout the round.
**Final count:** 30 sc.
Round 6
**Step by step:**
* Repeat the sequence **(4 sc, 1 increase)** around the entire round.
**What you should observe:** At the end of this round you will have a wide and firm base, ready to receive the counterweight.
**Final count:** 36 sc.
In this part, it is convenient for the “flat base” version to glue another plastic circle onto the 36-stitch circle to reinforce the base before placing the counterweight.
Placement of the Counterweight
Now that the base is large enough, it is time to insert the counterweight.
**How:** Place the small bag with the weight exactly in the center of the base.
**Where:** It must rest on the bottom part of the crochet fabric.
**When:** Before starting the next rounds of the body.
**Important:** Add a small layer of polyester fiberfill on top of the counterweight to immobilize it completely. The weight must not shift inside the cat when you move it.
⭐ Option B: Rocking Base (Wobble Toy Type)
If you want the cat to be able to rock gently and recover its upright position on its own, this is the right option.
The first **6 rounds** are exactly the same as in **Option A**, so you must follow the same instructions until you obtain **36 single crochets**.
The difference will appear in the following rounds, where we will shape a rounded base specially designed to house the counterweight and create the rocking effect.
**Important:** Once this base is finished, both versions will continue with exactly the same pattern in **Part 2: The Cat’s Body**.
PART 2: THE CAT’S BODY (From the Base to the Neck)
Now we will begin to shape the cat’s characteristic stylized body. In this stage, we will move from a wide and stable base to a body that will taper gradually until it forms the long neck. All decreases will be distributed evenly to maintain an elegant and completely symmetrical silhouette.
**Important:** Whether you chose the **Stable Base** or the **Rocking Base**, from this moment on both versions continue exactly the same.
Before starting, verify that the counterweight remains completely immobilized inside the base. If necessary, add a little more polyester fiberfill to prevent any movement.
* **Color:** Main color of the cat.
* **Initial count:** 36 single crochets (sc).
* **Objective:** Form the body, the chest, and the neck in a single continuous, seamless piece.
Rounds 7 to 12: Base of the Body
How: We will continue crocheting in a spiral, catching both loops of each stitch normally.
When: Always place the marker in the first stitch of each new round.
Where: Work over the 36 stitches of the previous round.
Crochet **1 single crochet (sc)** in each of the **36 stitches** during rounds **7, 8, 9, 10, 11, and 12**.
What you should observe: The crochet fabric will begin to rise vertically, forming a cylinder. The base must remain completely flat without deforming.
**Final count per round:** 36 sc.
Round 13: First Body Decrease
We will begin to narrow the body gently by using invisible decreases distributed evenly.
Repeat the sequence: **(4 single crochets, 1 invisible decrease) × 6**
The decrease must be very smooth. The body must not show folds or sudden changes in diameter.
**Final count:** 30 sc.
Rounds 14 to 18: Abdomen Height
We return to crocheting straight to stabilize the new body measurement.
Crochet **1 single crochet (sc)** in each of the **30 stitches** during rounds **14, 15, 16, 17, and 18**.
Stuffing recommendation
Continue adding polyester fiberfill little by little. Push the stuffing down to the base using the back of the crochet hook or a wooden stick.
The body should feel firm to the touch, but without opening the stitches of the fabric.
**Final count per round:** 30 sc.
Round 19: Second Body Decrease
We will keep narrowing the silhouette to begin the transition toward the neck.
Repeat the sequence: **(3 single crochets, 1 invisible decrease) × 6**
The transition between the abdomen and the upper part of the body must look natural and continuous.
**Final count:** 24 sc.
Rounds 20 to 24: Upper Part of the Body
Crochet **1 single crochet (sc)** in each of the **24 stitches** during rounds **20, 21, 22, 23, and 24**.
The silhouette will already begin to resemble the shape of a teardrop, characteristic of this design.
**Final count per round:** 24 sc.
Round 25: Neck Formation
We will make the last reduction before starting the neck.
Repeat the sequence: **(2 single crochets, 1 invisible decrease) × 6**
At the end of the round, the diameter of the fabric will be noticeably narrower, but it will maintain a perfectly circular shape.
**Final count:** 18 sc.
Rounds 26 to 36: The Long Neck
We will work the neck completely straight.
Keep the marker in the first stitch of each round so you do not lose the beginning of the round.
Crochet over the 18 stitches obtained in the previous round.
Crochet **1 single crochet (sc)** in each of the **18 stitches** during rounds **26 through 36**.
Stuffing recommendation
Stuff the neck very firmly. Use small portions of fiberfill and press them carefully so that no gaps are left.
The neck must remain completely straight and be able to support the head without bending. If you notice that it remains too flexible, add a bit more stuffing before continuing.
**Final count per round:** 18 sc.
At the end of **Round 36**, you will have completed the body and the elegant neck of the cat. In the next part, we will begin to crochet the head, maintaining the same continuous construction to avoid seams and achieve a clean and professional finish.
PART 3: THE HEAD
Before starting this section, you can choose between **two ways to construct the head**. Both produce the same final result and use exactly the same crochet pattern; the only difference is in the way it is joined to the body.
Option A: Head Crocheted in Continuity with the Body
This option continues the crochet work directly from the neck without cutting the yarn.
**Advantages:**
* It requires no seams on the neck.
* The fabric forms a single continuous piece.
* It is an excellent choice for those who prefer to reduce the number of independent pieces.
If you choose this option, continue the pattern from **Round 37** following the instructions below.
Option B: Independent Head (Recommended to Customize the Expression)
In this option, the head is crocheted as a completely independent piece and is sewn to the body during assembly.
**Advantages:**
* It allows you to tilt the head slightly to the left or to the right before sewing it.
* It makes embroidering the face and placing the ears easier.
* Each cat can acquire a different expression simply by shifting the position of the head by a few degrees.
How to start?
Instead of continuing from the neck, start the head as a new piece following these steps:
**Round 1:** Make a magic ring and crochet **6 single crochets (sc)** inside it. Close the ring.
**Round 2:** Crochet **6 increases (inc)**. (12 sc)
**Round 3:** Repeat the sequence **(1 sc, 1 increase)** × 6. (18 sc)
**Round 4:** Repeat the sequence **(2 sc, 1 increase)** × 6. (24 sc)
**Round 5:** Repeat the sequence **(3 sc, 1 increase)** × 6. (30 sc)
**Round 6:** Repeat the sequence **(4 sc, 1 increase)** × 6. (36 sc)
**Round 7:** Repeat the sequence **(5 sc, 1 increase)** × 6. (42 sc)
From this moment on, continue exactly the same as the main pattern, substituting the rounds as follows:
* **Rounds 8 to 15** correspond to **Rounds 41 to 48** of the pattern.
* **Round 16** corresponds to **Round 49**.
* **Round 17** corresponds to **Round 50**.
* **Round 18** corresponds to **Round 51**.
* **Round 19** corresponds to **Round 52**.
When finishing the head, do not sew it yet. Set it aside until you reach **Part 5: Assembly**, where you will be able to try different tilts before permanently fixing it to the neck.
PART 4: CLOSING OF THE HEAD, EARS, AND TAIL (Make 2 ears and 1 tail)
In this stage, we will finish the cat’s head and crochet the two pieces that will give it its personality: the ears and the tail. Both are worked separately and will be sewn on at the end of the project.
The tail has been designed with an elegant spiral shape, characteristic of this collection. If you want it to permanently keep that shape, you can place a thin wire inside it during stuffing. If you prefer an amigurumi completely suitable for young children, simply omit the wire and stuff the tail with a small amount of polyester fiberfill.
* **Color:** Main color of the cat.
* **Pieces to make:**
* 2 Ears.
* 1 Tail.
🐱 Section A: Closing of the Head
Round 53: Upper Closure
We will perform the last round of decreases before completely closing the head.
Make sure the head is completely stuffed before starting this round.
Work over the 18 stitches of the previous round.
Repeat the following sequence: **(1 single crochet, 1 invisible decrease) × 6**.
The upper opening will now be very small and the fabric will begin to close naturally.
**Final count:** 12 sc.
Definitive closure
Cut the yarn, leaving approximately 20 cm of length.
1. Thread the yarn tail into a yarn needle.
2. Pass the needle only through the front loops of the 12 remaining stitches.
3. Pull gently until the opening is completely closed.
4. Insert the needle through the center of the head and bring it out through a side.
5. Pull the yarn slightly, cut it, and let it disappear inside the stuffing.
The top of the head must be completely smooth and without visible folds.
🐱 Section B: The Ears (Make 2)
The ears of this design are small, triangular, and slightly tilted to the sides, providing a sweet and cute expression.
Round 1
Make a magic ring.
Crochet **4 single crochets (sc)** inside the ring. (4)
Round 2: Perform **1 increase (inc)** in each stitch. (8)
Round 3: Repeat the sequence: **(1 sc, 1 increase) × 4**. (12)
Round 4: 12 sc. (12)
Round 5: Repeat the sequence: **(5 sc, 1 increase) × 2**. (14)
Crochet **1 single crochet (sc)** in each of the **14 stitches**.
The ears will begin to form a small cone.
Finishing
Do not stuff the ears.
Gently fold the base to form a slight curve.
Cut the yarn, leaving approximately **20 cm** for sewing.
Set both pieces aside.
🐱 Section C: The Tail (Make 1)
The tail will be long, thin, and slightly curved. Later, we will roll it up to form a spiral.
Round 1: Make a magic ring.
Crochet **6 single crochets (sc)** inside the ring. (6)
Round 2: Crochet **1 single crochet (sc)** in each of the **6 stitches**. (6)
Round 3: Repeat the sequence: **(2 sc, 1 increase) × 2**. (8)
Rounds 4 to 28: Work normally in a spiral.
Crochet **1 single crochet (sc)** in each of the **8 stitches** during rounds **4 through 28**.
Stuffing recommendation
If you want a flexible tail, add very little fiberfill.
If you prefer a rigid tail, insert a thin plastic-coated wire or a thick pipe cleaner before closing the piece.
What you should observe: The tail must remain uniform from the base to the tip.
**Final count per round:** 8 sc.
Closing of the Tail
Step by step
1. Slightly fold the tip inward.
2. Close the opening by sewing the facing stitches together.
3. Shape the tail by gently rolling it with your hands until you get an elegant spiral.
What you should observe?
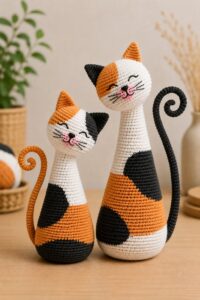
The spiral should not be completely closed. It is preferable that it keeps an open and natural shape, similar to the reference cats.
At the end of this part, you will already have all the main pieces of the cat completely finished. In the next section, we will learn how to sew each element in its correct position and we will embroider the face to give life and personality to our decorative amigurumi cat.
PART 5: ASSEMBLY AND FACIAL EMBROIDERY
The time has come to bring our decorative amigurumi cat to life! In this final part, we will join all the pieces and embroider the small details that will give it that tender and cute expression so characteristic of the design.
I recommend that you take your time with the assembly and check the position of each piece before permanently sewing it. A simple shift of one or two stitches can completely change the cat’s expression.
🧵 Section A: Placement of the Ears
The ears are responsible for conveying much of the cat’s personality. In this design, they should not be completely vertical, but rather slightly open toward the sides.
How: Hold each ear with a pin before beginning to sew.
When: The head must be completely closed and stuffed.
Where: Place the ears approximately between **Rounds 39 and 43**, separated from each other by about **8 to 10 stitches**, depending on the expression you wish to achieve.
1. Position both ears symmetrically.
2. Tilt them slightly toward the outside.
3. Check the expression by looking at the cat from the front.
4. When you are satisfied, sew them using small, invisible stitches.
What you should observe: Both ears must be at the same height and have the same tilt.
🧵 Section B: Placement of the Tail
The tail provides visual balance to the entire figure.
How: First, present the tail on the body without sewing it.
When? After finishing the ears.
Where? Sew it approximately in the center of the back of the body, a few rounds above the base.
1. Place the tail centered.
2. Check that the spiral is oriented toward one of the sides.
3. Sew the entire base using firm stitches.
What you should observe: The tail must look like a natural extension of the body.
😊 Section C: Facial Embroidery
The face is the detail that will turn a pretty amigurumi into a cat full of personality.
The Eyes
Use black yarn.
Embroider two small closed eyes using a slight curved line.
Where: Between **Rounds 45 and 46**.
What you should observe
The curves should rise slightly toward the ends to convey a cheerful expression.
The Nose
Use dusty pink or salmon-colored yarn.
How: Embroider a small inverted triangle.
Where: Two rounds below the eyes.
What you should observe
The nose must be perfectly centered.
The Mouth
With the same yarn as the nose.
How: From the lower tip of the triangle, embroider a small vertical line and then two very soft curves to both sides.
What you should observe
The smile should be discreet.
The Whiskers
Use black or dark brown yarn.
How: Embroider three small whiskers on each side of the muzzle.
What you should observe
They should not be too long in order to maintain the minimalist style of the design.
💛 Section D: The Most Important Detail
The personality of these cats does not depend solely on the embroidery.
The true expression is born from the combination of three elements:
* the tilt of the head;
* the position of the ears;
* the direction of the tail.
Before considering the project finished, observe the cat from different angles. If you want a more curious expression, you can tilt the head slightly to one side before permanently fixing it. Even a small variation will make each cat have a completely distinct personality.
✨ Final Finish
Carefully review the entire piece and hide any remaining yarn tails inside the fabric.
Gently brush the amigurumi with your hands to settle the stuffing and shape the neck and body.
If you chose the **Stable Base**, check that the cat stands completely firm on a flat surface.
If you chose the **Rocking Base**, push it gently with a finger and watch how it slowly returns to its upright position thanks to the hidden counterweight in the base.
Congratulations! You have finished the **Base Pattern of the Decorative Amigurumi Cat**. From this structure, you will be able to create the entire collection by changing only the colors and some small embroidery details to obtain versions such as the orange tabby, the Russian Blue, the Siamese, the black cat with cream details, or the calico.
PART 6: CUSTOMIZE YOUR CAT (Color Changes for Each Design)
Once you have finished the **Base Pattern of the Decorative Amigurumi Cat**, you can easily transform it into different breeds and color combinations.
All the models in this collection use exactly the same crochet structure; only the yarn colors and some small details of the facial embroidery change.
To obtain a clean finish, always make the color changes at the last loop of the single crochet from the previous round. This way, the transition between colors will be much neater.
🐈 Design 1: Orange Tabby Cat Main Color: Light orange.
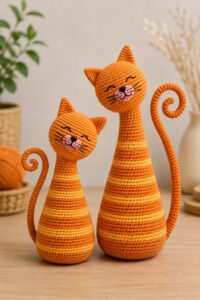
Secondary Color: Dark orange or brown.
Color distribution
* **Rounds 1 to 12:** Light orange.
* **Rounds 13 to 18:** Medium orange.
* **Rounds 19 to 36 (neck):** Light orange.
* **Rounds 37 to 52 (head):** Light orange.
* **Ears:** Light orange.
* **Tail:** Alternate 3 rounds of light orange and 2 rounds of dark orange until completing the piece.
Stripes
With dark brown yarn, embroider small lines on:
* both sides of the body;
* top of the head;
* tail;
* forehead.
It is not necessary for all the stripes to be identical. In natural tabby cats, every pattern is different.
🐈 Design 2: Bluish Grey Cat Main Color: Bluish grey.

Secondary Color: Dark grey.
Color distribution
* The entire body.
* Neck.
* Head.
* Ears.
* Tail.
These are crocheted completely in **bluish grey**, without color changes.
Embroidery
* Soft pink nose.
* Black whiskers.
* Light grey inside the ears.
🐈 Design 3: Siamese Cat Main Color: Cream.
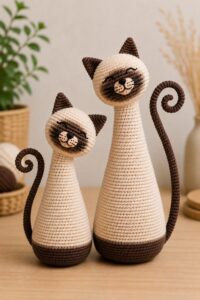
Secondary Color: Chocolate brown.
Color distribution
* **Rounds 1 to 30:** Cream.
* **Rounds 31 to 36 (neck):** Brown.
* **Rounds 37 to 44:** Brown.
* **Rounds 45 to 52:** Cream.
Ears: Completely chocolate brown.
Tail: Completely chocolate brown.
Embroidery: Dark brown nose.
🐈 Design 4: Black Cat with Cream Details Main Color: Black.
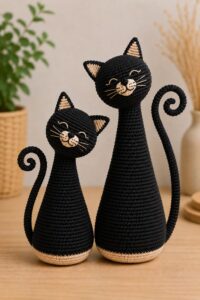
Secondary Color: Cream.
Color distribution
The entire base pattern is crocheted in black.
Cream color details
* Inside the ears.
* Muzzle.
* Tip of the tail (optional).
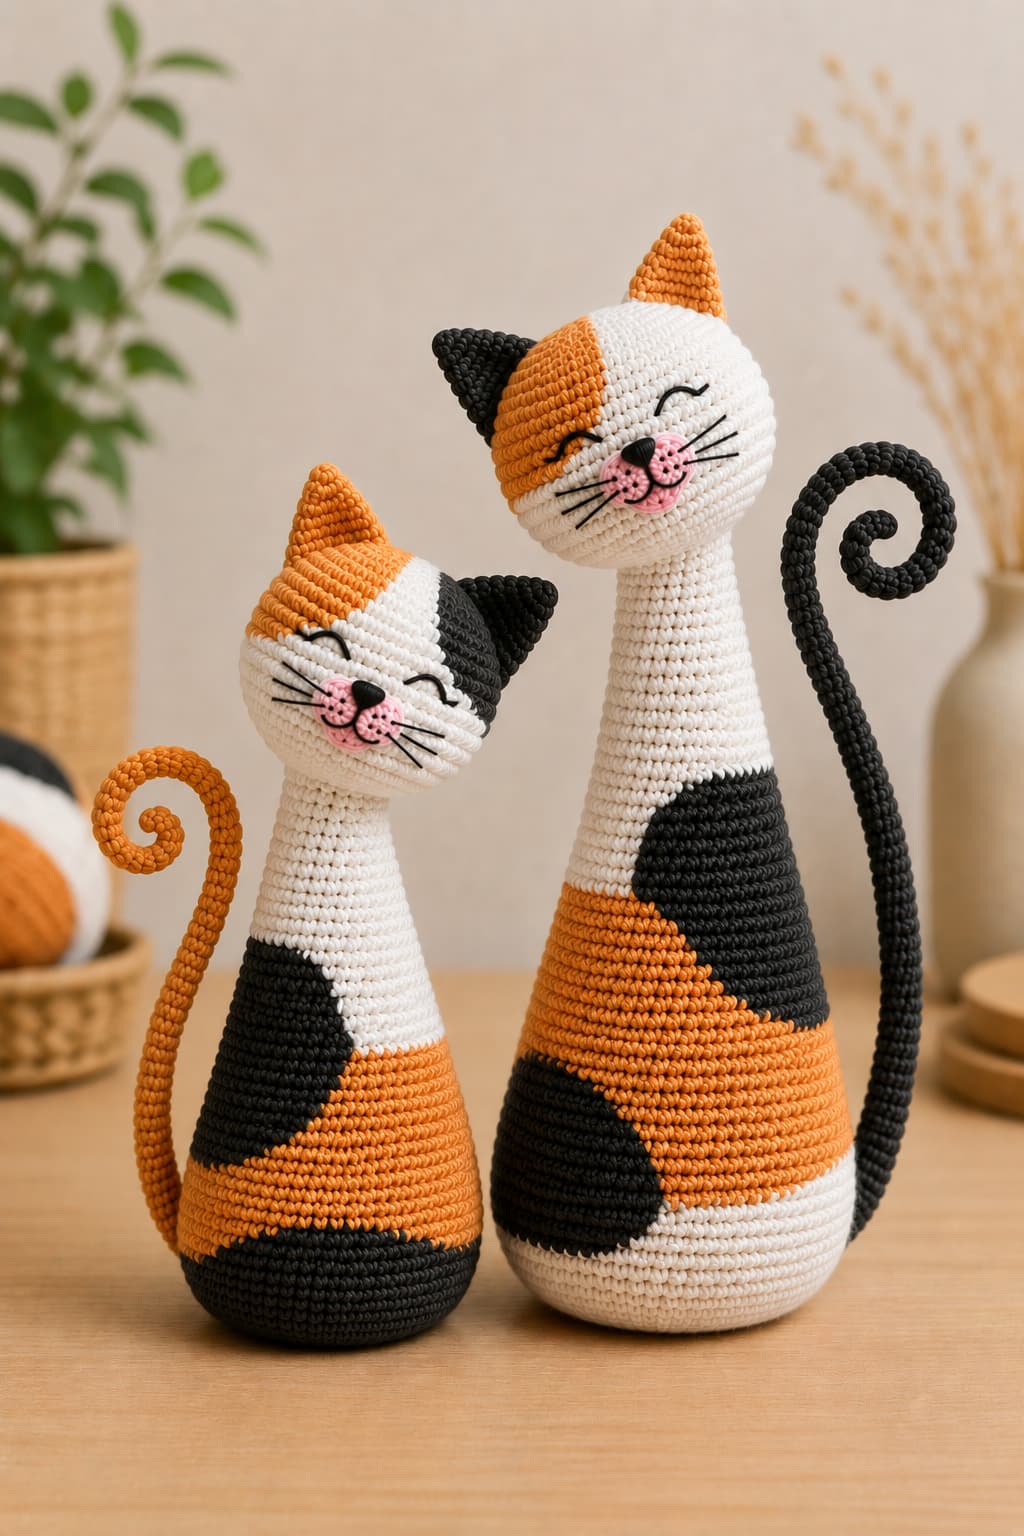
🐈 Design 5: Calico Cat
The calico cat is the most striking design in this collection. Unlike the other versions, its characteristic tricolor coat is constructed **through color changes while crocheting**, creating spots integrated directly into the fabric.
It is not necessary for the spots to be exactly the same as the ones on the model. In nature, no two calico cats have the same pattern, so small differences will make each piece unique.
**Colors to use:**
* White or very light cream.
* Warm orange.
* Black.
🤍 Head
The head is crocheted following the base pattern, making color changes to form three large sections.
Color distribution
* Most of the face will be **white**.
* The upper left part of the head will have a large **orange** patch covering approximately one-third of the crown and descending to one of the eyes.
* The ear located over this section will be completely **orange**.
* The opposite ear will be completely **black**.
**Tip:** Always make the color changes at the end of the last single crochet of the previous round to get clean transitions.
🤍 Neck
The entire neck is worked completely in **white**, without yarn changes.
🧡 Body
The body combines large blocks of color that start from the base and rise diagonally.
Front part
* **White** predominates.
* A large **black** spot appears on one of the sides.
* A wide **orange** spot develops on the opposite side.
Back part
Continue the same blocks of color, making sure that the spots partially encircle the body and join naturally.
Do not look for completely straight lines; slightly diagonal transitions provide a more organic look.
🐈 Tail
The tail starts in **black** and keeps this color until the tip.
👃 Face
Embroider:
* Black nose.
* Pink muzzle.
* Black whiskers.
* Black smile.
* Closed eyes with a slight upward curve to convey a cheerful expression.
💡 Tip for the color changes
In this design, it is not necessary to count exactly how many stitches each spot will have. The most important thing is to respect the general distribution of the colors:
* **White as the predominant color.**
* **A large orange spot.**
* **A large black spot.**
* **Ears of different colors (one orange and one black).**
By following this distribution, you will achieve a calico cat very similar to the collection model, maintaining the essence of authentic tricolor cats, where every pattern is unique and unrepeatable.
One last tip
Do not be afraid to experiment with different color combinations. One of the greatest advantages of this pattern is that the same structure allows you to create a wide variety of cats simply by changing the color of the yarn and some small embroidery details. This way, you can build a unique collection without needing to learn a new pattern for each design.

Spanish version of this pattern
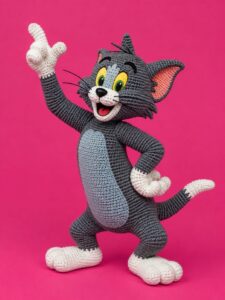
Here’s the pattern to knit the famous cat TOM
Video tutorial for knitting another kitten design
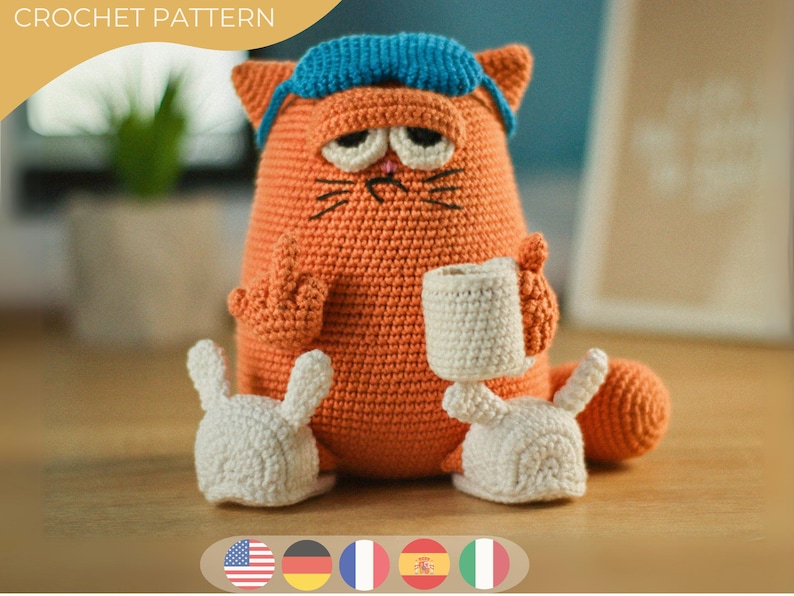
Pattern in several languages of another cute cat found on Etsy
Affiliate Disclosure:
This post contains affiliate links. If you purchase through them, I may earn a small commission at no extra cost to you. Thank you for supporting my work!
Este artículo contiene enlaces de afiliado, lo que significa que si comprás desde aquí, recibimos una pequeña comisión sin costo extra para vos. ¡Gracias por apoyar nuestro trabajo!
Discover more crochet patterns, free downloads, and premium PDFs on Ko-fi.