
Fashion Designer Amigurumi: The Art of Haute Couture Crochet
Welcome to a creative journey where crochet meets the refined world of high fashion. This Fashion Designer amigurumi pattern goes beyond simple doll-making, guiding you to create a sophisticated character that reflects elegance, creativity, and professional craftsmanship. Designed for intermediate and advanced makers, this project focuses on the innovative “Base Pro” structure, ensuring a balanced, upright silhouette that resembles a real fashion designer in miniature form.
What sets this pattern apart is its emphasis on technical excellence. You will master advanced techniques such as the Stability Spike system and Internal Head Cavity, eliminating neck wobble and guaranteeing long-lasting structural integrity. These methods elevate your amigurumi from a handmade toy to a collector-quality piece with perfect posture and proportions.
Every detail tells a story. From the miniature sketchbook of fashion sketches to the wire-frame glasses and measuring tape accessory, this doll embodies the creative soul of a designer. Perfect as a display piece or gift, this Fashion Designer amigurumi is a celebration of artistry, precision, and passion for crochet couture.
**Fashion Designer: The Art of Amigurumi Haute Couture**
Welcome to a project where crochet meets the sophisticated world of high fashion. This pattern is not just about making a doll; it is about bringing to life a **Fashion Designer** character that embodies elegance, creativity, and technical precision. Designed for those who wish to transition from basic shapes to professional-grade structures, this guide focuses on the “Base Pro” anatomy, ensuring your creation stands tall with a realistic and graceful silhouette.
**Elevating Your Craft**
In the world of amigurumi, details are the language of quality. Throughout this project, you will explore advanced techniques like the **Stability Spike** and the **Internal Head Cavity**, which eliminate the common “floppy neck” issue. These structural innovations allow your doll to maintain a perfect posture, making her the centerpiece of any collection or sewing studio.
**The Soul of the Creator**
Every designer is defined by their tools. Beyond the doll itself, you will craft iconic accessories: a miniature sketchbook for her “croquis,” delicate wire glasses, and a signature yellow measuring tape. These elements transform a simple toy into a storytelling piece. Prepare your hooks and finest cotton—it is time to stitch a masterpiece that truly captures the spirit of a **Fashion Designer**.
📏 PROJECT SIZE
Our fashion designer is a doll with an elegant presence. By following the instructions and using the recommended materials, the final size is approximately **31 cm (12.2 inches) tall**. It is the ideal format to showcase all her accessories and stand out on any shelf or sewing corner.
⭐ DIFFICULTY LEVEL: INTERMEDIATE
This is a “Base Pro” project. Although the stitches are basic amigurumi techniques, it requires attention to technical details such as the **PRO Neck Cavity**, the clean color change on the blouse, and the assembly of the hair by individual strands. It is the perfect challenge to level up your skills!
⏳ ESTIMATED CROCHET TIME
The completion time is approximately **12 to 15 hours**, depending on your pace and experience. I recommend enjoying the process: dedicate one afternoon to the base body, another to the head, and save a special session for the accessories and hairstyle, which are what give the character its soul.
🧶 MATERIALS LIST
To ensure your fashion designer is runway-ready, prepare the following:
* **Yarn:** 100% Cotton (4-ply/fingering weight) in colors: Skin (light beige), White (blouse), Black (skirt and shoes), and Brown or Black (hair).
* **Crochet Hook:** 2.5 mm (or the size that best fits your tension so the stuffing doesn’t show).
* **Safety Eyes:** 12 mm black.
* **Stuffing:** High-quality polyester fiberfill (siliconized).
* **Support:** A thick hot glue stick or plastic-coated galvanized wire (for the neck structure).
* **Accessories:** A small piece of white felt (for the notebook), fine jewelry wire (for the glasses), and scraps of yellow yarn (for the measuring tape).
* **Tools:** Yarn needle, scissors, stitch markers, and pins.
📝 STITCH ABBREVIATIONS
We will use standard US terminology to avoid confusion during the crochet process:
* **MR:** Magic Ring.
* **ch:** Chain.
* **sc:** Single Crochet.
* **inc:** Increase (2 sc in the same stitch).
* **dec:** Decrease (invisible, using front loops only).
* **sl st:** Slip Stitch.
* **BLO:** Back Loop Only.
* **FLO:** Front Loop Only.
* **dc:** Double Crochet.
* **(…) x N:** Repeat the instructions inside the parentheses N times.
* **(N):** The total number of stitches at the end of the round.
👞 SECTION 1: THE SHOES (Make 2)
*We start with the feet to create a stable base. We will use an oval sole so she can stand up.*
**Color: Black**
* **R1 (The Base):** **Ch 7**. Starting in the 2nd chain from the hook, crochet: **5 sc**, **3 sc in the last chain** (to turn), **4 sc** along the other side of the chains, and **1 inc** in the last space. (14)
* **R2 (Expansion 1):** **1 inc**, **4 sc**, **3 inc** (around the curve), **4 sc**, **2 inc**. (20)
* **R3 (Expansion 2):** **(1 sc, 1 inc)**, **4 sc**, **(1 sc, 1 inc) x 3**, **4 sc**, **(1 sc, 1 inc) x 2**. (26)
* **R4 (Final Expansion):** **(2 sc, 1 inc)**, **4 sc**, **(2 sc, 1 inc) x 3**, **4 sc**, **(2 sc, 1 inc) x 2**. (32)
* **R5 (Sole Effect):** Crochet **32 sc in BLO**.
* *Why?* This creates a flat edge that separates the sole from the sides of the shoe.
* **R6 – R7:** **32 sc** in each round. (32)
* **R8 (Instep 1):** **10 sc**, **6 dec** (centered at the front), **10 sc**. (26)
* **R9 (Instep 2):** **8 sc**, **5 dec**, **8 sc**. (21)
* **R10 (Adjustment):** **6 sc**, **3 dec**, **9 sc**. (18)
* **R11 (Shoe Closure):** **3 sc**, **3 dec**, **9 sc**. (**15**)
* *Important:* Do not close the last stitch with black. Prepare for the color change.
🦵 SECTION 2: THE LEGS (Make 2)
*We are looking for height and firmness. The legs should measure about 13-14 cm.*
**Color: Skin**
* **R12 (Color Change):** Close the stitch with skin color and crochet **15 sc in BLO**.
* *Why?* This leaves an outer black line that simulates the edge of the shoe.
* **R13 – R45 (Leg Length):** **15 sc** in each round (**33 rounds** in total).
* *How and when to stuff?* Stuff very firmly every 5 rounds. The ankle must be rigid to support the 31 cm doll.
* **Leg 1:** Cut the yarn and fasten off.
* **Leg 2:** **Do not cut the yarn**, **ch 3** to join to the first leg.
🍑 SECTION 3: JOINING AND HIPS
*Here we shape the “Base Pro” body with natural curves.*
**Color: Skin**
* **R46 (The Join):** Join to leg 1 with a sc. Crochet **15 sc** (leg 1), **3 sc** over the chains, **15 sc** (leg 2), and **3 sc** under the chains. (36)
* **R47 (Shaping the Hips):** **(5 sc, 1 inc) x 6**. (42)
* *Why?* These increases provide the volume necessary for the skirt to look good later.
* **R48 – R51:** **42 sc** (4 rounds). (42)
* **R52 (Reduction):** **(5 sc, 1 dec) x 6**. (36)
* **R53 (The Waist in BLO):** **36 sc in BLO**.
* *Where and why?* These front loops left free are the “anchor” where you will later attach the black yarn to crochet the skirt downwards.
👚 SECTION 4: THE TORSO (BLOUSE)
*Working up towards the shoulders with a clean color change.*
**Color: White**
* **R54 (Color Change):** Change to white and crochet **36 sc**. (36)
* **R55 – R62 (Blouse Height):** **36 sc** (8 rounds). (36)
* *How to stuff?* Keep the central support (wire or silicone stick) in the middle and stuff around it.
* **R63 (Shoulders):** **(4 sc, 1 dec) x 6**. (30)
* **R64 (Narrowing):** **(3 sc, 1 dec) x 6**. (24)
* **R65 (Towards the Neck):** **(2 sc, 1 dec) x 6**. (18)
* *Final note:* Change to **Skin color** in the last stitch to begin the head/neck in the next step.
> **💡 NOTE FOR THE CROCHETER:**
> You now have the main structure. If you look at the doll now, you will see a line of “ridges” at the waist (R53). When you want to make the **skirt**, attach black yarn to those loops and crochet downwards (36 sc per round) until the desired length.
👗 THE PENCIL SKIRT (Anatomic Fit with Resting Rounds)
**Color:** Black
**Technique:** Attached at the waist (R53 in BLO), crocheting with the doll **upside down**.
**R1: Waist Base**
* Attach black yarn to the front loops of R53.
* **36 sc** around. (36)
**R2: Resting Round 1**
* **36 sc** in each stitch. (36)
* *Why?:* This settles the black color at the waist before starting to widen.
**R3: First Transition (Increases)**
* **(5 sc, 1 inc) x 6**. (42)
* *Note:* By distributing 6 increases here, we reach the maximum diameter of the hip.
**R4 – R5: Resting Rounds 2 and 3 (Hip Setting)**
* **42 sc** in each round. (42)
* *The “How”:* These two rounds allow the skirt to cover the widest part of the base body (which also had 42 stitches) without pulling on the fabric.
**R6 – R14: The Body of the Skirt (9 rounds)**
* **42 sc** in each round. (42)
* *Instruction:* This is where the skirt goes straight down the thighs. Try it on the doll; if you want it a little longer, add a couple of rounds here.
**R15: Bottom Tapering (Pencil Effect)**
* To prevent the skirt from looking “flared” at the knees and to maintain the pencil line:
* **(5 sc, 1 dec) x 6**. (36)
**R16: Professional Finish**
* **36 slip stitches (sl st)**.
* *Why?:* This final stitch adds weight and rigidity to the edge, preventing the skirt from curling up when you sit the doll down.
**💡 Visual Summary:**
* **Waist:** 36 stitches (R1-R2).
* **Growth:** Jump to 42 stitches (R3).
* **Body:** Straight at 42 stitches (R4-R14).
* **Closure:** Return to 36 stitches to taper (R15-R16).
🦒 THE NECK AND STABILITY SPIKE
**Color: Skin (Light Beige)**
The **Spike** is an extension of the neck that functions as a support “post.” Eventually, it will be inserted into a hollow space (cavity) that we will crochet into the base of the head, achieving a perfect and firm fit.
**Constant Stitches:** 18 sc
**Technique:** Continuous spiral crochet.
* **R66: Beginning of the Actual Neck**
* We are coming from R65 (which had 18 stitches in white/skin).
* Crochet **18 sc in BLO** (Back Loop Only).
* *Why?* This creates a visual marker where the blouse ends and the neck begins. Additionally, it allows the neck to emerge at a clean upward angle.
* **R67 – R69: Neck Height (3 rounds)**
* Crochet **18 sc** in each round. (18)
* *Stuffing Instruction:* It is vital to insert the physical support (thick hot glue stick or plastic-coated galvanized wire) here. The stuffing must be very tight around the support.
📍 THE SPIKE (The Support “Post”)
Now we are going to narrow the fabric slightly to create the piece that will go inside the head.
* **R70: Reduction for the Spike**
* Crochet **(4 sc, 1 dec) x 3**.
* **Total stitches: 15 sc.**
* *Why 15 stitches?* This is the ideal measurement to be thick enough for stability but thin enough to enter the head cavity without deforming it.
* **R71 – R76: Spike Height (6 rounds)**
* Crochet **15 sc** in each round. (15)
* *Step-by-step:* You will see a long skin-colored cylinder forming, protruding from the body.
* *The Secret to Success:* As you crochet these 6 rounds, stuff with extreme firmness. If the spike is soft, it won’t work. It should feel like a firm finger.
* **R77: Closing the Spike**
* Crochet **(1 sc, 1 dec) x 5**. (10)
* Crochet **5 dec**. (5)
* Cut the yarn leaving a short tail, use a yarn needle to close the small circle, and hide the yarn tail inside.
**💡 Visualizing the result:**
At this moment, your doll should look like a torso with a skin-colored “mast” coming out of the neck. Don’t be alarmed if it looks too long; that 6-round piece will be hidden inside the head.
**Benefits of this system:**
* **Zero “Floppy Neck”:** The head won’t wobble.
* **No Visible Seams:** By fitting the head over the spike, the join remains clean and professional.
* **Durability:** The doll will maintain her upright posture for years, even if a child plays with her.
🖐️ THE ARMS AND SLEEVES (Make 2)
**Colors:** Skin and White.
**Stuffing:** Only in the hand and half of the arm (so they don’t look “stiff”).
1. **Proportion:** The arms are thin and delicate so as not to distract from the torso. A diameter of **10 stitches** for the skin is ideal for a 30 cm doll; if they were 12 or more, they would look too bulky.
2. **The Sleeves:** In the photo, the white blouse has a **short sleeve with volume** (a subtle puff style). To achieve this “garment over skin” effect, the sleeve must have at least **12 or 14 stitches** so it isn’t tight and the change in thickness is noticeable.
*We will crochet the arms from the **bottom up** (from hand to shoulder) so the join with the body is cleaner.*
SECTION A: The Hand and Arm (Skin Color)
* **R1: The Beginning (Magic Ring)**
* Make a magic ring of **6 sc**. (6)
* **R2: Shaping the Palm**
* Crochet **(1 sc, 1 inc) x 3**. (9)
* **R3 – R4: Hand Height**
* Crochet **9 sc** in each round. (9)
* *Dressmaker’s Tip:* If you want a subtle thumb, in R4 crochet: *4 sc, 1 puff stitch of 3 dc (the finger), 4 sc*. If you are a beginner, leave it straight at 9 sc.
* **R5: Wrist and Arm Adjustment**
* Crochet **1 inc and 8 sc**. (**10 sc**)
* *Why?* Here we reach 10 stitches. It is the perfect thickness for the arm.
* **R6 – R18: Arm Length (13 rounds)**
* Crochet **10 sc** in each round. (10)
* *Stuffing Instruction:* Stuff the hand firmly, but the arm only a little. Leave the last 2 cm without stuffing so the arm falls naturally at the side of the body.
SECTION B: The White Sleeve (The “Volume Effect”)
*This is where we apply the 12 stitches to create the sleeve.*
* **R19: Color Change and Volume Increase**
* Close the last stitch of R18 with **White**.
* Crochet **10 sc in BLO** (Back Loop Only).
* *Why BLO?* This will allow us later to pick up the front loops to make a prettier sleeve edge if you wish.
* **R20: Expanding to 12 Stitches**
* Crochet **(4 sc, 1 inc) x 2**. (**12 pb**)
* *Result:* Here we achieve the diameter needed to give that little “flare” to the sleeve compared to the arm.
* **R21 – R24: Short Sleeve Height**
* Crochet **12 sc** in each round (4 rounds). (12)
* **R25: Shoulder Closure**
* Crochet **6 dec** (6) or simply flatten the arm and crochet **5 sc through both layers** to close the piece flat.
* **Closure:** Cut the yarn leaving a long tail (**30 cm**) to sew to the body later.
**💡 Assembly Tips for Beginners:**
1. **When to sew?:** Don’t sew them yet. Wait until you have the head ready to calculate the exact height of the shoulders (generally sewn between R63 and R64 of the torso).
2. **The Detail:** Once the arm is finished, go back to the **BLO row of R19**. Attach white yarn and crochet a round of **slip stitches or single crochets** around it. This will create a real “hem” that will make the sleeve look separate from the arm, just like in the photo.
👂 THE EARS (Make 2)
**Color:** Skin.
The designer’s ears in the photo are very subtle, so we will use the half-magic ring technique.
**R1 (Half Ring):**
* Make a magic ring. Inside it, crochet: **ch 1, 5 sc**. **Do not close the circle**.
* *How?:* Pull the short tail to form a crescent or semicircle shape.
* Cut the yarn, leaving a **15 cm** tail for sewing.
**Where to sew the ears:**
* Count **6 or 7 stitches** to the sides from the eyes. They should be horizontally aligned with the bottom of the eyes (approximately between R23 and R24). Sew the flat part of the semicircle to the head.
👤 THE HEAD (Crown to Base – Max 54 stitches)
**Color:** Skin
**Eyes:** 12 mm (between R21 and R22)
**Spacing:** 10 visible stitches.
PART 1: The Crown (Increases)
* **R1:** Magic ring of 6 sc. (6)
* **R2:** 6 inc. (12)
* **R3:** (1 sc, 1 inc) × 6. (18)
* **R4:** (2 sc, 1 inc) × 6. (24)
* **R5:** (3 sc, 1 inc) × 6. (30)
* **R6:** (4 sc, 1 inc) × 6. (36)
* **R7:** (5 sc, 1 inc) × 6. (42)
* **R8:** (6 sc, 1 inc) × 6. (48)
* **R9:** (7 sc, 1 inc) × 6. (54)
PART 2: Face Height
* **R10 – R25:** sc in each stitch (16 rounds of straight height). (54)
* *Why 16 rounds?:* This provides the necessary height for the face to look clear and professional before starting to close.
* **👀 EYE PLACEMENT:** Place the safety eyes between R21 and R22. Leave 10 stitches of separation. Since there are no cheek increases, ensure they are well-centered relative to the start of the round.
PART 3: Base of the Head (Decreases)
Here we form the “floor” of the head before creating the inward tube.
* **R26:** (7 sc, 1 dec) × 6. (48)
* **R27:** (6 sc, 1 dec) × 6. (42)
* **R28:** (5 sc, 1 dec) × 6. (36)
* **R29:** (4 sc, 1 dec) × 6. (30)
* **R30:** (3 sc, 1 dec) × 6. (24)
* **R31:** (2 sc, 1 dec) × 6. (18)
* **Stuffing:** Stuff the head firmly. **Important:** Leave a hollow space in the center of the stuffing (you can use your finger or a thick marker) so the cavity tube can enter without issues.
PART 4: Internal Cavity (The 18-stitch Tube)
Now we convert the end of the head into the neck support.
* **R32 (The Fold):** Crochet 18 sc in **BLO** (Back Loop Only).
* *How and where?:* By crocheting in the back loop, you will see the fabric fold toward the inside of the head.
* **R33 – R38:** Crochet 18 sc in each round (6 rounds of height). (18)
* **Closure:** Cut the yarn leaving a tail of about 20 cm. Using a yarn needle, finish the final edge of the tube (R38).
💡 Visualizing the Assembly (The Moment of Truth):
Now you have a body with a post (spike) and a head with a garage (cavity).
1. **Step 1:** Insert the neck spike into the head cavity. You will see it fits perfectly.
2. **Step 2:** Using a yarn needle and skin-colored yarn, make invisible stitches exactly where the neck and the base of the head meet. Your designer will have a firm, professional neck!
💇♀️ THE HAIR (Color Brown or Black)
For our **Designer’s** hair, we are aiming for that professional finish seen in the image: a hairstyle with volume, a side part, and an elegant ponytail. For a 31 cm doll with a 54-stitch head, we will use the **Base Cap + Individual Strands** method.
**Material:** The same yarn and a 2.5 mm hook.
PART 1: The Base Cap
*This is crocheted the same as the top of the head up to 54 stitches, but with a slightly looser tension or adding an extra round so it fits well over the head.*
* **R1 – R9:** Repeat the instructions for the head (up to 54 sc).
* **R10 – R14:** sc in each stitch (5 rounds). (54)
* **Do not cut the yarn.** From here, we will start crocheting the strands directly attached to the edge of the cap.
PART 2: The Strands (The Hairstyle)
*We will crochet strands of different lengths to create the ponytail and side bang effect.*
**A. Base Strands (The back part – Make 15 strands):**
1. **Ch 35**.
2. Starting in the 2nd chain: crochet **34 sc** (or half double crochets for more volume).
3. Skip 1 stitch on the base cap and join with **1 slip stitch (sl st)** in the next.
* *Why 35 chains?:* This provides enough length to gather the hair into a medium-high ponytail.
**B. Side Strands and Bangs (The front part – Make 8 strands):**
1. **Ch 45** (these are longer so they cross the face elegantly).
2. Starting in the 2nd chain: crochet **44 sc**.
3. Join with **1 sl st** in the next stitch of the base (without skipping stitches so it looks fuller).
🪡 HAIRSTYLE ASSEMBLY (The “How and Where”)
1. **Placement:** Place the cap on the doll’s head. The long strands (Bangs) should be positioned to one side (right or left, depending on where you prefer the part).
2. **Securing:** * Sew or glue the cap to the crown.
* Arrange the 8 long strands to one side, covering the forehead diagonally (as in the photo).
* Pull all strands back toward the nape or slightly higher.
3. **The Ponytail:** * Secure all strands with a small hair tie or a strand of black yarn.
* **Pro Tip:** Take an extra strand from those you crocheted and wrap it around the tie to hide it. Secure with an invisible stitch.
**💡 Tips for Beginners:**
* **The “Wavy Effect”:** If you want the hair to have a bit of a wave, crochet **2 sc in each chain** instead of just one. This will cause the strand to curl on its own.
* **Symmetry:** Ensure the ears remain visible beneath the hair. The designer’s hairstyle is “clean,” so pull the hair away from the face to show off the eyes and glasses.
📏 1. THE MEASURING TAPE (The Star Accessory)
**Color:** Yellow (or White) with Black details.
**Technique:** Base chain and slip stitches to keep it flat and flexible.
* **Step 1:** **Ch 85**.
* **Step 2:** Starting in the 2nd chain from the hook, crochet **84 slip stitches (sl st)**.
* *Why?:* We want the tape to be a very thin strip that can drape naturally around the neck. Using single crochets would make it too thick.
* **Step 3 (The Detail):** Using a sewing needle and very fine black thread (embroidery floss), make small vertical stitches every 3 or 4 stitches. No need to add numbers; the lines already provide the visual effect of millimeters.
* **Placement:** Cross the tape over the doll’s shoulders and let the ends fall over the white blouse.
✂️ 2. THE SEWING SCISSORS
**Color:** Silver Gray (blades) and Black (handles).
**Technique:** Reinforced flat pieces.
**The Blades (Make 2 in Gray):**
* **Ch 9**.
* Turn and crochet **8 slip stitches (sl st)**. Fasten off, leaving a short tail.
**The Handles (Make 2 in Black):**
* Attach black yarn to the base of the gray blade.
* **Ch 7** and join with **1 sl st** in the same starting stitch to form a circle.
* Work **10 sc inside the ring** (crocheting over the chains); this adds thickness to the handle.
**Assembly:**
* Cross the two blades to form an “X”.
* Make a firm stitch in the center with black thread so they remain articulated or fixed. Sew the scissors to one of the doll’s hands.
📓 3. THE SKETCHBOOK
**Color:** Pink, Turquoise, or your designer’s favorite color.
**The Cover:**
* **Ch 11**.
* **R1 – R14:** Crochet **10 sc** in rows (ch 1 and turn at the end of each row). You will have a rectangle.
**The Pages:**
* Cut 3 rectangles of white felt slightly smaller than the cover.
**Assembly:**
* Fold the cover in half and sew the felt to the center.
* **Detail:** Embroider a small “croquis” (a simple silhouette) on the front cover with black thread.
👓 4. THE GLASSES (Optional, but very professional)
**Material:** Fine jewelry wire or a black pipe cleaner.
* Take a marker or a small tube about 2 cm in diameter.
* Wrap the wire around the tube twice to create the two circles for the lenses.
* Leave a small gap (the bridge of the nose) and bend the temples (arms) backward.
* If using wire, you can wrap it with black thread and a bit of glue to make it safe and finished.
💡 Final Assembly Checklist:
* **Arms:** Ensure they are sewn at the level of **R64** of the torso.
* **Head:** Insert the spike into the cavity and sew using an **invisible stitch**.
* **Face:** Embroider the nose (**2 stitches wide**) exactly between the eyes and add some side eyelashes to give her 그 “chic” designer touch.
**Fashion Designer: A Masterpiece in Every Stitch**
Congratulations on completing your **Fashion Designer** doll! You have transitioned from simple crochet loops to a sophisticated structural work of art. By mastering the “Base Pro” anatomy—from the seamless **Stability Spike** to the intricate **Internal Cavity**—you have elevated your amigurumi skills to a professional level. This project is more than just a doll; it is a tribute to the patience and precision that define the world of haute couture.
**Bringing Your Character to Life**
Now that the final stitches are in place and the accessories are positioned, your designer is ready to take her place in your creative sanctuary. Whether she is draped with her signature yellow measuring tape or holding her miniature sketchbook, she stands as a symbol of your dedication. Each detail, from the volume of the “lantern” sleeves to the sleek pencil skirt, reflects a deep understanding of silhouette and style.
**The Journey Continues**
This **Fashion Designer** is just the beginning of your high-fashion crochet journey. You can now use these advanced structural techniques to customize future projects, playing with different hair colors or garment textures. May this elegant creator inspire you every time you glance at your sewing corner. Keep your hooks busy, your tension even, and your creativity limitless. Until the next pattern, happy crocheting!
Hello, fellow crocheter! 🧶✨
Designing a pattern is like creating a piece of high fashion: sometimes a tiny stitch can slip away among so many rounds! I have put all my love and attention into every single instruction for this **Fashion Designer**, but if while following the step-by-step you notice something doesn’t quite add up, a stitch count is off, or an explanation could be clearer, **please let me know in the comments!**
Your feedback is essential to making this pattern perfect for the entire community. Don’t hesitate to ask questions or point out corrections; we are here to learn together and fix any technical details immediately.
Thank you for being part of this creative process and for helping me improve! **Happy crocheting!** 💖🔍
Love Crochet? Learn New Skills Today 👉 Explore beginner-friendly crochet courses
Spanish version of this same pattern
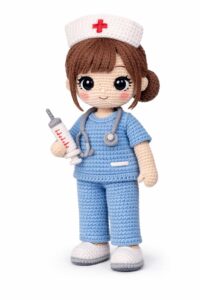
Here’s another pattern for crocheting an amigurumi nurse
video tutorial for crocheting another amigurumi doll pattern
A knitting pattern for another adorable little doll found on Etsy

Affiliate Disclosure:
This post contains affiliate links. If you purchase through them, I may earn a small commission at no extra cost to you. Thank you for supporting my work!
Discover more crochet patterns, free downloads, and premium PDFs on Ko-fi.