
Create a beautiful handmade doll with this crochet pattern designed to deliver structure, balance, and detailed craftsmanship. This step-by-step tutorial guides you through a doll with curly hair, layered skirt, and removable clothing, featuring a reinforced neck system for stability, making it perfect for intermediate crocheters seeking a polished result ideal for gifts, decoration, or selling handmade creations.
A Charming Project for Doll Lovers
If you’ve been searching for a **handmade doll pattern** that combines structure, sweetness, and detailed craftsmanship, this design was created for you. This doll is not just adorable — she is thoughtfully constructed from the feet up to ensure stability, proportion, and long-lasting quality. From her defined curls to her double-ruffle skirt and removable raglan sweater, every element has been carefully planned to achieve a professional finish.
Designed for Balance and Beauty
One of the standout features of this handmade doll pattern is the reinforced cavity-and-spike neck system. This internal structure allows the head to securely support the volume of curly hair without wobbling. The result is a beautifully balanced doll that feels sturdy while maintaining a delicate appearance.
The removable clothing adds versatility and realism, making the doll even more special. The layered skirt creates dramatic movement, while the raglan sweater ensures a comfortable and polished fit.
A Rewarding Creative Experience
Whether you crochet for personal joy or to sell your creations, this project offers an enriching and satisfying experience. With clear shaping, thoughtful construction, and detailed facial embroidery, this handmade doll pattern will help you create a doll full of personality and charm.

Step-by-step crochet PDF pattern with colorwork and full assembly guide.
**⏳ Estimated Completion Time**
The total making time for this doll is approximately **18 to 22 hours of net work**. This may vary depending on your crocheting pace and skill level.
For better organization, the project can be divided as follows:
* **Body and Limbs (6–7 hours):** Includes crocheting the legs, joining the body using the spike-neck technique, and the arms.
* **Head and Facial Embroidery (3–4 hours):** Creating the cavity requires attention, and embroidering the eyes, lashes, and facial details is the step that demands the most patience to achieve the desired expression.
* **Hair and Curls (4–5 hours):** Because of the curl length and volume, this is the most labor-intensive phase.
* **Clothes and Accessories (5–6 hours):** The double-ruffle skirt and the raglan yoke sweater are detailed pieces that require color changes and finishing work.
> **Tip for makers:** If you crochet to sell, we recommend dividing the work over **3–4 days** to avoid hand fatigue — dedicate one day to structure, another to hair, and the last to clothing and final details.
**🧶 Materials List**
To obtain a doll measuring **11–12 in (28–30 cm)** tall, use **Sport or Fine (2) weight cotton yarn** (approx. 100–125 m per 50 g).
**Yarn Amounts**
* **Skin Color (Beige):** 60 g (includes an extra 10 g for the spike neck and reinforcement).
* **Brown (Hair):** 70 g (important: curls use a lot of yarn to achieve volume).
* **Dark Green (Sweater & Shoes):** 40 g.
* **Red (Skirt & Flower):** 50 g (for both full layers).
* **White (Details & Socks):** 25 g.
* **Leaf Green:** scraps for hair leaves.
* **Embroidery thread:** fine black (lashes), brown (eyebrows), and pink (mouth).
**Tools & Notions**
* **Hook:** 2.25 mm (or size needed to obtain tight stitches without gaps).
* **Safety eyes:** 1 pair **12 mm** (recommended for the cute look shown).
* **Stuffing:** high-quality polyester fiberfill (approx. 100–120 g).
* **Structural support:** 1 wooden skewer (tip removed) or a 10–12 cm plastic tube for the cavity/spike reinforcement system.
* **Buttons:**
Guide to useful tools for crocheting
* 2 small red buttons (6 mm) for the skirt
* 1 green button for sweater closure
* 2 small buttons for the shoe straps
* **Other:** yarn needle, stitch marker, pins, scissors, and a bit of blush or pink pastel chalk for the cheeks.
**📍 Stitches & Abbreviations**
This project uses basic stitches and intermediate techniques to create textures and volume.
* **MR:** Magic Ring (base for circular pieces)
* **ch:** chain
* **sc:** single crochet
* **hdc:** half double crochet
* **dc:** double crochet
* **sl st:** slip stitch
* **inc:** increase (2 stitches in same stitch)
* **dec:** invisible decrease (work front loops of two stitches together)
* **FLO (Front Loop Only):** used for ruffles and details
* **BLO (Back Loop Only):** used to create the neck cavity and directional shaping
* **popcorn (3 dc):** thumb detail on arms
* **(…) x N:** repeat instructions N times
* **[N]:** total stitch count at end of round
**💡 Additional Technical Notes**
1. **Worked in Spiral:** Most of the body and head are crocheted continuously. Always use a stitch marker.
2. **Worked in Rows:** The sweater and some appliqués are crocheted turning at the end of each row.
3. **Tension:** Maintain consistent tension. If stuffing shows through, switch to a hook **0.25 mm smaller**.
Project Structure
**Construction note:** To achieve stability and proportions, this doll is worked from the bottom up. We begin with the feet and legs, which are later joined to form the body in one piece. This method allows the integration of the **“cavity and spike” neck technique**, ensuring the head supports the weight of the curly hair without wobbling.
We will use the **dark green** shown in the reference image. Stitch counts were adjusted so the shoes are removable and fit perfectly over the plush white socks.
Shoes (Make 2)
*Start with green yarn. Work in joined rounds (finish with sl st and ch 1) to keep the edge straight, or in spiral if preferred, though the slip stitch helps the shoe structure.*
Sole
**Rnd 1:** ch 7. Starting in 2nd ch from hook: 5 sc, 3 sc in last ch. Turn to other side of chain: 4 sc, inc in last [14]
**Rnd 2:** inc, 4 sc, 3 inc, 4 sc, 2 inc [20]
**Rnd 3:** 1 sc, inc, 4 sc, (1 sc, inc) x3, 4 sc, (1 sc, inc) x2 [26]
**Rnd 4:** 2 sc, inc, 4 sc, (2 sc, inc) x3, 4 sc, (2 sc, inc) x2 [32]
*Note: Sole should measure about 4.5–5 cm. If too small for the 18-stitch leg, use a 2.5 mm hook only for the sole.*
Shoe Body
**Rnd 5:** BLO 32 sc [32] (creates the base ridge)
**Rnd 6–7:** 32 sc [32]
**Rnd 8 (toe decreases):** 10 sc, 6 dec, 10 sc [26]
*Make sure the decreases are centered at the front.*
**Rnd 9:** 8 sc, 5 dec, 8 sc [21]
**Rnd 10:** 21 sc. sl st and fasten off.
Shoe Strap
1. Attach green yarn to the inner side of the shoe (Rnd 10).
2. ch **12–14** (enough to cross the instep).
3. Return from 6th chain with sc (the initial gap becomes the buttonhole).
4. Sew a small button to the outer side of the shoe.
Plush Socks (White)
The sock should be slightly wider than the leg so it appears to emerge from the shoe.
**Rnd 1:** ch 18, join to ring.
**Rnd 2–4:** 18 sc [18]
**Rnd 5 (fluffy edge):** In FLO: (3 dc in same st, skip 1 st, sl st in next) repeat around.
Legs (Make 2) – Skin Color
Stuff firmly as you go, especially feet and ankles.
**Rnd 1:** 6 sc in MR [6]
**Rnd 2:** 6 inc [12]
**Rnd 3:** (1 sc, inc) x6 [18]
**Rnd 4–5:** 18 sc
**Rnd 6 (heel):** 6 sc, 3 dec, 6 sc [15]
**Rnd 7:** 5 sc, 2 dec, 6 sc [13]
**Rnd 8–9:** 13 sc
**Rnd 10 (ankle):** dec, 11 sc [12]
Marker should be centered at back heel.
**Rnd 11–30:** 12 sc (20 rounds)
**Joining instructions:**
Leg 1: fasten off.
Leg 2: DO NOT cut yarn. Crochet 3–4 extra sc to reach inner side for centered join.
Body
Continue from Leg 2.
**Rnd 1:** ch 6, join to Leg 1 with sc (place marker).
Work 11 sc around Leg 1 + 6 sc across chains + 12 sc around Leg 2 + 6 sc across other side of chains [36]
**Rnd 2:** (5 sc, inc) x6 [42]
**Rnd 3–8:** 42 sc
**Rnd 9:** (5 sc, dec) x6 [36]
**Rnd 10–15:** 36 sc
**Rnd 16:** (4 sc, dec) x6 [30]
**Rnd 17–20:** 30 sc
**Rnd 21:** (3 sc, dec) x6 [24]
**Rnd 22:** (2 sc, dec) x6 [18]
**Rnd 23:** (4 sc, dec) x3 [15]
**Rnd 24–28:** 15 sc (5 rounds height)
Reinforced Spike Neck
These 5 rounds form the spike inserted into the head.
Fasten off leaving a long sewing tail.
**Stuffing tip:** Insert the wooden stick or plastic support now — from mid-chest to the end of the spike.
Head (Skin Color)
**Rnd 1:** 6 sc MR [6]
**Rnd 2:** 6 inc [12]
**Rnd 3:** (1 sc, inc) x6 [18]
**Rnd 4:** (2 sc, inc) x6 [24]
**Rnd 5:** (3 sc, inc) x6 [30]
**Rnd 6:** (4 sc, inc) x6 [36]
**Rnd 7:** (5 sc, inc) x6 [42]
**Rnd 8:** (6 sc, inc) x6 [48]
**Rnd 9:** (7 sc, inc) x6 [54]
**Rnd 10–19:** 54 sc
Insert safety eyes between **Rounds 15–16**, spaced **10–11 stitches apart**.
**Rnd 20:** (7 sc, dec) x6 [48]
**Rnd 21:** (6 sc, dec) x6 [42]
**Rnd 22:** (5 sc, dec) x6 [36]
**Rnd 23:** (4 sc, dec) x6 [30]
**Rnd 24:** (3 sc, dec) x6 [24]
**Rnd 25:** (2 sc, dec) x6 [18]
Head Cavity (Interior)
**Rnd 26:** BLO 18 sc
**Rnd 27–28:** 18 sc
Fasten off.
Stuff firmly around the walls, leaving the center hollow for the neck spike.
Facial Details
* **Lashes:** embroider 3 small lashes on outer side of each eye using black thread.
* **Nose:** small stitch between eyes, one round below.
* **Mouth:** small curved line two rounds below nose in soft pink or brown.
* **Cheeks:** apply blush or pink pastel.
Arms (Make 2)
**Rnd 1:** 6 sc MR [6]
**Rnd 2:** 6 inc [12]
**Rnd 3–5:** 12 sc
**Rnd 6 (thumb):** popcorn (3 dc cluster), 11 sc
**Rnd 7:** (4 sc, dec) x2 [10]
**Rnd 8–22:** 10 sc
Stuff firmly in hand, lightly in arm. Leave top 2 cm unstuffed.
**Close:** flatten and crochet 5 sc through both layers. Leave tail to sew.
**Placement:** sew around **Round 21** of body, thumbs forward.
Hair Base Wig Cap
**Rnd 1–9:** increase to 54 sc (same as head).
**Rnd 10–15:** 54 sc.
Cap should reach eyebrow level and cover nape.
Bangs
Attach yarn to front edge.
ch 10, return with 9 sc, skip one stitch and sl st to cap.
Repeat across front.
Curls
**Long curl:** ch 45
Work (2 sc in next ch, 1 sc in next) across.
Attach with sl st to next cap stitch.
Make varied lengths (35–50 chains).
For top volume, add spaced curls on Round 7 FLO.
Flower & Leaves
Red Flower (Rosette)
ch 31.
In 2nd ch: (sc, hdc, dc, hdc, sc) in same stitch, skip 1, sl st next. Repeat.
Roll and sew.
Leaves (Make 2)
ch 8
sl st, sc, hdc, 2 dc, hdc, sc, (3 sc in tip)
Return along other side: sc, hdc, 2 dc, hdc, sc, sl st.
Sew wig first, then attach flower on right side.
Removable Sweater (Green)
Worked top-down in rows.
**Row 1:** ch 37, 36 sc
**Row 2:** (5 sc, inc) x6 [42]
**Row 3 (raglan distribution):**
6 sc, ch 2, 9 sc, ch 2, 10 sc, ch 2, 9 sc, ch 2, 6 sc
**Row 4:** sc across, 3 sc in each ch-2 space (~50)
**Row 5:** increase at each shoulder center [54]
**Row 6 (separate sleeves):**
8 sc, skip 11, ch 3, 16 sc, skip 11, ch 3, 8 sc [46]
**Rounds 7–14:** 46 sc
**Round 15:** switch to white: (sc, 3 dc same st, skip 1) ruffle edge.
Sleeves
Attach yarn at armhole.
Rnd 1–10: 14 sc
Rnd 11: (sc, inc) [21] white
Rnd 12: (sc, 3 dc same st, skip 1)
Collar
White yarn along neckline: (3 dc in one st, skip 1, sl st next) repeat.
Add button closure and optional cherry ties.
Red Double-Ruffle Skirt
**Waistband**
Rnd 1: ch 43, join [42]
Rnd 2–4: 42 sc
Upper Layer (FLO)
Rnd 5: (dc, dc inc) [63]
Rnd 6: (2 dc, inc) [84]
Rnd 7: (3 dc, inc) [105]
Rnd 8: white scallop: (sc, ch 3, sc same st, skip 1)
Lower Layer
Return to BLO of Round 5.
Rnd 1: 42 dc
Rnd 2: (dc, inc) [63]
Rnd 3: (2 dc, inc) [84]
Rnd 4: (3 dc, inc) [105]
Rnd 5: (4 dc, inc) [126]
Rnd 6: 126 dc
Rnd 7: white scallop edge.
Add decorative buttons and lightly steam shape (no direct contact).
Final Assembly Order
1. Put on socks
2. Add shoes
3. Add skirt
4. Put on sweater
5. Insert head onto spike and sew invisibly
Facial Embroidery Guide (Soft Expression)
Placement
* Eyes: between R15–16, 10–11 stitches apart
* Nose: centered one round below eyes
* Mouth: two rounds below nose
Lashes
3 fan-shaped lashes with fine black thread.
Eye highlight
Small white stitch on lower outer eye edge.
Eyebrows
2–3 rounds above eyes, short and slightly angled outward.
### Nose
3–4 horizontal passes.
Mouth
Soft pink curved line (wide V or flat U).
Blush
Apply lightly under eyes toward temples.
Final Tip
Before knotting, view the doll from arm’s length. Adjust symmetry if needed. Hide all knots at the top of the head under the wig.
**Your doll will now have the same sweet personality as the reference image!**
Bringing Your Doll to Life
Finishing a project like this is always a special moment. As you complete the final stitches and gently place the wig, you will notice how the personality of your creation begins to appear. This **handmade doll pattern** was designed so the crocheter becomes part of the artistic process — small choices in the embroidery, blush, and hairstyle give every doll a unique expression.
Take a few minutes to observe your doll from different angles. The balanced proportions, reinforced neck, and soft silhouette work together to create a piece that feels both delicate and durable. The removable outfit allows you to dress and restyle the doll whenever you wish, turning it into a lasting keepsake rather than a static figure.
A Piece Made to Be Loved
Whether you plan to keep it, gift it, or sell it, this handmade doll pattern offers more than a finished object — it offers a story. Handmade dolls carry warmth because every stitch records time, patience, and intention.
With practice, you can adapt colors, hair styles, and outfits to create entire characters. This pattern can become the foundation of a collection, allowing you to develop your own recognizable style and bring many future dolls to life.
💌 **Dear Crocheters,**
We truly hope you enjoy making this doll as much as we enjoyed designing it. Every stitch in this project was carefully planned to guide you step by step while still leaving room for your own creativity. Take your time, enjoy the process, and don’t worry if your doll looks a little different — that is exactly what makes handmade creations special.
If at any point you notice an unclear step, a possible mistake, or a part that could be better explained, we would be very grateful if you let us know in the comments on the blog. Your feedback helps us correct and improve the pattern so that other crocheters can also have a smooth and enjoyable experience.
Even the smallest observation can be helpful. Together we can build a friendly crochet community where we learn from one another and continue improving our patterns.
Thank you for being part of this project and for supporting handmade creations. Your time, patience, and passion are what truly bring this doll to life.

Spanish version of this pattern
Here’s the pattern for another amigurumi doll
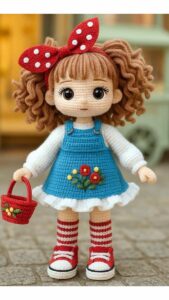
Video tutorial for knitting another doll design
Pattern for crocheting another wonderful amigurumi doll found on Etsy
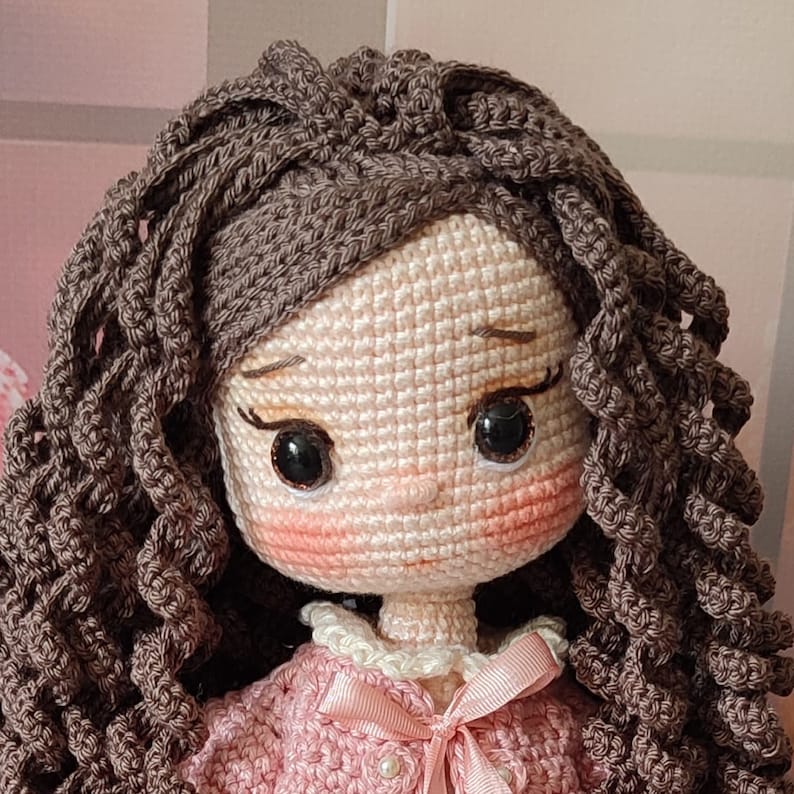
Some links in this post may be affiliate links. If you purchase through them, I may earn a small commission at no extra cost to you. Your support helps me continue creating and sharing free crochet patterns.
Discover more crochet patterns, free downloads, and premium PDFs on Ko-fi.