
Create your own cozy crochet doll with this step-by-step amigurumi pattern featuring a modern bucket hat design. This tutorial guides you through making a charming handmade doll with detailed clothing, striped stockings, and customizable accessories, making it perfect for gifts, decoration, or adding a stylish piece to your amigurumi collection.
Amigurumi with bucket hat: A cozy handmade creation
The charm of handmade dolls
Amigurumi with bucket hat represents more than just a crochet project—it embodies the warmth and creativity of artisan work. Each stitch is carefully placed to bring life to a doll that radiates tenderness and personality. The bucket hat, combined with the detailed outfit, adds a modern yet cozy touch that makes this design stand out.
A project for learning and enjoyment
This pattern is designed to guide crocheters step by step, from the shoes to the final accessories. The process allows you to practice essential techniques such as shaping, color changes, and decorative details. Whether you are an intermediate crafter or an adventurous beginner, the project offers both challenge and satisfaction.
Style and personalization
The doll’s outfit—complete with dress, pockets, and striped stockings—invites endless customization. You can experiment with different yarn colors, add small accessories, or adjust the hair length to create a unique version. The bucket hat not only enhances the doll’s style but also provides a playful accessory that highlights its cozy aesthetic.
A gift full of meaning
Amigurumi with bucket hat is perfect as a heartfelt gift or as a decorative piece that brings warmth to any space. More than a toy, it is a handmade treasure that reflects patience, creativity, and love for crochet.
Pattern Overview
This pattern is designed to be worked **bottom-up**. We’ll start with the feet, join the legs to form the body, and finish at the neck with a “spike” structure that supports the head.
⏳ **Estimated Crochet Time**
The total time may vary depending on your pace and skill level, but here’s an average guide to help you plan:
– **Body & limbs:** 6–8 hours (including the spike system)
– **Head & facial embroidery:** 3–4 hours (eyes and cheeks require patience)
– **Hair (wave technique):** 5–7 hours (most time-consuming due to strand volume)
– **Clothing & accessories (dress, shoes, hat):** 4–6 hours
– **Final assembly & details:** 1–2 hours
**Total estimate:** 20–25 hours of handmade work.
**Tip:** Work the hair in multiple sessions to avoid hand fatigue, since the many wavy strands can be tiring. Enjoy every stitch!
Materials List
– **Beige (skin):** approx. 55–60 g
– **Brown hair:** approx. 70–80 g
– **Cream (dress & hat):** approx. 60–70 g
– **Mustard/Ochre (sweater & shoes):** approx. 35–40 g
– **Dark brown or black (soles):** approx. 10 g
– **White (stocking & eye details):** approx. 15 g
– **Hook:** 2.25 mm (or size that matches your tension)
– **Safety eyes:** 12 mm
– **Polyfill stuffing:** approx. 160–180 g
– **Accessories:** Yarn needle, stitch markers, 2 small buttons (or thread to crochet them)
– **Details:** Pink blush or eyeshadow for cheeks
Guide to useful tools for crocheting
🧶 **Abbreviations & Stitches Used**
We’ll use standard U.S. crochet terms. A stitch marker is recommended to keep track of rounds.
**Basic Stitches:**
– ch = chain
– sc = single crochet
– hdc = half double crochet
– dc = double crochet
– sl st = slip stitch
– crab stitch = reverse single crochet (for edging)
**Techniques & Increases:**
– inc = increase (2 stitches in same base stitch)
– inv dec = invisible decrease (work 2 stitches together using front loops only)
– MR = magic ring
– BLO = back loop only
– FLO = front loop only
**Counting Symbols:**
– (…) × N = repeat instructions inside parentheses N times
– = N = total stitch count at end of round/row
Part 1: Feet and Legs
1. Mary Jane Shoes (Color: Dark Brown/Black and Mustard)
*Start with the sole in Dark Brown or Black.*
* **R1:** Ch 7. Starting in the 2nd ch from hook: 5 sc, 3 sc in the last st. Working along the other side of the chain: 4 sc, 1 inc = **14**
* **R2:** 1 inc, 4 sc, 3 inc, 4 sc, 2 inc = **20**
* **R3:** 1 sc, 1 inc, 4 sc, (1 sc, 1 inc) ×3, 4 sc, (1 sc, 1 inc) ×2 = **26**
* **R4:** **BLO** (Back Loop Only) 26 sc = **26**
* **R5:** *Change to Mustard color:* 26 sc = **26**
* **R6:** 26 sc = **26**
* **R7:** 7 sc, 6 dec (at the toe), 7 sc = **20**
* **R8:** 6 sc, 4 dec, 6 sc = **16**
* **R9:** 16 sc. Fasten off the Mustard color.
**Visual Note:** The shoe strap and the button will be made at the end as decorative details so they don’t get in the way while crocheting the leg.
Part 2: Ruffled Socks (Color: White and Caramel)
*Join White yarn in the remaining Back Loops (BLO) of Round 9 of the shoe.*
* **S1:** In **BLO**: (2 sc, 1 dec) ×4 = **12**
* **S2–S3:** 12 sc (White)
* **S4–S5:** 12 sc (Caramel)
* **S6–S7:** 12 sc (White)
* **S8–S9:** 12 sc (Caramel)
* **S10:** 12 sc (White)
**The Ruffle (Lettuce Edge Effect):**
Go back to the Front Loops (FLO) left from **Round S1**. Join White yarn and crochet:
* *(Ch 3, 1 sl st in the next st)* all the way around. This creates the lace detail that falls over the shoe.
Part 3: Legs (Color: Beige Skin Tone)
*Continue from S10 with Skin color.*
* **L11:** **BLO** 12 sc = **12**
* **L12–L28:** 12 sc (17 rounds total to achieve the “Slim” height).
* **L29:** 12 sc.
* *Leg 1:* Cut yarn and fasten off.
* *Leg 2:* Do not cut the yarn. **Ch 6** to join to the first leg.
Measurements and Shape Audit
1. **Thickness:** Maintaining 12 stitches in the leg ensures a “Slim” fit.
2. **Transition:** By using **BLO** during the color change from the sock to the skin (L11), the leg appears to come “from inside” the sock, just like in the image.
3. **Joining:** The 6-chain separation will result in a hip circumference of **36 stitches** (12 + 6 + 12 + 6), which is ideal for later decreasing down to the **15 stitches required for your neck spike**.
Part 4: Joining and Body (Continuation)
Picking up from the 6 joining chains between the legs. Use Beige Skin color.
B1: 12 sc (Leg 1), 6 sc in the chains, 12 sc (Leg 2), 6 sc along the other side of the chains = 36
B2: (5 sc, 1 inc) ×6 = 42
B3–B5: 42 sc (3 rounds)
B6 (Hips): (5 sc, 1 dec) ×6 = 36
B7: 36 sc
B8 (Waist): (4 sc, 1 dec) ×6 = 30
B9: BLO 30 sc (This leaves the front loops available to attach the skirt later).
Part 5: Torso / Sweater (Color: Mustard or Caramel)
Change to the sweater color so it stays integrated and doesn’t look bulky under the dungarees/pinafore.
T10–T13: 30 sc (4 rounds)
T14: (3 sc, 1 dec) ×6 = 24
T15–T16: 24 sc
T17: (2 sc, 1 dec) ×6 = 18
Part 6: The Neck (Spike System – 15 stitches)
This is where we apply your characteristic technique to ensure the head doesn’t wobble.
T18: (4 sc, 1 dec) ×3 = 15
T19–T21: 15 sc (3 rounds to form the “spike” or internal neck support).
Fasten off, leaving a long tail for securing the join.
Part 7: Arms (Make 2 – Skin and Mustard/Caramel Color)
Start with Beige Skin color.
A1: MR 6 sc = 6
A2: (1 sc, 1 inc) ×3 = 9
A3: (2 sc, 1 inc) ×3 = 12
A4–A6: 12 sc (3 rounds)
A7: (2 sc, 1 dec) ×3 = 9 (This defines the wrist)
Change color to Mustard/Caramel (sweater color):
A8: BLO 9 sc = 9
A9–A24: 9 sc (16 rounds to achieve the length shown in the image).
Finishing the Arms:
Stuff only the hand firmly. The rest of the arm should have very little stuffing (or none at the top) so that when sewn to the body, they don’t “stick out” to the sides but fall naturally.
Flatten the top opening and join both sides by crocheting 4 sc through both layers.
Cut the yarn, leaving a long tail for sewing.
💡 Tips for a Professional Finish:
Cuff Detail: In round A8, we worked in BLO. If you want the sweater to have real texture/relief, you can go back to the front loops (FLO) of that round with the sweater color and crochet one round of (1 sc, 1 inc). This makes the sleeve look like it is “over” the hand.
Symmetry: Make sure both arms measure the same length before fastening off. Sometimes yarn tension can be tricky!
Part 8: Head (Color: Beige Skin)
Worked in a spiral from top to bottom.
R1: MR 6 sc = 6
R2: inc ×6 = 12
R3: (1 sc, 1 inc) ×6 = 18
R4: (2 sc, 1 inc) ×6 = 24
R5: (3 sc, 1 inc) ×6 = 30
R6: (4 sc, 1 inc) ×6 = 36
R7: (5 sc, 1 inc) ×6 = 42
R8: (6 sc, 1 inc) ×6 = 48
R9: (7 sc, 1 inc) ×6 = 54
R10: (8 sc, 1 inc) ×6 = 60
R11–R20: 60 sc (10 rounds)
Eye Placement: Between rounds R15 and R16, with 9 stitches of separation (ensure they are centered relative to the front of the face).
R21: (8 sc, 1 dec) ×6 = 54
R22: (7 sc, 1 dec) ×6 = 48
R23: (6 sc, 1 dec) ×6 = 42
R24: (5 sc, 1 dec) ×6 = 36
R25: (4 sc, 1 dec) ×6 = 30
R26: (3 sc, 1 dec) ×6 = 24
R27: (2 sc, 1 dec) ×6 = 18
R28–R32: 18 sc (5 straight rounds to provide depth for the cavity).
Finishing the Head:
Stuff very firmly, especially the sides (the cheeks), to achieve the rounded shape from the image.
Leave the 18-stitch hole open. This is where the 15-stitch neck “spike” will be inserted.
Part 9: Ears (Make 2 – Color: Beige Skin)
To add that cute touch from the image.
R1: MR 6 sc. Do not close the circle completely; leave it in a “D” or half-moon shape.
Sew to the sides of the head, approximately 5 or 6 stitches away from the eyes, at the same eye level.
💡 Assembly Tips:
Embroidery: Before closing the head or attaching the hair, embroider the eyelashes (2 or 3 fine lines flicking outward) and a small nose just one stitch below the eye line using the same skin color or a very soft pink.
The Join: When mounting the head onto the neck, the “spike” must be fully inserted into the cavity. When sewing the 18 stitches of the head to the base of the neck, you will notice the head becomes very stable without the need for wire. If you want extra stability, you can insert a hot glue stick or a plastic tube.
Crocheting the Hair
To achieve the effect in the image, we need high-volume hair that doesn’t turn into tight “coils” or ringlets. The secret lies in the number of stitches worked into each chain.
Part 10: Hair (Color: Brown)
Part A: The Wig Cap (Base)
Worked in a spiral using the same hook size.
R1–R10: Follow the same increase pattern as the head until you reach 60 stitches.
R11–R14: 60 sc (4 rounds to properly cover the back of the neck).
Part B: Long Strands (Waves)
Upon finishing R14, do not cut the yarn. We will begin crocheting the strands around the entire edge of the wig cap.
Side and Back Strands (approx. 45 strands):
Ch 50.
Starting in the 2nd ch from hook: 1 hdc in each chain (49 hdc total).
Join to the wig cap with 1 sl st, skipping one stitch of the base (or don’t skip any for extra volume).
Note: By working only 1 hdc per chain, the strand will not curl like a spring but will have a natural wavy drape like the photo.
Part C: The Bangs
In the front section (where the face would be), crochet about 10 to 12 short strands.
Ch 10.
Work back with 9 sc.
Join with 1 sl st into the next stitch of the base.
Part 11: Assembly and Hair Styling
Positioning: Place the wig cap on the head. The bangs (fringe) should be centered above the eyes (about 3 or 4 rounds above them).
Securing: You can sew the wig cap around the entire edge or use fabric glue/hot glue at the top (the crown) to fix it in place.
Distribution: In the photo, the strands fall forward over the shoulders. Arrange the long strands and add a small stitch with brown thread if you want them to maintain that specific position.
💡 Tips for the volume shown in the image:
If the hair looks a bit “thin,” you can crochet a second layer of strands using the Front Loops (FLO) of round R13 of the wig cap.
The Wave Trick: If you want the wave to be more defined without it becoming a tight ringlet, alternate stitches along the strand chain: (1 hdc, 1 hdc inc). This provides the “flair” seen in the image.
Part 12: Dress Skirt (Color: Cream)
Join Cream yarn into the Front Loops (FLO) we left available in round B9 of the waist.
R1: (2 sc, 1 inc) ×10 = 40
R2: (4 sc, 1 inc) ×8 = 48
R3 (DC Increases): Work 2 double crochet (dc) in each stitch of the previous round = 96
R4–R8: 96 dc (Work straight to reach the desired length; it should sit just above the knees).
Scalloped Edge: (Ch 3, skip 1 st, 1 sl st in the next) repeat all the way around. This mimics the “wavy” finish in the photo.
Part 13: Bib and Straps
Locate the 12 center stitches at the front of the waist (just above the skirt) so it is perfectly aligned.
The Bib:
Row 1–Row 4: 12 sc, ch 1, turn (4 rows).
Row 5: 1 dec, 8 sc, 1 dec, ch 1, turn = 10
Row 6: 10 sc.
Row 7: 1 dec, 6 sc, 1 dec, ch 1, turn = 8
Row 8: 8 sc. Fasten off.
The Straps (Make 2):
Join the yarn to the top corner of the bib.
Ch 35–40 (measure over the doll’s shoulder to the back to ensure a good fit).
Work back with sc along the chain to give them thickness.
Cross the straps in the back to form an “X” and sew them to the back of the waist.
Part 14: Rounded Pockets (Make 2)
MR 6 sc, ch 1, turn (do not close the circle).
(1 sc inc) x 6, ch 1, turn = 12
(1 sc, 1 inc) x 6 = 18.
Cut the yarn leaving a long tail and sew to the front of the skirt in a “U” shape, leaving the top part open.
Part 15: Final Clothing Details
Buttons: Sew two small buttons (or crochet two magic rings with 5 sc in brown) at the join where the straps meet the bib.
Shoe Straps: Join mustard yarn to one side of the shoe, ch 12, work back with sc in each chain, and join to the other side with a slip stitch. Sew a mini “button” on the outer side.
💡 Styling Tip
To give the dress the volume seen in the photo, you can use a steam iron very gently over the skirt (if using cotton) to set the double crochets, or simply shape it with your hands by opening it outward.
To finish with a flourish, we will crochet the Bucket Hat. This accessory is key to the doll’s “cozy” style. We will make it with a flat crown and a brim that drapes with the structure seen in the image.
Part 16: Bucket Hat (Color: Cream)
Worked in a spiral. Use the same hook (2.25 mm) so the fabric remains firm.
The Crown (Flat top):
H1–H10: Follow the same increase pattern as the head until you reach 60 stitches.
H11: BLO 60 sc (This back-loop-only round creates the “drop” angle of the hat).
The Sides (Body of the hat):
H12–H18: 60 sc (7 rounds).
Test the fit over the head with the hair on; if it’s too short, add one more round.
The Brim:
H19: FLO (4 sc, 1 inc) ×12 = 72
H20: (5 sc, 1 inc) ×12 = 84
H21: 84 sc.
H22: (6 sc, 1 inc) ×12 = 96
H23: 96 sc.
Final Edge: For a subtle finish, work one round of Reverse Single Crochet (Crab Stitch) or simply a round of slip stitches (sl st) with loose tension.
Part 17: Final Personalization Touches
Once the doll is fully assembled (following the order: Body → Head onto neck spike → Arms → Hair → Clothes → Hat), proceed with the expression details:
Eyebrows: Embroider them with a single strand of brown thread, two rows above the eyes, with a slight tilt to give her a sweet expression.
Cheeks: Use a bit of fabric blush or real pink eyeshadow to give a soft glow under the eyes.
Eye Highlights: Using a strand of white thread, embroider a small curved line on the side edge of each safety eye to bring “life” to her gaze.
Amigurumi with bucket hat: A heartfelt conclusion
A creation full of warmth
Amigurumi with bucket hat is more than a crochet doll—it is the result of patience, dedication, and creativity. Each stitch reflects the care of the artisan, transforming yarn into a piece that radiates tenderness and personality.
Learning through practice
This project not only delivers a beautiful finished doll but also provides valuable experience in shaping, color changes, and decorative details. The process of crocheting the hair, dress, and accessories allows crafters to refine their skills while enjoying the journey of handmade creation.
A versatile and personal gift
The doll can be customized with different colors, accessories, or small details, making each version unique. Whether given as a gift or displayed as decoration, Amigurumi with bucket hat becomes a meaningful keepsake that conveys affection and artistry.
Continuing the creative path
Completing this pattern opens the door to new ideas and variations. You can experiment with different outfits, hairstyles, or accessories to expand your collection. Each new project will carry the same essence: the joy of crochet and the satisfaction of creating something truly special.

Spanish version of this pattern
pattern for knitting another doll design
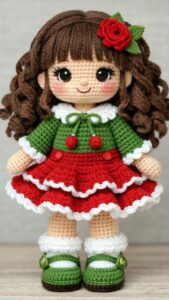
Video tutorial for knitting a basic body for dolls
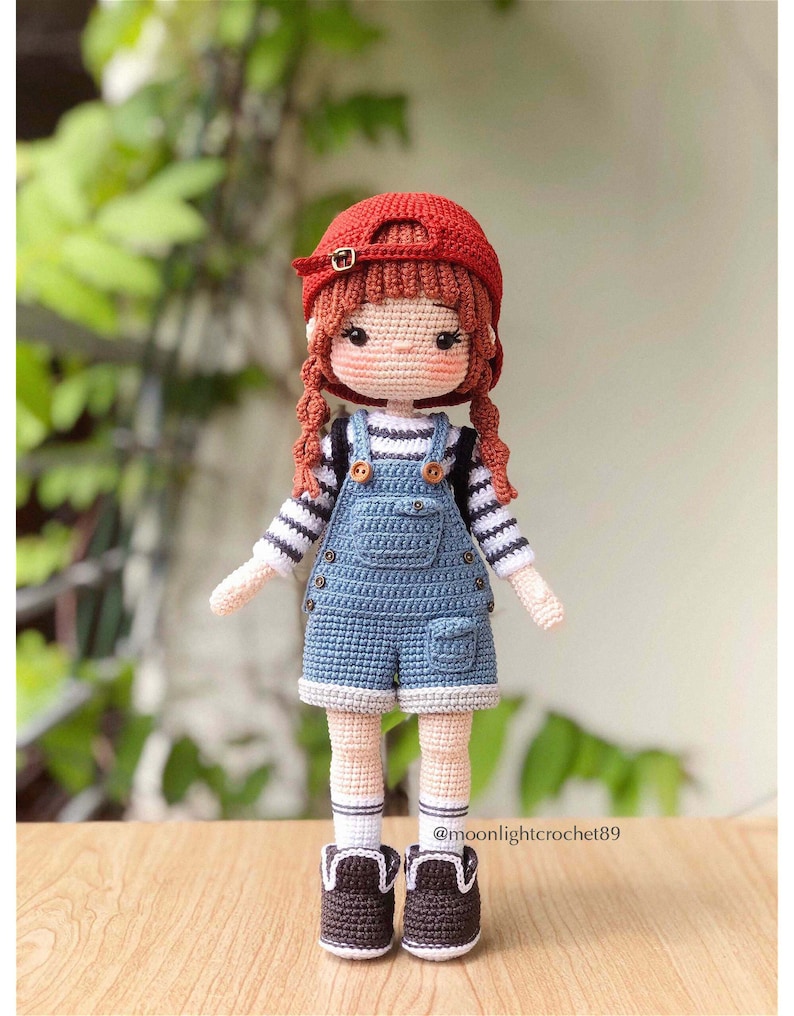
Pattern to crochet another wonderful amigurumi doll found on Etsy
Affiliate Disclaimer
This post contains affiliate links. If you purchase through these links, I may earn a small commission at no extra cost to you. These commissions help support the time and effort I dedicate to creating free crochet patterns and tutorials.
I only recommend products and materials that I personally use and trust in my own projects. Your support allows me to continue sharing high-quality content with the crochet community. Thank you for helping keep this space alive and creative!
Discover more crochet patterns, free downloads, and premium PDFs on Ko-fi.
Und die Abkürzungen VMG und HMG gibt es auch nicht in der Maschenerklärung.
I don’t know what you’re talking about, those abbreviations don’t exist in the pattern.
Hallo, ich bin gerade etwas verwirrt, innerhalb Anleitung bek den Beinen steht die Abkürzung HLO. Ich hab dann danach gesucht und fand nur FLO. Hat sich bei Ihnen ein Fehlerteufel eingeschlichen oder haben Sie sich vertan?
The correct term is “FLO,” meaning it knits through the front loops. “HLO” does not exist in the pattern.
hi. this doll looks lovely I’m certainly giving it a try. I went over your pattern. however I could not see the details for the skirt and the hat. can you pls share
Hi! 😊 Thank you so much for your message and for your kind words about the doll, I’m really happy you’re going to give it a try.
You’re right, the skirt and hat details were not fully included—sorry about that! I’ve now updated the pattern and added those sections so everything is complete.
Please refresh or download the file again, and you should see all the instructions there. If you still have any trouble, just let me know and I’ll be happy to help.
Happy crocheting! 🧶✨