
Create an elegant handmade piece with this free amigurumi pattern, designed to help you craft a detailed Rose Flower Doll with professional structure and beautiful finishing. This step-by-step crochet tutorial is perfect for intermediate makers, guiding you through shaping, assembly, and a stable neck system—ideal for gifts, décor, or adding a refined floral doll to your amigurumi collection.
Free Amigurumi Pattern: The Rose Doll Project
Welcome to our latest creative journey! If you have been looking for a comprehensive Free Amigurumi Pattern to elevate your crochet skills, you have come to the right place. This “Rose Flower Doll” is more than just a toy; it is a masterpiece of stability and detail, designed for makers who love a touch of elegance in their handmade collections.
Why This Design is Unique
What sets this Free Amigurumi Pattern apart is its professional structure. We utilize a specialized “spike and cavity” system for the neck assembly. By creating a firm internal “spike” in the torso and a corresponding “cavity” in the head, we ensure your doll can perfectly support her beautiful, heavy curls without any wobbling. This Step-by-Step Guide will walk you through every round, from her dainty shoes to her lush bouquet of roses.
Ready to Start Crocheting?
Whether you are making this as a special gift or a centerpiece for your own shelf, this Detailed Amigurumi Tutorial provides all the written instructions you need right here on the blog. No downloads are necessary—just grab your hook, choose your favorite cotton yarn, and let’s bring this floral beauty to life. Happy crocheting!
Project Structure: “Doll with Roses”
To achieve the stability and professional finish seen in the image, this pattern follows a **Bottom-up** construction.
This means we will start by crocheting the shoes and legs individually and then joining them at the hip. From that point, we will continue crocheting the torso in one single piece, integrating the **”espiga” (spike)** system in the neck. This method makes the doll firmer and ensures the body perfectly supports the weight of the head and the heavy curly hair without bending.
Estimated Completion Time
The time to create this doll may vary depending on your pace and experience, but for an intermediate-level crocheter, it is estimated to take between **15 to 20 hours** of actual work.
To help you organize your time, here is an approximate breakdown:
* **Legs and Body:** 4 to 5 hours (including joining and firm stuffing).
* **Head and Facial Embroidery:** 3 to 4 hours (embroidering eyes and lashes requires patience).
* **Curly Hair and Assembly:** 4 to 5 hours (making the curls one by one is the most laborious part).
* **Dress and Accessories:** 3 to 4 hours.
* **Bouquet of Roses and Final Assembly:** 2 hours.
**Tip:** There’s no rush! We recommend enjoying every stage, especially the assembly of the bouquet and the facial details, as these give your doll its unique personality.
🧶 Required Materials
To obtain a finish identical to the image, we recommend the following materials:
1. **Yarns:**
* **Skin Color:** Fine/Sport weight cotton (50–70 g) for a smooth finish on the skin.
* **Red:** Medium weight cotton or acrylic for the dress, shoes, and hair base (60–80 g).
* **Yellow:** Yarn for the hair highlights, shoe bows, and sleeves (20–30 g).
* **White:** Yarn for the sock ruffles and the baby-style dress collar.
* **Green:** For the bouquet leaves and the hair leaf detail.
* **Pink:** Small amount for some flowers in the bouquet.
2. **Tools and Accessories:**
* **Hooks:** 2.5 mm for skin parts (to keep the stitches tight) and 3.0 mm or 3.5 mm for clothing and hair.
* **Safety Eyes:** 10 mm or 12 mm (black, with embroidered lashes).
* **Stuffing:** High-quality polyester fiberfill (poly-fill).
* **Buttons:** 2 medium yellow buttons for the front of the dress.
* **Structure:** Coated wire or pipe cleaners (optional) to support the flower bouquet.
Guide to useful tools for crocheting
3. **Basic Notions:**
* Yarn needle for sewing pieces and embroidering details.
* Stitch marker (essential for spiral crocheting).
* Scissors.
* Black embroidery thread for lashes and mouth.
* Blush or pink eyeshadow for the cheeks.
📋 Abbreviations (US Terms)
* **MR:** Magic Ring.
* **ch:** Chain.
* **sc:** Single crochet.
* **sl st:** Slip stitch.
* **hdc:** Half double crochet.
* **dc:** Double crochet.
* **inc:** Increase (2 sc in the same stitch).
* **dec:** Invisible decrease (use front loops only).
* **BLO:** Back Loop Only.
* **FLO:** Front Loop Only.
* **(…) x N:** Repeat instructions inside parentheses N times.
* **[N]:** Total number of stitches at the end of the round.
We will start with the base. To ensure the shoes have that rounded and firm shape seen in the image, use a **2.0 mm or 2.5 mm hook** (depending on your tension) so the fabric is dense.
Work in a spiral, but mark the base clearly so the shoe has a “sole.”
1) Shoes (Make 2)
**Material:** Red Cotton/Acrylic. **Hook:** 2.5 mm.
1. MR 6 sc [6]
2. 6 inc [12]
3. (1 sc, inc) × 6 [18]
4. (2 sc, inc) × 6 [24]
5. (3 sc, inc) × 6 [30]
6. **BLO** 30 sc [30] (Marks the edge of the sole).
7–9. 30 sc [30] (3 rounds).
10. 9 sc, 6 dec, 9 sc [24] (Toe of the shoe).
11. 6 sc, 6 dec, 6 sc [18].
2) Socks (Make 2)
Change to **White**. Continue with a 2.5 mm hook.
12. **BLO** 18 sc [18]. (Crocheting in the back loops leaves a front loop ridge where we will later work the ruffle).
13. 18 sc [18].
14. (4 sc, dec) × 3 [15]. (Adjusting the diameter so the sock isn’t too wide on the leg).
15. 15 sc [15].
**Ruffle Detail (Lace):**
Work in the front loops (**FLO**) left free in Round 12:
* Attach white yarn to one of the front loops of Round 12 (at the back of the foot so the knot is hidden).
* Work the following sequence around: **(ch 3, 1 sl st in the next stitch)**. Repeat for all 18 stitches.
* Fasten off and weave in ends.
**Stuffing Tip:** Start stuffing the shoe now, ensuring you shape the toe and heel well before the leg narrows.
3) Legs (Make 2)
Change to **Skin Color**. Hook: 2.5 mm.
To ensure a clean transition, attach the skin color to the back loops (**BLO**) of the last round of the sock.
16. **BLO** 15 sc [15] (This allows the sock to show volume above the leg).
17–28. 15 sc [15] (12 rounds total).
**Important:** Stuff the leg as you go. The stuffing should be firm at the bottom to help the doll stand, but slightly softer at the top to make joining the body easier.
* **Leg 1:** Crochet extra stitches if necessary to reach the inner side, sl st, and fasten off.
* **Leg 2:** Crochet the necessary sc to reach the inner side, but **DO NOT** cut the yarn. From here, we will chain to join both legs in the next step.
4) Joining the Legs and Body
Continue with **Skin Color** and a 2.5 mm hook.
From where you stopped on Leg 2:
1. ch 3 (these chains provide the necessary hip width).
2. Join to Leg 1 with 1 sc (this will be the first stitch of the round).
3. 14 sc around Leg 1.
4. 3 sc along one side of the ch-3.
5. 15 sc around Leg 2.
6. 3 sc along the other side of the ch-3. **[Total: 36 stitches]**
7–14. 36 sc (8 rounds for the hips and lower torso).
7. (4 sc, dec) × 6 [30].
16–18. 30 sc [30] (3 rounds).
**Stuffing Tip:** As you move up the body, stuff the joining area (between the legs) very well to prevent gaps or the doll losing its shape when sitting or standing.
5) Upper Torso and “Espiga” (Spike)
19. (3 sc, dec) × 6 [24]
20–22. 24 sc [24] (3 rounds).
20. (2 sc, dec) × 6 [18]
24–25. 18 sc [18] (2 rounds).
From here, we begin the **”espiga” (spike)**. The spike is an extension of the neck that will go inside the head. For it to be effective, it must be very firm, almost hard, to act as an internal skeleton.
26. (4 sc, dec) × 3 [15]
27–31. 15 sc [15] (5 rounds).
32. 6 dec (leave remaining stitches unclosed or close with a needle).
**Assembly Instruction:** Stuff the body very firmly, especially the neck area (the spike). You can insert extra support (like a silicone stick or a plastic tube) inside the spike so the head doesn’t “wobble” once mounted.
6) Arms (Make 2)
**Skin Color**. 2.5 mm hook.
These arms are thin and do not require much stuffing so they can bend slightly toward the center to hold the bouquet.
1. MR 6 sc [6]
2. (1 sc, inc) × 3 [9]
3. 9 sc [9]
4. (2 sc, dec) × 2, 1 sc [7]
5–18. 7 sc [7] (14 rounds).
**Stuffing:** Only stuff the lower half of the arm (the hand and wrist). Leave the upper half unstuffed so that when sewn to the body, they don’t stick out but fall naturally at the sides.
* Flatten the top of the arm and crochet 3 sc through both layers to close. Fasten off, leaving a long tail to sew to the body at Round 25.
7) Head
**Skin Color**. 2.5 mm hook.
Work from the crown down to the base of the neck.
1. MR 6 sc [6]
2. 6 inc [12]
3. (1 sc, inc) × 6 [18]
4. (2 sc, inc) × 6 [24]
5. (3 sc, inc) × 6 [30]
6. (4 sc, inc) × 6 [36]
7. (5 sc, inc) × 6 [42]
8. (6 sc, inc) × 6 [48]
9. (7 sc, inc) × 6 [54]
10–20. 54 sc [54] (11 rounds).
**Safety Eyes:** Place them between Rounds 16 and 17, with 9 or 10 visible stitches between them. Ensure they are centered relative to the front.
21. (7 sc, dec) × 6 [48]
22. (6 sc, dec) × 6 [42]
23. (5 sc, dec) × 6 [36]
24. (4 sc, dec) × 6 [30]
25. (3 sc, dec) × 6 [24]
26. (2 sc, dec) × 6 [18]
27–31. 18 sc [18]. Fold these rounds inward toward the inside of the head, creating the (cavity)
**The Cavity (Adjustment for the Spike):**
For the cavity/spike system to work, the last rounds must have a slightly larger diameter than the spike (15 sts) to allow the fabric to enter and be sewn later. Do not close the piece. Stuff the head firmly, leaving a cylindrical hole in the center for the spike to enter.
8) Facial Details
1. **Nose:** One round below the eye line, centered. Use skin color thread to make 3-4 horizontal passes over 2 sc, then wrap the thread around them (festoon stitch) for relief.
2. **Lashes and Brows:** Use black or dark brown embroidery thread (1-2 strands). Embroider 3 small lashes pointing up and out. Brows should be 4 rounds above the eyes, 2 stitches long, slanted slightly downward.
3. **Mouth:** 3-4 rounds below the nose. Embroider a wide “V” or a slightly curved smile over 2 sc using pink or soft red thread.
4. **Cheeks:** Use real blush or pink pastel chalk. Apply with a soft brush under the eyes.
9) Assembly: Cavity/Spike System
* Insert the body spike (15 sts) into the head cavity (18 sts).
* Ensure the head is level and facing forward.
* Use a yarn needle and skin-colored thread to perform a hidden stitch, joining the 18 stitches of the head to the neck.
10) Hair Base (Cap)
**Red**. 2.5 mm hook.
1–9. Repeat rounds 1-9 of the head [54].
10–16. 54 sc [54] (7 rounds).
*Try it on the head; it should reach the top of the eyes at the back.*
11) Hair Strands (Curls)
**Curl Technique:**
1. ch 35.
2. Starting in the 2nd ch from hook, 2 hdc in each chain. (The strand will curl automatically).
**Color Distribution:**
* **Base strands:** Work red curls around the edge of the cap, leaving the forehead free for the bangs.
* **Yellow highlights:** Interperse 1 yellow strand for every 3 red ones on the sides.
* **Bangs (Fringe):** At the front, work short strands (ch 8) returning with sc, in red only.
12) Headdress Leaves (x2)
**Green**. 2.5 mm hook.
* ch 9. From 2nd ch: 1 sl st, 1 sc, 1 hdc, 2 dc, 1 hdc, 1 sc, 3 sc in the last ch (to turn).
* Other side: 1 sc, 1 hdc, 2 dc, 1 hdc, 1 sc, 1 sl st.
* **Embroidery:** sl st down the center for the vein.
13) Dress Body and Skirt
**Red**. 2.5 mm hook.
**Bodice (Upper part):**
1. ch 37. Starting in 2nd ch: 36 sc. (Work in rows).
2. (5 sc, inc) × 6 [42].
3. **Armholes:** 6 sc, ch 8 (skip 8), 14 sc, ch 8 (skip 8), 6 sc.
4. 42 sc (working over the stitches and chains).
5–8. 42 sc.
**Skirt:** Attach red yarn to the starting waist chain.
1. (5 sc, inc) × 6 [42]. Join with sl st to work in rounds.
2. (6 sc, inc) × 6 [48].
3. (7 sc, inc) × 6 [54].
4. (8 sc, inc) × 6 [60].
5–10. 60 sc.
* **Yellow Border:** Change to yellow: (1 sc, skip 1, 5 dc in same st, skip 1) repeat around for the shell edge.
14) Baby Collar (White)
Attach white yarn to the neckline. Work 2 hdc in each stitch around. Finish with a round of sl st.
15) Puff Sleeves (x2)
**Yellow**. 2.5 mm hook.
1. Attach yarn to the armhole and pick up 18 sc.
2. (2 sc, inc) × 6 [24].
3–4. 24 sc.
3. (2 sc, dec) × 6 [18].
* **White Detail:** (ch 3, 1 sl st in next st) repeat around.
17) Rose Bouquet
**Red (7), Pink (2)**.
1. ch 16. From 2nd ch: 3 dc in each chain.
2. Roll the strip to form a rose and sew the base.
### 18) Bouquet Leaves (Make 8–10)
**Green**.
1. ch 7. From 2nd ch: 1 sl st, 1 sc, 1 hdc, 1 dc, 1 hdc, (1 sc, ch 2, 1 sc in same ch for the tip).
2. Other side: 1 hdc, 1 dc, 1 hdc, 1 sc, 1 sl st.
19) Bouquet Assembly
Sew the roses together in a circle (pinks in center). Tuck leaves underneath. Cut green yarn “stems” and sew to the base. Sew the doll’s hands to the sides of the bouquet.
20) Final Details
* **Shoe Bows:** ch 20, return with 19 sl st for thickness. Tie and sew to shoes.
* **Hair Styling:** Gather the side curls into two high pigtails and secure with red yarn at temple height.
* **Note on Firmness:** If the head wobbles, add more fiberfill through the cavity before closing the final seam.
Final Touches and Caring for Your Rose Doll
Congratulations on completing your masterpiece! By following this Free Amigurumi Pattern, you have created more than just a doll; you’ve crafted a character full of personality and charm. The combination of the sturdy neck structure and those intricate rose details makes this project a true standout. Before you set her on a shelf or gift her to someone special, take a moment to adjust her curls and ensure her bouquet is nestled perfectly in her arms.
Join Our Crafting Community
The best part of sharing a Free Amigurumi Pattern is seeing the unique touch each maker adds. Did you choose a different color for the dress? Did you add extra roses to the bouquet? We would love to see your version of the Rose Doll! Seeing your finished work is what inspires us to keep creating and sharing these detailed guides with the crochet community.
We Value Your Feedback
We strive to make every Step-by-Step Guide as clear and accurate as possible. If you happen to find any errors or inconsistencies while working through the rounds, please let us know in the comments below. Your feedback allows us to fix issues quickly and ensures that every crocheter has a smooth and joyful experience. Thank you for being part of our creative world—we can’t wait to see what you hook up next!

Spanish version of this pattern
Here’s another amigurumi doll pattern
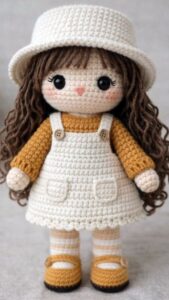
Video tutorial for knitting another doll design
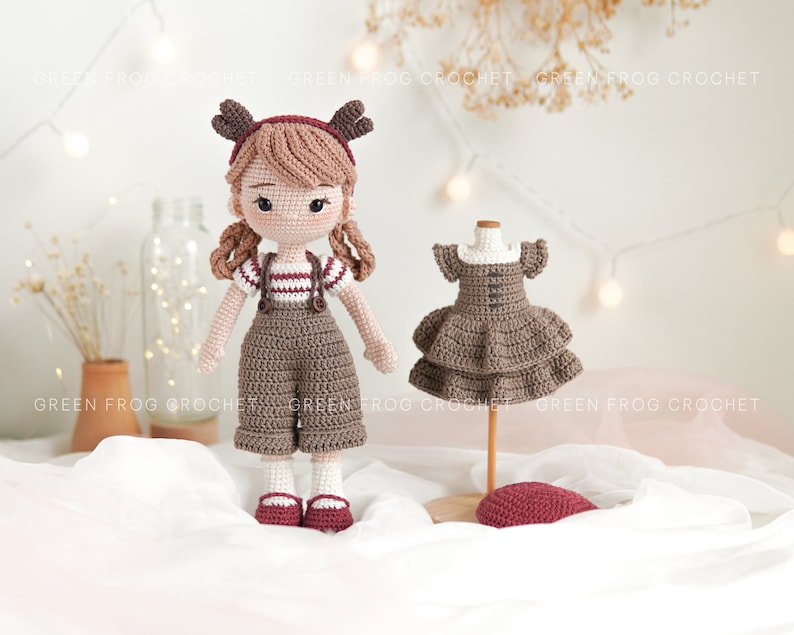
Pattern for a beautiful amigurumi doll found on Etsy
Affiliate Disclosure:
This post contains affiliate links. If you purchase through them, I may earn a small commission at no extra cost to you. Thank you for supporting my work!
Discover more crochet patterns, free downloads, and premium PDFs on Ko-fi.
On the rose flower doll with curly hair:
When making the shoes it goes to row 8 then it says to change to white for socks, but the next row is 12.
What happens on row 9-11?
Thanks for letting me know, it was an error in the lap count, you’ve already corrected it.