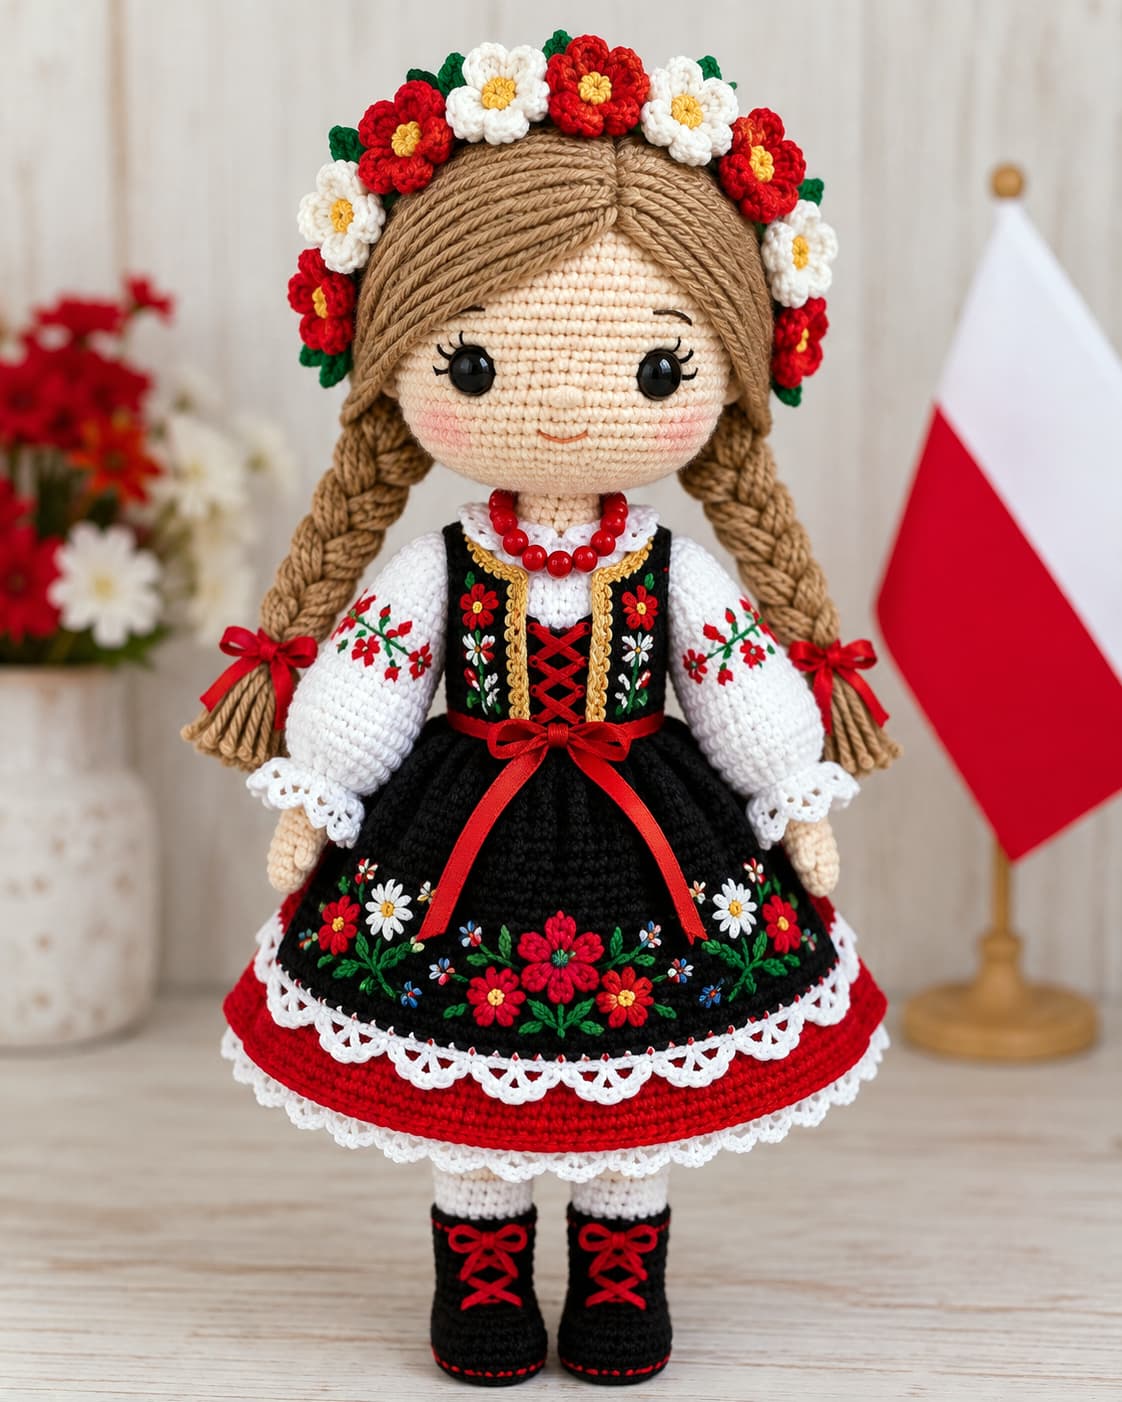
Discover the charm of traditional folk art with this complete **Polish amigurumi doll** crochet pattern. Perfect for intermediate and advanced crocheters, this step-by-step guide walks you through crafting an authentic handmade doll featuring detailed clothing, intricate embroidery, and a flower crown. Learn specialized techniques like the structural neck tenon and puffed sleeve construction to create a stunning, high-quality display piece that celebrates classic heritage and timeless crochet artistry.
Welcome to the Folk Art Crochet Journey
Step into a world of rich heritage and timeless craft with this exquisite Polish amigurumi doll crochet pattern. Inspired by vibrant traditional costumes, this project brings folklore to life through every carefully placed stitch. Whether you are expanding your amigurumi collection or seeking a uniquely rewarding challenge, this guide offers a seamless blend of cultural storytelling and technical precision. From the delicate floral crown to the intricately embroidered vest, every detail has been thoughtfully designed. Grab your hook, select your favorite yarns, and enjoy creating a treasured heirloom piece that honors the beauty of classic handmade traditions.
Project size
The approximate final size of the Polish amigurumi doll is 25 to 28 cm in height, using a 2.5 mm crochet hook and fine or semi-thick yarn. The exact dimension may vary depending on the tension of the stitches and the selected material.
Difficulty level
Intermediate to advanced level. Requires mastery of basic crochet stitches, color changes, increases, decreases, spiral crocheting, assembly of pieces, and crafting internal structures.
Estimated crocheting time
The estimated time to complete the doll is 8 to 12 hours in total, distributed according to the individual pace of the crocheter and the complexity of the clothing pieces and final details.
Materials list
2.5 mm crochet hook or appropriate size for the chosen yarn.
Fine or semi-thick cotton yarn in skin tone, white, red, black, and complementary colors for the outfit.
8 mm or 10 mm safety eyes.
Synthetic fiberfill stuffing.
Blunt-ended tapestry needle.
Stitch marker.
Scissors.
Galvanized wire or cotton swabs to articulate or add firmness to the neck and body optional.
Guide to useful tools for crocheting
Stitch abbreviations
MR: magic ring.
sc: single crochet.
hdc: half double crochet.
dc: double crochet.
sl st: slip stitch.
inc: single crochet increase two single crochets in the same stitch.
dec: single crochet decrease take two stitches and close together.
BLO: back loop only.
FLO: front loop only.
rnd: round.
st: stitch or stitches.
rep: repeat.
Assembly & Technical Questions
How does the neck support system (Tenon/Cavity) work?**
The neck includes an extended 15-stitch support tube (“tenon”) that slides snugly into an internal 18-stitch inverted tube (“cavity”) inside the head. This system keeps the head erect without requiring heavy external wires or dowels.
What technique is used for attaching the hair?**
3The hair is attached using the **strand rooting method** (lark’s head knot). Strands of yarn are folded in half and hooked individually onto the stitches of the head, then styled into two thick side braids.
Is wiring required for the doll?**
Internal wiring (such as galvanized wire) is optional. The built-in neck cavity system provides sufficient stability for displaying the doll without additional structural support.
How do I attach the flower crown?**
The flowers and leaves are sewn onto a crocheted green base strip, which is then positioned above the hair line and sewn directly to the head fabric with invisible stitches.
Section 1: Little Shoes (Folk Costume Boots)
To ensure the shoes have the correct proportion for our 30 cm tall doll, the sole is crocheted starting from a central chain on which we work in an oval. We will apply the rule of increases in multiples of 6 in each round until reaching a total of 30 stitches in the flat base.
Then, through the technique of crocheting taking only the back loop (BLO: Back Loop Only), we will form the right angle that lifts the walls of the shoe.
The shoes are black boots, with red laces crossed on the front, a bow at the top, and a firm finish on the sole.
We will crochet two identical pieces.
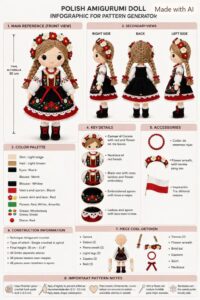
Reference images
Step 1: The Shoe Sole (Base of 30 stitches)
How and where to start:
We take the black yarn and the hook. We will start by crocheting the central oval from the initial chain.
Round 1:
How to crochet it: Make a slip knot and chain 6.
Next, skip the first chain from the hook and start crocheting from the second chain.
Crochet 1 sc in each of the next 4 chains.
In the last chain of the strip, crochet 3 sc inside the same space (this turns the work toward the other side of the oval).
Turn and crochet along the opposite side of the starting chain: crochet 1 sc in the next 3 chains.
In the last available chain, crochet 1 inc (2 sc in the same stitch).
Place your marker in the last worked stitch.
Total stitches at the end of Round 1: 12 single crochet (Multiple of 6).
Round 2:
How to crochet it:
Crochet 1 inc in the first stitch.
Crochet 1 sc in each of the next 3 stitches.
Crochet 3 increases in a row (1 inc in each of the next 3 stitches to go around the front curve).
Crochet 1 sc in each of the next 3 stitches.
Crochet 2 increases in a row in the last 2 stitches to close the back curve.
Total stitches at the end of Round 2: 18 single crochet (Multiple of 6).
Round 3:
How to crochet it:
Crochet (1 sc, 1 inc).
Crochet 1 sc in the next 3 stitches.
In the front curve crochet: (1 sc, 1 inc) repeated 3 times.
Crochet 1 sc in the next 3 stitches.
In the back curve crochet: (1 sc, 1 inc) repeated 2 times.
Total stitches at the end of Round 3: 24 single crochet (Multiple of 6).
Round 4:
How to crochet it:
Crochet (2 sc, 1 inc).
Crochet 1 sc in the next 3 stitches.
In the front curve crochet: (2 sc, 1 inc) repeated 3 times.
Crochet 1 sc in the next 3 stitches.
In the back curve crochet: (2 sc, 1 inc) repeated 2 times.
Total stitches at the end of Round 4: 30 single crochet (Multiple of 6).
Here we finish the perfectly flat and proportioned 30-stitch sole.
Step 2: Elevation of the Shoe Body
Round 5 (Bend in BLO):
What is BLO and how it is done: We insert the hook taking only the back loop of the V of the stitch. This creates a well-marked line at the base that causes the fabric to fold vertically.
How to crochet it: Crochet 1 sc in each of the 30 stitches taking back loop only (BLO). No increases or decreases are made.
Total stitches at the end of Round 5: 30 single crochet.
Rounds 6 and 7:
How to crochet them: Returning to taking both loops normally, crochet 1 sc in each of the 30 stitches in round 6 and repeat in round 7 to raise the wall of the shoe.
Total stitches at the end of Rounds 6 and 7: 30 single crochet per round.
Step 3: Reduction and Shaping of the Instep
Round 8:
How to crochet it: Crochet 1 sc in the first 9 stitches. On the front curve we work decreases: crochet (1 sc, 1 dec) repeated 4 times. Then finish the round crocheting 1 sc in the next 9 remaining stitches.
Total stitches at the end of Round 8: 26 single crochet.
Round 9:
How to crochet it: Crochet 1 sc in the first 7 stitches. In the front crochet 6 decreases in a row (converts 12 stitches into 6). Finish crocheting 1 sc in the next 7 stitches.
Total stitches at the end of Round 9: 20 single crochet.
Round 10:
How to crochet it: Crochet 1 sc in the first 8 stitches. In the front crochet 2 decreases in a row. Finish crocheting 1 sc in the next 8 stitches.
Total stitches at the end of Round 10: 18 single crochet.
Step 4: Shaft or Ankle of the Boot
Rounds 11, 12, 13 and 14:
How to crochet them: Crochet 1 sc in each of the 18 stitches in spiral along rounds 11, 12, 13 and 14 to give the proper height to the shaft of the boot.
Total stitches at the end of Rounds 11 to 14: 18 single crochet in each round.
Round 15 (Upper edge):
How to crochet it: Crochet 1 slip stitch in each of the 18 stitches to give a firm finish to the edge of the boot.
Fasten off: Cut the thread leaving about 10 cm, pass it with a tapestry needle inwards and secure it with a hidden knot.
Step 5: Embroidery of Red Laces
How and where to make the laces:
1. Thread the tapestry needle with red cotton yarn or thin embroidery thread.
2. Locate the central front area on the instep between rounds 9 and 13.
3. Enter from the inside and make 3 crossed embroideries in an “X” shape over the tongue of the shoe.
4. At the upper part (Round 13) bring out both ends of the thread and make a small bow or tie with a double knot, letting the tips hang neatly.
Step 6: Stuffing the Boot
How and when to stuff:
Insert synthetic fiberfill pushing it firmly toward the toe of the shoe and the sole. Make sure the base remains well expanded so that it supports the weight of the doll. The upper part of the shaft should remain slightly less stuffed to allow attaching or sewing the white leg in the next section.
Section 2: Socks and Legs (22 Actual Rounds)
In this section we will crochet the two legs starting from the ankle inside the shoe, going up with the white color of the sock and making a clean color change to light beige (skin) to complete the thigh up to the hip.
Observing the reference image, the socks are plain and white. The legs are crocheted in a spiral maintaining a constant quantity of 18 single crochet per round.
We will crochet two identical legs. The first leg is fastened off upon completion, while on the second leg the yarn is kept on the hook to continue directly with the joining of the hips.
Step 1: The Sock (White Color)
How and where to attach the yarn:
Attach the white yarn at the ankle, right on the top inner edge of the little shoe.
Round 1:
How to crochet it: Make a slip knot with the white yarn and crochet 1 sc in each of the 18 base stitches of the ankle.
Total stitches at the end of Round 1: 18 single crochet.
Rounds 2 to 8:
How to crochet them: Crochet 1 sc in each of the 18 stitches in spiral from round 2 to round 8 (a total of 7 straight rounds in white).
Total stitches at the end of Rounds 2 to 8: 18 single crochet per round.
Step 2: Clean Color Change to Skin Color
Round 9:
How to make the color change: In the last stitch of Round 8, insert the hook, yarn over white and close the stitch pulling through the light beige yarn.
How to crochet the round: With the light beige yarn, crochet 1 sc in each of the 18 stitches taking both loops normally.
Total stitches at the end of Round 9: 18 single crochet.
Step 3: The Leg (Light Beige Skin Color)
Rounds 10 to 22:
How to crochet them: With the light beige yarn, crochet 1 sc in each of the 18 stitches in spiral from round 10 to round 22 (a total of 13 straight rounds in skin color).
Total stitches at the end of Rounds 10 to 22: 18 single crochet per round.
Step 4: Finishing the Legs
For Leg 1 (Left Leg):
1. In Round 22, crochet 1 sl st in the next stitch to even out the height.
2. Cut the yarn leaving a 15 cm tail.
3. Fasten off and hide the excess inside.
For Leg 2 (Right Leg):
4. Crochet Round 22 complete.
5. Do not cut the yarn. Leave the loop on the hook with a safety marker to start the torso joining chain in the next section.
Step 5: Stuffing the Legs
How and when to stuff:
1. As you go up in the skin color rounds, insert synthetic fiberfill progressively.
2. Stuff the ankle and calf area firmly to support the body.
3. In the last 3 rounds of the thigh (rounds 20 to 22), place softer stuffing to allow natural bending when joining the hips.
Section 3: Joining the Legs, Hip and Waist
In this section we will join the two previously crocheted legs using a small central chain that will give the correct width to the hips. Then, we will go up crocheting the torso to the waist.
the lower part of the dress/body carries an overlapping black skirt. To be able to attach the black skirt cleanly and evenly later, we will crochet the last round of the waist in BLO (Back Loop Only / taking only the back loop). This will leave a ridge of front loops (FLO) on the outside, over which we will mount the skirt.
The yarn color for this section will depend on whether you prefer to crochet the underwear/base in white or skin beige; we will use the white color to simulate the base of the petticoat/base clothing on which the folk costume rests.
Step 1: Joining the Legs (Hip Creation)
How and where to join:
We have Leg 2 (right) with the active loop on the hook. Make sure both legs are aligned facing forward (with the toes of the boots pointing forward).
Round 1 (Round 23 of cumulative count):
How to crochet it:
1. From Leg 2, chain 2.
2. Take Leg 1 and insert the hook into the corresponding stitch on the inner part of the thigh. Crochet 1 sc to secure the join.
3. Crochet 1 sc in each of the remaining 16 stitches around Leg 1 (completing the 18 stitches of this leg).
4. Now crochet 1 sc in each of the 2 central chains along one side of the joining chain.
5. Crochet 1 sc in each of the 18 stitches around Leg 2.
6. Crochet 1 sc in each of the 2 central chains along the opposite side of the joining chain.
Place the stitch marker in the last worked stitch.
Total stitches at the end of Round 1 of joining: 18 + 2 + 18 + 2 = 40 single crochet.
Step 2: Increases and Hip Shaping
Round 2 (Round 24 of cumulative count):
How to crochet it: We are going to shape the hip by distributing 4 increases evenly (2 on the sides and 2 on the back/buttocks).
Crochet: (8 sc, 1 inc) repeated 4 times. In the last 2 stitches crochet 1 sc in each.
Total stitches at the end of Round 2: 42 single crochet.
Rounds 3 to 6 (Rounds 25 to 28 of cumulative count):
How to crochet them: Crochet 1 sc in each of the 42 stitches in spiral for 4 straight rounds without making increases or decreases. This gives height to the hip and the base of the waist.
Total stitches at the end of Rounds 3 to 6: 42 single crochet per round.
Step 3: Lower Torso Decreases and Waist Start
Round 7 (Round 29 of cumulative count):
How to crochet it: We begin to shape the waist by gently reducing the hip volume.
Crochet: (5 sc, 1 dec) repeated 6 times along the entire round.
Total stitches at the end of Round 7: 36 single crochet.
Round 8 (Round 30 of cumulative count):
How to crochet it: Crochet 1 sc in each of the 36 stitches in spiral without making decreases.
Total stitches at the end of Round 8: 36 single crochet.
Round 9 (Round 31 of cumulative count):
How to crochet it: Crochet (4 sc, 1 dec) repeated 6 times along the round.
Total stitches at the end of Round 9: 30 single crochet.
Round 10 (Round 32 of cumulative count):
How to crochet it: Crochet 1 sc in each of the 30 stitches in spiral without making decreases.
Total stitches at the end of Round 10: 30 single crochet.
Step 4: Waist Round in BLO (Preparation for attaching the skirt)
Round 11 (Round 33 of cumulative count):
What BLO means and how to crochet this round:
Insert the hook taking only the back loop (BLO) of each stitch. The front loop (FLO) will remain loose towards the outside, forming a line of exposed ridges around the entire waist. Later, we will attach the black yarn to these front loops to crochet the flared skirt.
How to crochet it: Crochet 1 sc in each of the 30 stitches taking back loop only (BLO).
Total stitches at the end of Round 11: 30 single crochet.
Step 5: Hip and Waist Stuffing
1. Once the round in BLO is completed, pause before continuing with the chest and blouse.
2. Take synthetic fiberfill and insert it firmly into the hip cavity and the join between the legs.
3. Make sure the legs remain well centered and the hip area is rounded and firm to support the weight of the doll.
Section 4: Torso, Corset/Bib, Neckline Lace and Neck with Tenon
In this section we will crochet the torso in white (corresponding to the blouse). In the upper part of the blouse we will execute a round through the back loop (BLO) to leave the front loops (FLO) exposed outward. Over those outer loops we will crochet the white decorative lace that finishes the neckline of the blouse.
Then we will continue going up in light beige (skin color) to crochet the 3 visible rounds of the neck and the 7 rounds of the support tenon.
Step 1: Torso and Chest in White (Base Blouse)
We continue crocheting over the 30 stitches of the waist.
Round 1 (Round 34 of cumulative count):
How to crochet it: With white yarn, crochet 1 sc in each of the 30 stitches.
Total stitches at the end of Round 1: 30 single crochet.
Rounds 2 and 3 (Rounds 35 and 36 of cumulative count):
How to crochet them: Crochet 1 sc in each of the 30 stitches in spiral for 2 straight rounds.
Total stitches at the end of Rounds 2 and 3: 30 single crochet per round.
Round 4 (Round 37 of cumulative count):
How to crochet it: Crochet (3 sc, 1 dec) repeated 6 times along the round.
Total stitches at the end of Round 4: 24 single crochet.
Round 5 (Round 38 of cumulative count):
How to crochet it: Crochet 1 sc in each of the 24 stitches without making decreases.
Total stitches at the end of Round 5: 24 single crochet.
Round 6 (Round 39 of cumulative count – Preparation for lace in BLO):
How to crochet it: With white yarn, crochet (2 sc, 1 dec) repeated 6 times taking back loop only (BLO) of each stitch. The 18 front loops (FLO) will remain exposed outward around the chest to crochet the lace in Step 2.
Total stitches at the end of Round 6: 18 single crochet in white.
Step 2: Crocheting the Blouse Neckline Lace (Crocheted in FLO)
Before going up to the neck, we will crochet the lace directly on the blouse to work with greater comfort.
How and where to crochet the lace:
1. Position the doll facing you, with the head pointing up.
2. Attach white yarn to the first front loop (FLO) that remained free in Round 6 (at the back or side of the neck).
3. Crochet the following sequence around the 18 front loops:
* Repeat in each front loop: (1 sc, ch 2, 1 sl st in the same loop) to form a very fine scalloped edging, or crochet (1 sc, ch 1, skip 1 loop, 1 dc in the next loop) depending on your openwork preference.
4. Upon completing the round around the entire circumference of the neck, finish with 1 sl st, cut the yarn and hide the tail inside with the tapestry needle.
5. Optional: You can embroider a fine backstitch with gold thread using stem stitch or backstitch right above this lace to replicate the gold braid edging the neck in the image.
Step 3: Transition to Skin Color at the Base of the Neck
Round 7 (Round 40 of cumulative count – Change to skin and adjustment to 15 stitches):
How to make the color change: Attach the light beige yarn (skin color) to the back loops resulting from Round 6.
How to crochet it: With light beige yarn and taking both loops normally, adjust to the 15 stitches of the neck crocheting: (4 sc, 1 dec) repeated 3 times.
Total stitches at the end of Round 7: 15 single crochet.
Step 4: The 3 Visible Neck Rounds (15 stitches)
Rounds 8, 9 and 10 (Rounds 41, 42 and 43 of cumulative count):
How to crochet them: With light beige yarn, crochet 1 sc in each of the 15 stitches in spiral during Rounds 8, 9 and 10.
Total stitches at the end of Rounds 8 to 10: 15 single crochet per round.
Step 5: Tenon Extension (Structural Support)
Rounds 11 to 17 (Rounds 44 to 50 of cumulative count – 7 identical rounds):
How to crochet them: Crochet 1 sc in each of the 15 stitches in spiral during 7 consecutive rounds (rounds 11 to 17) in light beige color.
Total stitches at the end of Rounds 11 to 17: 15 single crochet per round.
Closing the tenon:
1. Crochet 1 sl st in the next stitch to level the edge.
2. Cut the yarn and fasten off.
Step 6: Structural Stuffing
How and when to stuff:
1. Stuff the white torso firmly before closing the neck area.
2. Stuff the 15-stitch tenon very compactly pushing the fiberfill with a stick to ensure rigid support.
Section 5: Hands, Fingers and Semi-Puffed Sleeves with Lace
In this section we will crochet the two upper extremities. We will start with the hands in light beige color (skin), crocheting a small detail to define the thumb in a very simple yet realistic way. Then, we will make a color change to white to crochet the wrist lace and give way to the blouse sleeves.
the sleeves are white, featuring a semi-puffed style (meaning they start fitted at the wrist, widen noticeably at the forearm/arm, and narrow down again at the shoulders) and finish at the wrist with a delicate white lace trim.
We will crochet two identical arms.
Step 1: The Hand and Thumb (Light Beige Skin Color)
How and where to start:
We start with the palm of the hand crocheting in a spiral with the light beige yarn.
Round 1:
How to crochet it: Make a magic ring of 6 sc with light beige yarn.
Total stitches at the end of Round 1: 6 single crochet.
Round 2:
How to crochet it: Crochet (1 sc, 1 inc) repeated 3 times around the round.
Total stitches at the end of Round 2: 9 single crochet.
Round 3:
How to crochet it: Crochet 1 sc in each of the 9 stitches.
Total stitches at the end of Round 3: 9 single crochet.
Round 4 (Thumb Formation):
How to crochet it:
* For the right hand: Crochet 1 3-dc popcorn stitch in the first stitch (this will be the thumb) and then crochet 1 sc in each of the remaining 8 stitches.
* For the left hand: Crochet 1 sc in the first 4 stitches, 1 popcorn stitch in the fifth stitch (thumb) and 1 sc in the remaining 4 stitches.
Total stitches at the end of Round 4: 9 single crochet/raised stitches.
Round 5:
How to crochet it: Crochet 1 sc in each of the 9 stitches of the previous round (when passing over the popcorn stitch of the thumb, push it outward so it stands out).
Total stitches at the end of Round 5: 9 single crochet.
Round 6:
How to crochet it: Crochet (1 sc, 1 dec) repeated 3 times to cinch the wrist.
Total stitches at the end of Round 6: 6 single crochet.
Step 2: The Wrist and Transition to the Sleeve (BLO for the lace)
Round 7:
How to crochet it: Crochet 1 sc in each of the 6 stitches in light beige color.
Total stitches at the end of Round 7: 6 single crochet.
Round 8 (Color change and preparation for lace in BLO):
How to make the color change: In the last stitch of Round 7, perform a clean color change to white.
How to crochet the round: With white yarn, crochet 1 sc in each of the 6 stitches taking back loop only (BLO). The 6 front loops (FLO) will remain free on the outside to crochet the wrist lace.
Total stitches at the end of Round 8: 6 single crochet in white.
Step 3: Crocheting the Wrist Lace (Crocheted in FLO)
To crochet the lace comfortably, we will make it at this point before adding volume to the arm.
How and where to crochet the lace:
1. Position the hand facing you.
2. Attach white yarn to the first front loop (FLO) that remained free in Round 8.
3. Crochet the following sequence around the 6 front loops:
* In each front loop crochet: (1 sc, ch 2, 1 dc, ch 2, 1 sl st in the same stitch) to form a small openwork lace around the wrist.
4. Upon completing the 6 loops, finish with 1 sl st, cut the yarn and hide the tail inside the arm with a tapestry needle.
Step 4: The Semi-Puffed Sleeve (White Color)
Now we will continue crocheting the white sleeve over the back loops worked in Round 8. To achieve the puffed effect, we will make drastic increases at the base to multiply the volume and then gradually decrease toward the shoulder.
Round 9 (Increases for puffing):
How to crochet it: With white yarn, crochet 1 inc in each of the 6 stitches (we double the number of stitches).
Total stitches at the end of Round 9: 12 single crochet.
Round 10:
How to crochet it: Crochet (1 sc, 1 inc) repeated 6 times around the round to give the maximum width of the puffing.
Total stitches at the end of Round 10: 18 single crochet.
Rounds 11 to 17:
How to crochet them: Crochet 1 sc in each of the 18 stitches in spiral during 7 straight rounds (rounds 11, 12, 13, 14, 15, 16 and 17). This forms the puffed body of the sleeve.
Total stitches at the end of Rounds 11 to 17: 18 single crochet per round.
Round 18 (Beginning of upper tapering):
How to crochet it: Crochet (1 sc, 1 dec) repeated 6 times along the round.
Total stitches at the end of Round 18: 12 single crochet.
Rounds 19 and 20:
How to crochet them: Crochet 1 sc in each of the 12 stitches in spiral during 2 straight rounds.
Total stitches at the end of Rounds 19 and 20: 12 single crochet per round.
Round 21 (Shoulder closure):
How to crochet it: Crochet 6 decreases in a row along the round.
Total stitches at the end of Round 21: 6 single crochet.
Step 5: Fastening Off and Closure
1. Crochet 1 sl st in the next stitch to even out the round.
2. Cut the yarn leaving a long tail of approximately 20 cm to sew the arm to the torso at the shoulder area later.
Step 6: Stuffing the Hands and Sleeves
How and when to stuff:
1. Stuff the hand (skin color) firmly but lightly.
2. Stuff the puffed sleeve lightly/medium. It is very important not to overload the puffed sleeve with fiberfill so it does not end up as a rigid ball, but rather maintains a soft drape and the characteristic blown shape of the folk costume.
3. Do not place stuffing in the last 2 rounds of the shoulder (rounds 20 and 21) so that when sewn to the body, the arm falls naturally to the sides of the torso without sticking up.
Section 6: Skirt and Apron in Black and Red Color with White Lace
In this section we will crochet the flared skirt of the doll starting from the waist. It attaches over the front loops (FLO) that we reserved in Section 3 (Round 33 of cumulative count).
So that the skirt opens in a smooth and perfect “A” line (without forming straight tubes or rigid corners), we will alternate staggered increase rounds with straight rounds without increases along the entire skirt. The upper part is crocheted in black color and includes a round crocheted in BLO (Back Loop Only) to attach the intermediate openwork lace. The lower part consists of the last 6 rounds in red color, where we will also continue the flaring pattern until reaching the final 80 stitches. To conclude, we will crochet the white lace trims.
Step 1: Base of the Skirt and Initial Flare (Black Color)
How and where to attach the yarn:
Position the doll upside down facing you. Attach the black yarn to the first available front loop (FLO) around the waist in Round 33 of Section 3.
Round 1 (Waist attachment):
How to crochet it: Make a slip knot with black yarn and crochet 1 sc in each of the 30 front loops around the waist.
Total stitches at the end of Round 1: 30 single crochet.
Round 2 (First step of increases):
How to crochet it: Crochet (4 sc, 1 inc) repeated 6 times along the round.
Total stitches at the end of Round 2: 36 single crochet.
Round 3 (Straight settling round):
How to crochet it: Crochet 1 sc in each of the 36 stitches without increases.
Total stitches at the end of Round 3: 36 single crochet.
Round 4 (Staggered increases):
How to crochet it: Crochet (2 sc, 1 inc, 3 sc) repeated 6 times along the round.
Total stitches at the end of Round 4: 42 single crochet.
Round 5 (Straight settling round):
How to crochet it: Crochet 1 sc in each of the 42 stitches without increases.
Total stitches at the end of Round 5: 42 single crochet.
Step 2: Development of the Skirt Body (Black Color)
Round 6 (Staggered increases):
How to crochet it: Crochet (6 sc, 1 inc) repeated 6 times along the round.
Total stitches at the end of Round 6: 48 single crochet.
Round 7 (Straight settling round):
How to crochet it: Crochet 1 sc in each of the 48 stitches without increases.
Total stitches at the end of Round 7: 48 single crochet.
Round 8 (Staggered increases):
How to crochet it: Crochet (3 sc, 1 inc, 4 sc) repeated 6 times along the round.
Total stitches at the end of Round 8: 54 single crochet.
Round 9 (Round in BLO for the intermediate white lace):
How to crochet it: Crochet 1 sc in each of the 54 stitches taking back loop only (BLO). The 54 front loops (FLO) will remain free on the outside to mount the white openwork lace in Step 4.
Total stitches at the end of Round 9: 54 single crochet.
Round 10 (Staggered increases):
How to crochet it: Returning to taking both loops normally, crochet (8 sc, 1 inc) repeated 6 times along the round.
Total stitches at the end of Round 10: 60 single crochet.
Round 11 (Straight settling round):
How to crochet it: Crochet 1 sc in each of the 60 stitches without increases.
Total stitches at the end of Round 11: 60 single crochet.
Round 12 (Last round in black – Staggered increases):
How to crochet it: Crochet (4 sc, 1 inc, 5 sc) repeated 6 times along the round.
Total stitches at the end of Round 12: 66 single crochet.
Step 3: Flared Lower Stripe (Last 6 Rounds in Red Color)
Upon completing Round 12, make a clean color change to red. We continue alternating increases within the red section to prevent the stripe from falling like a vertical tube and to maintain the “A” line.
Round 13 (First round in red – Straight round):
How to crochet it: With red yarn, crochet 1 sc in each of the 66 stitches.
Total stitches at the end of Round 13: 66 single crochet.
Round 14 (Second round in red – Staggered increases):
How to crochet it: Crochet (10 sc, 1 inc) repeated 6 times along the round.
Total stitches at the end of Round 14: 72 single crochet.
Round 15 (Third round in red – Straight round):
How to crochet it: Crochet 1 sc in each of the 72 stitches without increases.
Total stitches at the end of Round 15: 72 single crochet.
Round 16 (Fourth round in red – Staggered increases until reaching 80 stitches):
How to crochet it: Crochet (8 sc, 1 inc) repeated 8 times along the round.
Total stitches at the end of Round 16: 80 single crochet.
Round 17 (Fifth round in red – Straight round):
How to crochet it: Crochet 1 sc in each of the 80 stitches without increases.
Total stitches at the end of Round 17: 80 single crochet.
Round 18 (Sixth round in red – Straight closing round):
How to crochet it: Crochet 1 sc in each of the 80 stitches.
Total stitches at the end of Round 18: 80 single crochet.
Closing the skirt:
When finishing Round 18, crochet 1 sl st in the next stitch to level the lower edge, cut the yarn and hide the tail inside with a tapestry needle.
Step 4: Crocheting the White Lace Trims (Openwork Lace)
Lace 1 (Intermediate lace on the black skirt in FLO):
1. Position the doll with feet pointing up.
2. Attach white yarn to the first front loop (FLO) that remained free in Round 9.
3. Crochet the lace pattern around the 54 loops:
* Crochet: (1 sc, ch 3, skip 1 loop, 1 dc in the next loop, ch 3, skip 1 loop) or crochet (1 sc, ch 2, skip 1 loop, 1 sc in the next) to form openwork arches.
4. Upon completing the entire round, crochet 1 sl st to close, cut the yarn and hide the tail inside.
Lace 2 (Lower lace under the red edge):
5. Attach white yarn to the lower edge of Round 18 (in red color).
6. Crochet around the 80 stitches the sequence of openwork shells to replicate the lace visible under the dress:
* Crochet: (1 sc, skip 1 stitch, 5 dc in the same stitch, skip 1 stitch) repeated along the entire lower edge.
3. Crochet 1 sl st to close the round, fasten off with the tapestry needle and hide the tail inside.
Section 7: Vest / Corset in Black Color
In this section we will crochet the traditional black vest or corset that the doll wears over the white torso.
the vest is black, hugs the waist, goes up the back and chest leaving a “V” opening in the front. This opening features gold piping around the neckline and 3 crossed “X” shaped laces in red. On the black side panels it has colorful floral embroidery.
We will crochet the vest in back-and-forth rows (flat crochet) starting from the waist, then separating the straps and the neckline, to finally place it over the body.
Step 1: Base of the vest waist
Row 1: Chain 31 in black yarn. Starting from the second chain from the hook, crochet 1 single crochet in each chain (30). Chain 1 to turn and turn.
Rows 2 to 4: Crochet 1 single crochet in each of the 30 stitches back and forth (30).
Step 2: Separation of back and front panels
Back of the vest:
Row 5 (back): Skip the first 5 stitches (right front) and 2 armhole stitches. Attach black yarn in stitch 8 and crochet 16 single crochet. Leave the last 7 stitches free (2 armhole + 5 left front). Turn (16).
Rows 6 and 7: Crochet 1 single crochet in each of the 16 stitches back and forth (16). Fasten off leaving a short tail.
Left front panel and strap:
Row 5b: Attach black yarn to the outer edge of the left front. Crochet 1 single crochet in the 5 free stitches (leaving the 2 stitches adjacent to the back free for the armhole). Turn (5).
Row 6b: Crochet 1 decrease on the inner neckline edge, 3 single crochet (4). Turn.
Row 7b: Crochet 1 decrease on the inner neckline edge, 2 single crochet (3). Turn.
Row 8b: Crochet 1 decrease on the neckline edge, 1 single crochet (2). Turn.
Rows 9b and 10b (strap): Crochet 2 single crochet back and forth for 2 rows (2). Fasten off leaving 15 cm for sewing.
Right front panel and strap:
Repeat exactly the same sequence over the 5 stitches of the right front, making the decreases on the inner edge to form the symmetrical diagonal of the “V” neckline until reaching 2 single crochet in row 8b and extending rows 9b and 10b.
Step 3: Placement and sewing onto the body
Dress the doll with the black vest over the white blouse.
Join the ends of the upper straps to the upper ends of the back using a tapestry needle with invisible stitches.
Secure the base of the vest around the waist to fit the garment over the torso.
Step 4: Gold Piping, Red Laces and Floral Embroidery
How to perform the finishing embroidery directly on the garment:
1. **Gold Edge/Piping:** Thread the tapestry needle with gold or yellow yarn. Crochet a slip stitch (sl st) border or embroider in stem/backstitch along the entire contour of the “V” neckline and front straps to frame the vest.
2. **Crossed Red Laces:** Thread the tapestry needle with red yarn. In the central opening of the “V” neckline, pass the thread from side to side making 3 overlapping “X” shaped crosses (imitating the lacing of a corset).
3. **Floral Embroidery:** With thin red, white and green threads, embroider floral details on the black front panels on the sides of the lacing:
* Embroider small red flowers using French knots or lazy daisy stitches.
* Embroider thin green branches with stem stitch and small leaves on the sides.
Section 8: Head with Internal Cavity and Ears
In this section we will crochet the head and ears of the doll. The head is crocheted from top to bottom (from crown to base) in light beige (skin color). It will reach a maximum diameter of 60 single crochet to give it the round and cute shape characteristic of traditional amigurumis.
At the bottom base of the head, we will create an internal cavity in the shape of an inverted tube measuring 18 stitches in circumference by 7 rounds in depth. This cavity is designed to fit snugly over the 15-stitch tenon that we crocheted on the neck (Section 4). This way, when assembling both pieces, the neck remains firmly socketed inside, preventing the head from drooping or tilting.
The ears are crocheted separately as two small semicircular pieces of 9 stitches and sewn to the sides of the face.
Step 1: The Head (From Crown to 60 Stitches)
We start crocheting the sphere of the head from the top with light beige yarn (skin color).
Round 1:
How to crochet it: Make a magic ring of 6 sc.
Total stitches at the end of Round 1: 6 single crochet.
Round 2:
How to crochet it: Crochet 1 inc in each of the 6 stitches.
Total stitches at the end of Round 2: 12 single crochet.
Round 3:
How to crochet it: Crochet (1 sc, 1 inc) repeated 6 times.
Total stitches at the end of Round 3: 18 single crochet.
Round 4:
How to crochet it: Crochet (2 sc, 1 inc) repeated 6 times.
Total stitches at the end of Round 4: 24 single crochet.
Round 5:
How to crochet it: Crochet (3 sc, 1 inc) repeated 6 times.
Total stitches at the end of Round 5: 30 single crochet.
Round 6:
How to crochet it: Crochet (4 sc, 1 inc) repeated 6 times.
Total stitches at the end of Round 6: 36 single crochet.
Round 7:
How to crochet it: Crochet (5 sc, 1 inc) repeated 6 times.
Total stitches at the end of Round 7: 42 single crochet.
Round 8:
How to crochet it: Crochet (6 sc, 1 inc) repeated 6 times.
Total stitches at the end of Round 8: 48 single crochet.
Round 9:
How to crochet it: Crochet (7 sc, 1 inc) repeated 6 times.
Total stitches at the end of Round 9: 54 single crochet.
Round 10:
How to crochet it: Crochet (8 sc, 1 inc) repeated 6 times to reach the maximum diameter of the head.
Total stitches at the end of Round 10: 60 single crochet.
Step 2: Face Height and Safety Eyes Placement
Rounds 11 to 22 (12 Straight rounds of 60 stitches):
How to crochet them: Crochet 1 sc in each of the 60 stitches in spiral from round 11 to round 22 without making increases or decreases.
Total stitches at the end of Rounds 11 to 22: 60 single crochet per round.
Placement of Safety Eyes:
1. Stop crocheting at the end of Round 22.
2. Place the black safety eyes between Rounds 16 and 17, leaving a separation of 10 to 11 visible stitches between them.
3. Secure the eyes on the inside of the head with their respective pressure safety backings.
Step 3: Decreases of the Head Base
We begin to close the sphere from the bottom part.
Round 23:
How to crochet it: Crochet (8 sc, 1 dec) repeated 6 times.
Total stitches at the end of Round 23: 54 single crochet.
Round 24:
How to crochet it: Crochet (7 sc, 1 dec) repeated 6 times.
Total stitches at the end of Round 24: 48 single crochet.
Round 25:
How to crochet it: Crochet (6 sc, 1 dec) repeated 6 times.
Total stitches at the end of Round 25: 42 single crochet.
Round 26:
How to crochet it: Crochet (5 sc, 1 dec) repeated 6 times.
Total stitches at the end of Round 26: 36 single crochet.
Round 27:
How to crochet it: Crochet (4 sc, 1 dec) repeated 6 times.
Total stitches at the end of Round 27: 30 single crochet.
Round 28:
How to crochet it: Crochet (3 sc, 1 dec) repeated 6 times.
Total stitches at the end of Round 28: 24 single crochet.
Round 29:
How to crochet it: Crochet (2 sc, 1 dec) repeated 6 times.
Total stitches at the end of Round 29: 18 single crochet.
Stuff the head firmly with synthetic fiberfill at this point, leaving the lower center free for the cavity.
Step 4: Creation of the Internal Cavity (Inverted Tube of 18 Stitches)
To construct the inner tube inside the head, we will use a round in BLO and crochet 7 rounds that will be pushed toward the interior of the piece.
Round 30 (Cavity turn in BLO):
How to crochet it: Crochet 1 sc in each of the 18 stitches taking back loop only (BLO). This generates a flat edge at the outer base of the head.
Total stitches at the end of Round 30: 18 single crochet.
Rounds 31 to 37 (The 7 Cavity Rounds):
How to crochet them: Returning to taking both loops normally, crochet 1 sc in each of the 18 stitches in spiral during 7 consecutive rounds (rounds 31 to 37) in light beige color.
Total stitches at the end of Rounds 31 to 37: 18 single crochet per round.
Closing the cavity:
1. Upon finishing Round 37, crochet 1 sl st in the next stitch to level.
2. Cut the yarn leaving a short tail and fasten off.
3. Using the handle of your crochet hook or a finger, push this 18-stitch tube toward the inside of the head. Adjust the fiberfill around the tube so that the cavity remains clear and firm.
Step 5: The Ears (9 Circumference Stitches)
We will crochet two independent semicircular pieces.
In a magic ring, crochet the following sequence of 9 stitches without closing the ring in a full circle (we work in a semicircular fan):
1. Make a magic ring and crochet inside it: ch 2 (does not count as a stitch), 1 sc, 5 dc, 1 sc and ch 2.
2. Pull the short tail of the magic ring to adjust the center until a well-defined semicircle of 9 contoured edge stitches is formed.
3. Cut the yarn leaving a 15 cm tail for sewing.
Assembly of the ears:
Sew the ears to the sides of the head, placing them at the same height as the safety eyes (between Rounds 15 and 18), at a distance of 6 to 7 stitches to the sides from each eye.
Section 9: Hair and Rooting for Braids
In this section we will craft the doll’s hair using the strand rooting technique (also known as the fringe method or lark’s head knot).
the doll wears light brown hair styled with a very clean center part. The hair covers the whole head thickly and falls toward the sides dividing into two large thick braids that hang on the sides of the face, tied at the ends with red ribbons.
This technique consists of cutting yarn strands of twice the desired length and folding them in half to attach them one by one with the crochet hook directly over the stitches of the head fabric.
Materials needed for this section:
* Medium thickness cotton yarn (8/4 or DK) in light brown color.
* Thin satin or cloth red ribbon (to tie the braids).
* 2.5 mm to 3.0 mm crochet hook.
* Rigid cardboard or small book approximately 25 cm to 30 cm long (serves as a guide to cut the strands uniformly).
* Sharp scissors.
* Wide-tooth comb or tapestry needle to align the strands.
Step 1: Preparation and Cutting of Strands
To make the braids long, thick and well-proportioned for our 30 cm tall doll, we will need yarn strands approximately 50 cm to 60 cm long.
How to measure and cut strands:
1. Take the 25 cm to 30 cm long cardboard guide.
2. Wrap the light brown yarn continuously around the cardboard without pulling too tight.
3. With scissors, cut the yarns at only one of the ends of the cardboard. You will obtain individual folded strips about 50 cm to 60 cm in total length.
4. Prepare initially around 120 to 150 strands of yarn.
Step 2: Center Parting and Contours (Rooting Guide)
Before attaching the yarn, we will define the hairstyle line on the head with the help of pins or by imagining a straight line:
1. **Center Part:** Trace a clean vertical line going from the forehead (between Rounds 11 and 12 of the head, well centered between the eyes) passing over the crown down to the nape of the neck.
2. **Front Line:** Define the face frame going down smoothly from the center part toward the sides, passing in front of the ears.
Step 3: Strand Rooting Technique (Lark’s Head Knot)
How to place each strand of hair on the fabric:
1. Take 1 strand of light brown yarn and fold it exactly in half, forming a loop at the top end.
2. Insert your crochet hook from bottom to top passing under a single crochet stitch on the head.
3. Catch the folded loop of the strand with the hook and pull it under the single crochet stitch. A small yarn loop will form at the front.
4. With the hook or your fingers, take the two loose ends of the strand, pass them through the loop and pull firmly to tighten the knot against the head.
Step 4: Distribution of Rooting on the Head
To make the hair look even and without gaps when styled, we will apply rooting by strategic areas:
1. **Zone 1 (Center Part):** Root 1 strand in each single crochet stitch along the entire center line (from forehead to nape).
2. **Zone 2 (Face Frame):** Root strands following the line bordering the face, going down the temples and passing right in front of the ears.
3. **Zone 3 (Filling the Sides):** Root alternating strands (one stitch yes, one stitch no) on the upper rounds of the head on both sides of the center part. It is not necessary to fill every internal stitch of the head; by covering the center part, contours and top layers, the hair will have sufficient volume to braid without becoming excessively bulky.
Step 5: Styling and Making the Braids
1. **Division:** Once the strands are placed, divide all the hair into two exactly equal parts following the center part (right half and left half).
2. **Styling:** With your fingers or a wide-tooth comb, smooth the hair bringing it gently from the center part toward the sides and behind the ears, ensuring no crossed or tight strands remain.
3. **Braids:**
* Take the full lock from the left side and divide it into 3 strands of equal thickness.
* Crochet/braid a traditional 3-strand braid tightly and evenly, ensuring it starts well below near the neck.
* Upon reaching near the ends (leaving about 3 cm to 4 cm of loose fringe), tie the braid firmly with a piece of brown yarn or a mini elastic band.
* Repeat exactly the same procedure for the right side.
Step 6: Finishing and Red Bows
1. **Red Ribbons:** Cut two strips of red satin ribbon about 20 cm each. Tie them over the ends of the braids right where you placed the bands, forming a small neat bow or tie on each end as in the image.
2. **Trimming and Leveling:** With sharp scissors, trim the lower fringe of each braid so that the ends remain even and clean.
Section 10: The Flower Crown
In this section we will crochet the traditional headpiece that adorns the doll’s head.
the flower crown is a colorful arrangement that surrounds the upper part of the head above the hair. It consists of red flowers and white flowers (both with yellow centers) interspersed with small green leaves.
We will crochet a rigid green base strip on which we will densely sew each of the small flowers and leaves, to then attach it firmly to the head.
Materials needed for this section:
* Fine or medium thickness cotton yarn (8/4) in red color.
* Fine or medium thickness cotton yarn (8/4) in white color.
* Fine or medium thickness cotton yarn (8/4) in yellow color (for the centers).
* Fine or medium thickness cotton yarn (8/4) in green color (for the base ribbon and leaves).
* 2.0 mm to 2.5 mm crochet hook (using a slightly smaller hook helps the flowers look firmer and more defined).
* Tapestry needle.
* Scissors.
Step 1: The Crown Base Ribbon (Green Color)
We will crochet a green strip that will serve as a support to mount the entire floral arrangement and adapt to the contour of the head.
1. Chain 45 to 50 in green yarn (this strip should measure enough to go from the back of one ear to the other, passing over the crown/upper forehead).
2. Starting from the second chain from the hook, crochet 1 sc in each of the chains to the end.
3. Crochet 1 sl st to close, cut the yarn leaving about 20 cm for sewing later and set the strip aside.
Step 2: Red and White Flowers (Crochet 6 red and 6 white)
We will crochet approximately 12 small 5-petal flowers (6 red and 6 white).
How to crochet each flower:
1. **Yellow Center:** With yellow yarn, make a magic ring and crochet 5 sc inside the ring. Close the ring with 1 sl st in the first stitch. Change to the flower color yarn (red or white) and cut the yellow yarn.
2. **Petals:** Working over the 5 yellow sc:
* In the first stitch crochet: (1 sc, 2 dc, 1 sc). This forms the first petal.
* Move to the next stitch and crochet: (1 sc, 2 dc, 1 sc). This forms the second petal.
* Repeat the same sequence (1 sc, 2 dc, 1 sc in the same stitch) in the remaining 3 stitches to complete the 5 petals of the flower.
3. **Closing:** Crochet 1 sl st in the base of the first stitch, cut the yarn leaving a 10 cm tail to sew to the base strip.
Step 3: The Green Leaves (Crochet 8 to 10 units)
How to crochet each leaf:
1. With green yarn, chain 5.
2. Starting in the second chain from the hook, crochet: 1 sc, 1 half double crochet, 1 dc, and in the last chain crochet (1 sc, ch 1, 1 sc) to turn the tip of the leaf.
3. Working along the opposite side of the base chain, crochet: 1 dc, 1 half double crochet and 1 sc.
4. Crochet 1 sl st in the first stitch to close, cut the yarn leaving 10 cm of tail.
Step 4: Crown Assembly
1. **Mounting pieces:** With the tapestry needle, sew the alternating red and white flowers onto the green base strip (for example: one red, one white, one red, one white).
2. **Placing leaves:** Sew the green leaves under and between the flowers, so that they protrude slightly from the upper and lower edges of the crown.
3. **Attachment to the head:** Place the crown on the doll’s head, positioning it right above the hair parting and the start of the braids.
4. Sew the green strip to the fabric of the head passing with the tapestry needle under the hair with firm but invisible stitches at the ends and in the center so that the crown remains permanently fixed.
Section 11: Facial Details, Final Embroidery and Assembly
In this final section we will join all the doll’s pieces and execute the facial expression, traditional costume embroidery, and blush touch.
the doll has a sweet expression with fine curved eyebrows, delicate eyelashes at the sides of the eyes and a small smiling mouth. The wardrobe stands out with floral embroidery on the black apron, geometric details on the white blouse sleeves, and a red bead necklace around the neck.
Materials needed for this section:
* Embroidery thread or fine cotton yarn in black color (for eyebrows and eyelashes).
* Embroidery thread or fine cotton yarn in brown or fine pink/red color (for the mouth).
* Embroidery threads in red, white, green, yellow and blue colors (for apron and sleeve embroidery).
* Large red beads or seed beads (or red yarn to crochet a chain necklace with small popcorn stitches).
* Red satin or fine cloth ribbon about 40 cm (for the apron bow).
* Pink cosmetic blush and a soft brush or cotton swab.
* Blunt tapestry needle and fine embroidery needle.
* Pins to position pieces before sewing.
Step 1: Facial Expression Embroidery
We will execute the facial embroidery with an embroidery needle on the already stuffed head.
1. **Eyelashes:**
* Thread fine black yarn.
* Enter with the needle from the lower back of the head and bring the thread out next to the outer edge of each safety eye.
* Embroider 2 to 3 small diagonal lines upward at the upper outer corner of each eye to form the eyelashes.
2. **Eyebrows:**
* Position the eyebrows 2 or 3 rounds above the safety eyes.
* Embroider a smooth slanted line downward approximately 3 to 4 stitches long using fine black or brown thread.
3. **Nose (Optional):**
* Right 1 round below the central line of the eyes, make 2 or 3 horizontal passes with light beige yarn (skin color) covering 2 stitches to form a small discrete ridge.
4. **Mouth:**
* 2 rounds below the nose, embroider a small smiling curve in a smooth “V” shape covering 2 stitches with fine soft pink or red thread.
5. **Blush:**
* Take a small amount of pink blush with a soft brush or swab and apply it with gentle circular dabs on the cheeks, right below the eyes.
Step 2: Structural Assembly (Head to Torso and Arms)
1. **Joining Head and Neck (Tenon – Cavity System):**
* Take the finished body with the rigid 15-stitch tenon protruding at the neck.
* Insert the 15-stitch tenon firmly into the 18-stitch internal cavity located at the base of the head.
* Once fully socketed, sew the flat outer edge of the head base (the round in BLO of Section 8) to the 3 visible rounds of the neck with invisible and firm stitches around the entire contour using light beige yarn.
2. **Sewing the Arms:**
* Place the two arms at the sides of the torso, positioning them right under the edge of the blouse/vest at the shoulder area.
* Sew the flat upper part of the arm to the body using the long tail we left in Section 5.
Step 3: Garment Embroidery (Apron and Sleeves)
1. **White Sleeves Embroidery:**
* With red and green embroidery thread, execute a pattern of small crosses or floral sprigs embroidered symmetrically along the forearm of each puffed sleeve.
2. **Black Apron Embroidery:**
* Over the central front part of the black skirt, thread vibrant color threads (red, white, green, yellow and blue).
* Embroider large central red flowers with yellow centers (using lazy daisy stitch or French knot).
* Embroider small white daisies around and green sprigs with small leaves in stem stitch extending toward the sides.
Step 4: Final Accessories (Necklace and Waist Ribbon)
1. **Red Bead Necklace:**
* Thread red beads or seed beads on a thread and wrap them around the visible base of the neck (above the neckline lace and under the chin).
* If you do not have beads, chain a strip in red color alternating small 3-dc popcorn stitches to simulate the necklace beads and tie it behind the neck.
2. **Waist Ribbon:**
* Cut a strip of fine red satin ribbon.
* Tie it around the waist (right over the join of the black vest and the skirt) forming a bow or tie centered toward the front with both ends hanging down over the skirt.
Celebrating Your Handcrafted Polish Legacy
Congratulations on bringing your Polish amigurumi doll to life! Through each section—from the structured base and embroidered folk vest to the vibrant flower crown—you have woven patience, artistry, and tradition into a truly remarkable creation. This doll is more than just a completed crochet project; it is a celebration of cultural heritage and a testament to your dedication as a maker. Display her proudly in your collection or gift her as a cherished heirloom to pass down through generations. May this enchanting journey inspire your next creative endeavor and keep the timeless beauty of handmade crafts forever alive.

Spanish version of this same pattern
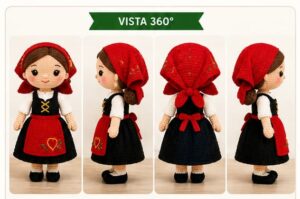
Here’s another pattern for crocheting a Portuguese amigurumi doll
Video tutorial for crocheting another amigurumi doll design
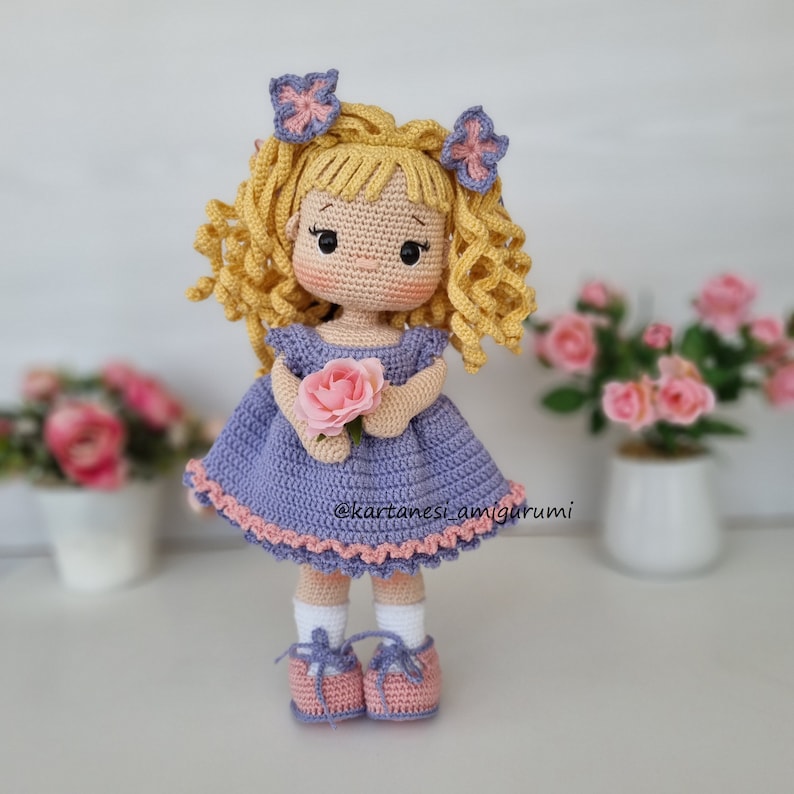
Pattern in several languages found on Etsy to knit this wonderful doll
Affiliate Disclosure:
This post contains affiliate links. If you purchase through them, I may earn a small commission at no extra cost to you. Thank you for supporting my work!
Discover more crochet patterns, free downloads, and premium PDFs on Ko-fi.