
Create your own tribute crochet figure inspired by a legendary pop icon with this detailed step-by-step amigurumi pattern. This design guides you through making a stylized crochet doll featuring signature curls, a statement jacket, a glove, and a microphone pose, along with a stable structure system, making it perfect for collectors, gifts, or advanced amigurumi projects.
A Legend Stitched in Thread
The King of Pop transcended music, fashion, and culture in a way no artist had before or since. His movements, his style, and his iconic red jacket became symbols recognized across every corner of the globe. Now, for the first time, you can bring that magic into your hands — quite literally — through the art of crochet.
Why We Created This Pattern
This pattern was born from a deep love for amigurumi and an even deeper admiration for one of the greatest performers who ever lived. The King of Pop deserved more than a generic doll. He deserved a figure with his signature curls, his legendary glove, his Thriller jacket, and that unmistakable microphone pose. Every stitch in this design was crafted with intention and care.
What You Will Create
By following this pattern, you will crochet a fully detailed, stylized amigurumi figure complete with poseable arms, a structured cavity-and-spike neck system for stability, and hand-embroidered jacket details. Whether you are making this as a collector’s piece, a heartfelt gift, or simply a personal challenge, the result will be nothing short of spectacular.
Let the Show Begin
Pick up your hook. The stage is yours.
🎓 Difficulty Level: Intermediate
This pattern is classified as Intermediate. While the base structure is straightforward, it requires careful attention in the following areas:
• Required techniques: Magic ring, increases, decreases, spiral knitting, and row-by-row knitting (for the jacket), plus clean color changes.
• Special challenge: Assembling the head using the cavity/spike system, and the patience needed to crochet the curly hair locks.
• Details: Embroidering fine lines on the jacket and managing small pieces (like the microphone).
💡 Tip: If you’re a beginner and want to try it, go for it! Just make sure to read each step carefully.
⏳ Estimated Crafting Time
Total estimated time is approximately 10 to 14 hours of work, depending on your experience level and crocheting pace. Here’s a breakdown by stage:
• Body & Limbs: 4–5 hours (including the cavity/spike system)
• Head & Facial Details: 1–2 hours
• Jacket & Accessories (Microphone): 2–3 hours
• Curly Hair (The most detailed part): 3–4 hours
💡 Tip: Crochet the hair in short sessions to avoid hand fatigue — the King of Pop’s curls take time, but the result is spectacular!
🧶 Materials Needed
For the King of Pop, use a fine or medium weight yarn (Fingering or Sport weight) to maintain the stylized scale of this design.
Yarn: Medium weight (fine to medium) chenille yarn (velvet) in **Black** (this will be the main color of our footwear).
• Red: For the iconic jacket
• Black: For the pants, shoes, and hair
• White: For the shirt, socks, and glove
• Skin tone: For the face and bare hand
• Gray: A small amount for the microphone mesh
• Crochet hook: 3.5 mm or 4.00 mm (choose based on your tension — the fabric should be firm)
• Safety eyes: One pair in black, recommended 8 mm or 10 mm
• Stuffing: Good quality polyester fiberfill
• Yarn needle: For sewing pieces together and embroidering details
• Stitch marker: Essential for working in a spiral
Guide to useful tools for crocheting
• Optional extras: Galvanized wire or pipe cleaners (for poseable arms); black and gold embroidery floss (for jacket details)
⚠️ Important note: Choose a yarn that is not too stretchy so the cavity/spike neck system works correctly and keeps the head firmly in place.
If you are new to amigurumi, choosing the correct yarn really matters.
I recommend reading my complete guide on the best yarn for amigurumi beginners before starting this pattern.
📝 Abbreviations (Crochet Terms)
All stitches are single crochet (sc) unless otherwise noted. This pattern uses US crochet terminology.
• mr: Magic ring
• ch: Chain
• sc: Single crochet
• sl st: Slip stitch
• inc: Increase (2 single crochets in the same stitch)
• dec: Invisible decrease (2 stitches closed together through the front loop)
• BLO: Back Loop Only
• FLO: Front Loop Only
• rep: Repeat
• (…) x N: Repeat instructions inside parentheses the indicated number of times
• [N]: Total stitch count at the end of the round or row

**SECTION 1: SHOES (Make 2 identical pieces)**
**PIECE INTRODUCTION**
Hello! What a joy that we are starting this project together. In this first section, we are going to bring our doll’s sneakers to life, inspired by none other than the iconic style worn by the King of Pop himself in *Thriller*. To achieve that characteristic urban, very eighties, and chunky sneaker look, we are going to work with **chenille yarn** (which you might know as velvet yarn). This yarn is wonderful because it naturally adds a fluffy and rounded volume, ideal so that we don’t end up with a sleek and flat shoe, but rather a real sneaker with lots of personality.
We will start crocheting from the bottom up, starting with a very pretty oval sole. Then, we will make a marked edge to clearly separate the sole from the sides, and we will gradually decrease the stitches in the instep and the heel until we reach the perfect measurement to continue crocheting the leg.
A super important detail before moving forward: we are going to crochet the rounds of this shoe in a continuous spiral. This means we will not close the rounds with a slip stitch or chain up at the beginning of each round, unless expressly instructed in the text. This way, our work looks flawless!
**SPECIFIC MATERIALS**
* **Yarn:** Medium weight (fine to medium) chenille yarn (velvet) in **Black** (this will be the main color of our footwear).
* **Crochet Hook:** 3.5 mm or 4.0 mm (choose the one that best suits your tension; ideally, the fabric should be very tight and dense so that the fiberfill does not escape between the chenille fibers).
* **Stuffing:** Good quality polyester fiberfill to give it a nice shape.
* **Basic tools:** A stitch marker (this accessory is your best friend when working with chenille yarn, since stitches are hard to see with the naked eye), a wide-eyed yarn needle, and very sharp scissors.
**CONSIDERATIONS BEFORE STARTING**
1. **Tension with chenille yarn:** Try to maintain a firm and constant tension. If you crochet too loosely, you will see that the shoe loses its shape and the structural firmness we need so much.
2. **Always use your stitch marker:** Don’t forget to place it in the first stitch of each round. Since chenille is so fluffy and its fibers hide the tops of the stitches, keeping track patiently and continuously is the key to success.
3. **Our abbreviations:**
* **ch:** Chain.
* **sc:** Single crochet.
* **inc:** Increase (means crocheting 2 single crochets in the same stitch from the previous round).
* **dec:** Decrease (close 2 single crochets together. I suggest you use the traditional decrease if the invisible one is a bit difficult for you due to the thickness and texture of the chenille fiber).
* **BLO:** Back Loop Only (crochet taking only the back loop).
**ROUND-BY-ROUND INSTRUCTIONS (In Black Color)**
**PART A: THE OVAL SOLE**
We will start by crocheting a foundation chain on which we will work around to achieve a beautiful symmetrical oval of 18 stitches. Get your hook ready and let’s begin!
* **Round 1:** We start by crocheting 5 ch. Starting in the second chain from your hook, crochet: 3 sc. Now, crochet 3 sc together in the last chain to be able to turn cleanly and work along the other side of our foundation chain. Continuing along the opposite side of the chains, crochet: 2 sc and finish with 1 inc in the last chain loop. **[Total: 10 sc]**
* **Round 2:** Crochet 1 inc, continue with 2 sc, work 3 inc in a row along the front curve to turn, then crochet 2 sc and finish with 2 inc in a row along the back curve. **[Total: 16 sc]**
* **Round 3:** Crochet 1 sc, 1 inc, continue with 3 sc, then 1 inc, 2 sc, 1 inc, continue with 3 sc, 1 inc and finish with 3 sc. **[Total: 20 sc]**
*At the end of this round, you will see that the sole is perfectly symmetrical, flat, and with an approximate length of between 4.5 and 5 cm. We are now ready to raise the sides!*
**PART B: SIDES AND VOLUME OF THE SHOE**
* **Round 4 (Sole wall in BLO):** Crochet 20 sc taking only the back loop of each stitch. **[Total: 20 sc]**
*A little workshop tip:* By crocheting this round in the back loop only (BLO), we will create a very nice and marked horizontal ridge that will cleanly define the flat boundary of the sole and start to raise the vertical structure of our shoe.
* **Round 5 (Straight round of height):** Now crochet 20 sc taking the complete stitch normally. **[Total: 20 sc]**
**PART C: REDUCTION AND SHAPING OF THE INSTEP AND THE HEEL**
To ensure we get a very robust sneaker, with a beautiful rounded toe and a well-defined heel, we are going to concentrate some specific decreases on each end.
* **Round 6 (First shaping round):** Crochet 5 sc, make 4 dec in a row right at the front end (the toe), then crochet 5 sc and finish by making 1 dec at the back end (the heel). **[Total: 15 sc]**
* **Round 7 (Second shaping round):** Crochet 4 sc, work 3 dec in a row at the toe, continue with 3 sc and make 1 dec at the heel. **[Total: 11 sc]**
*At this point in our workshop, I suggest taking a short pause to firmly stuff the toe using the polyester fiberfill. Help yourself with your fingers or a stick; this step is super important so that the shoe does not deform or end up flat while we continue crocheting.*
* **Round 8 (Leg opening adjustment and final stitch count for the leg):** Crochet 4 sc, make 1 inc right in the center of the toe (this will help us round out the front area of the instep in a very visual way) and finish by crocheting 6 sc. **[Total: 12 sc]**
And that’s it! Upon completing your Round 8, make a slip stitch in the next stitch to secure your work very well. Cut the yarn leaving a length of about 10 cm, fasten off gently, and hide the yarn tail inside the shoe with the help of your yarn needle.
**EXPECTED RESULT AT THE END OF THE SECTION**
When you finish this stage of the workshop, you will have **two identical black shoes** in your hands.
Thanks to the magic and texture of the chenille yarn, you will see that each piece has a fluffy body and a beautiful three-dimensional volume that perfectly recreates that awesome eighties sneaker footwear. Each shoe will measure between 4.5 and 5 cm in length at its sole, with a firm rounded toe thanks to the fiberfill, a well-defined heel, and an opening at the top with a total of **12 perfect stitches** ready for the color change, so that we can join them with the sock and the leg of our doll in the next sections of the pattern.
**SECTION 2: SOCKS AND LEGS (Make 2 identical pieces)**
**PIECE INTRODUCTION**
How nice that you are still here! In this second stage of our project, we are going to crochet our doll’s legs in a continuous way, inspired of course by the iconic and memorable look from *Thriller*.
To achieve this, we will start from the 12 final stitches we had left on the shoe from the previous section. From there, we will raise long, stylized, and slender legs, designed to provide the perfect support for a doll of about 30 cm in height. You will see how well the transition looks: we will seamlessly integrate the black chenille footwear with a section of short white socks, and then make way for long, fitted black pants. We will achieve this clean effect using very neat color changes and textured ridges that simulate real garments. Get ready because you are going to love them!
**ROUND-BY-ROUND INSTRUCTIONS**
**PART A: THE WHITE SOCKS (Make 2 identical pieces)**
To begin, we are going to attach our **White** yarn right at the back of the shoe’s ankle. This way, we will make a super clean and discreet color change from the 12 black stitches of the footwear.
* **Round 9 (Upper edge of the shoe in BLO):** With **White** yarn, crochet 12 sc taking only the back loop (BLO) of Round 8 of our shoe. **[Total: 12 sc]**
*A little design secret:* Working this round in BLO creates a beautiful physical and visual division. It gives the exact impression that the foot goes inside the sneaker and the sock emerges cleanly above it. A beautiful detail of quality!
* **Round 10 (Body of the sock):** Crochet 12 sc in a regular way, that is, taking both loops of the stitch as you always do. When finishing the last stitch of this round, change color to **Black** to start the pants (remember to close the last loop of your 12th stitch already with the black strand). **[Total: 12 sc]**
**PART B: THE PANTS AND THE LONG LEG (In Black Color)**
From this moment on, we put the white away and will work with our **Black** yarn. We will maintain a constant diameter of 12 stitches to achieve that slender silhouette of the leg, making the pants fit perfectly without awkward bulges.
* **Round 11 (Pants hem ridge in FLO):** With **Black** yarn, crochet 12 sc taking only the front loop (FLO). **[Total: 12 sc]**
*Crochet note:* Remember to crochet these 12 sc taking only the front loop of the stitches from Round 10. In Round 12, we will continue crocheting in the normal way, working the stitches regularly over the ones you just made in this Round 11.
* **Round 12 (Transition round):** Crochet 12 sc in a regular way. **[Total: 12 sc]**
* **Round 13 to Round 26 (Straight sections of the leg – 14 rounds):** Crochet 12 sc in each round in a regular way, without increases or decreases. **[Total: 12 sc per round]**
*My workshop stuffing advice:* I suggest stuffing the leg with polyester fiberfill progressively every 4 or 5 rounds. Try to make the stuffing at the base of the ankle very firm to give the doll a good structure and stability, but make it a little softer towards the top. This way, the joins will not be too rigid and the stitches of the fabric will not stretch open.
**PART C: DIFFERENTIATED CLOSURE OF THE LEGS**
So that when we reach the torso section joining both legs is a piece of cake and fits perfectly, we will make a different finish for each one:
* **Left Leg (The first one you will crochet):** In Round 26, right after completing stitch number 12, make 1 slip stitch in the next stitch to secure your work very well. Cut the black yarn leaving a length of about 10 cm so that you can make an invisible fasten off, and hide the remaining tail inside the leg. Stuff it gently to the edge.
* **Right Leg (The second one you will crochet):** In Round 26, crochet your 12 sc in a regular way, but **attention, DO NOT cut the yarn!** Do not make any closing slip stitch at the end either. Simply leave the active loop on your hook, with the black yarn intact and connected directly to the skein. Stuff firmly. We will leave this leg on hold, ready to attach from here the joining chains that will shape the body in the next section.
**EXPECTED RESULT AT THE END OF THE SECTION**
Congratulations! At the end of this stage of the workshop, you will have **two beautiful identical, long, and stylized legs** ready.
You will see how great they look: each one measures exactly the same and features its black chenille sneaker, a delicate 2-round white sock stripe that stands out very cleanly thanks to the BLO ridge, and a long leg of tight black pants that ends with exactly **12 stitches** on its upper edge. The Left Leg will be fastened off and closed, while your Right Leg will have the active yarn waiting to immediately start crocheting the structure of the torso. See you in the next step!
**SECTION 3: JOINING THE LEGS AND TORSO**
**PIECE INTRODUCTION**
One of the most exciting moments of our project has arrived! In this section, we are going to physically join both legs to form the hips, and from there, we will begin raising our doll’s entire torso.
To make it look spectacular before dressing him in his iconic red *Thriller* jacket (which, don’t worry, we will crochet completely independently later on), we will design a slender, very masculine, and athletic silhouette. Through super precise color changes and very simple ribbing techniques, we will directly transform the black pants into his white t-shirt. To finish, we will crown the upper part with a skin-colored neck that extends into a semi-rigid support post, ideal for the head to fit perfectly later on without wobbling. Let’s give this body some shape!
**TECHNICAL CONSIDERATIONS FOR ASSEMBLY AND STUFFING**
1. **Front alignment:** When starting Round 1 of the join, it is super important that you make sure the rounded toes of the shoes face straight forward. Look at them patiently before making the first stitches!
2. **Avoid gaps in the crotch:** When crocheting the single crochets over the initial separating chains, try to tension the yarn firmly. This will prevent those annoying little holes from opening up, through which the polyester fiberfill could escape.
3. **Achieve a very firm neck:** Since chenille is a very soft and fluffy yarn, we need to give it some extra help to support the weight of the head. To keep it from wobbling, we will insert a rigid support (it can be a plastic tube, a plastic rod, or thick covered wire) inside the torso. This support will go up through the neck and the post before you finish putting in the final stuffing. An infallible workshop trick!
**ROUND-BY-ROUND INSTRUCTIONS**
**PART A: JOINING THE LEGS AND HIP (In Black Color)**
We resume that active loop we left on our Right Leg upon completing Round 26 in the previous section. We continue crocheting with our **Black** yarn.
* **Round 1 (Join):** From the Right Leg, ch 3. Join with 1 sc in the first available stitch of the Left Leg (remember to position the leg with the toe of the shoe pointing toward you to ensure perfect alignment). Crochet the next 11 sc around the Left Leg. Now, crochet 3 sc along one side of the 3 joining ch we made at the beginning. Crochet 12 sc around the Right Leg and finish by crocheting 3 sc along the opposite side of the 3 joining ch. **[Total: 30 sc]**
* **Round 2 (Stabilization round):** Crochet 30 sc around the entire hip in a regular way. **[Total: 30 sc]**
* **Round 3 (Light lateral shaping):** Crochet 6 sc, make 1 dec right on the left side, continue with 13 sc, work 1 dec on the right side and finish with 7 sc. **[Total: 28 sc]**
* **Round 4 and Round 5 (Straight hip rounds):** Crochet 28 sc in each of these rounds in a regular way. **[Total: 28 sc per round]**
*A key detail:* When you finish the last stitch of Round 5, change color to **White** to start shaping the t-shirt. Remember to close the last loop of the 28th stitch already with the new white strand.
**PART B: THE WHITE T-SHIRT AND THE TORSO (In White Color)**
* **Round 6 (Waistline in BLO):** With our **White** yarn, crochet 28 sc taking only the back loop (BLO). **[Total: 28 sc]**
*A design tip:* Crocheting this round in BLO gives us a super clean physical division, flawlessly separating the black pants from the white t-shirt.
* **Round 7 and Round 8 (Waist sections):** Crochet 28 sc in each round in a regular way, taking both loops of each stitch. **[Total: 28 sc per round]**
*Initial Stuffing:* Take advantage of this moment in the project to start firmly stuffing the crotch and the base of the hips using the polyester fiberfill.
* **Round 9 (First torso reduction):** Crochet 5 sc, make 1 dec, crochet 12 sc, make 1 dec and finish with 7 sc. **[Total: 26 sc]**
* **Round 10 and Round 11 (Straight torso sections):** Crochet 26 sc in each round in a regular way. **[Total: 26 sc per round]**
* **Round 12 (Second torso reduction):** Crochet 4 sc, work 1 dec, crochet 11 sc, make 1 dec and finish with 7 sc. **[Total: 24 sc]**
* **Round 13 and Round 14 (Chest shaping):** Crochet 24 sc in each round in a regular way, without increases or decreases. **[Total: 24 sc per round]**
**PART C: SHOULDERS AND COLOR CHANGE TO SKIN (Neck Formation)**
We are going to shape subtly firm shoulders to give him that athletic and stylized figure that so greatly characterizes our character.
* **Round 15 (Quick shoulder shaping):** Crochet 2 sc, make 1 dec, and then repeat the sequence of (4 sc, 1 dec) about 3 times. Finish the round with 2 sc. **[Total: 20 sc]**
* **Round 16 (Reduction toward the neck):** Crochet 1 sc, make 1 dec, and repeat (2 sc, 1 dec) about 4 times. Finish by crocheting 1 sc. **[Total: 15 sc]**
> *Important technical detail:* When closing the last stitch of this Round 16, make the final color change to the **Skin Color** of our neck. You can now cut the white yarn.
**PART D: VISIBLE NECK AND SUPPORT POST (In Skin Color)**
From this moment on, we will work solely with the **Skin Color** yarn. This upper post will become the structure where we will fit the head later on.
* **Round 17 (Neck in BLO):** With your **Skin Color** yarn, crochet 15 sc taking only the back loop (BLO). **[Total: 15 sc]**
* **Round 18 (Visible neck):** Crochet 15 sc in a regular way taking both loops of the stitch. **[Total: 15 sc]**
*¡Key assembly and stuffing step!:* Stuff the torso very firmly. Insert the rigid support you have chosen (about 10 to 12 cm long) right into the geometric center of the torso, pushing it through the fiberfill toward the hip. The support should protrude approximately 4 cm above Round 18 of the neck. Make sure to stuff the sides of the neck very well and compactly so that the support does not shift.
* **Round 19 to Round 25 (The Neck Post – 7 rounds):** Crochet 15 sc in each round straight up, working around our rigid support. **[Total: 15 sc per round]**
*Workshop observation:* Do not add polyester fiberfill inside these last 7 rounds (the post). We want the rigidity to be provided by the internal support to keep the post thin, firm, and with a perfect fit.
* **Closure:** Upon completing the last stitch of Round 25, make 1 slip stitch in the next stitch to secure the tension. Cut the yarn leaving about 10 cm and make an invisible fasten off to hide the strand.
**EXPECTED RESULT AT THE END OF THE SECTION**
Excellent work! Upon concluding this section, you will have completed the entire base body of your amigurumi, with an ideal and super proportional height for a doll of about 30 cm.
The torso already features its black pants cuffs and hips that simulate the trousers, a clean transition at the waist toward a white t-shirt of 11 rounds in height, and a stylized neck in skin color that ends in a semi-rigid and thin tube (our post) of exactly 15 stitches in diameter by 7 rounds high. Thanks to the internal support, the body stands upright on its own, leaving it completely ready for us to start crocheting its arms and head in the following stages. Time to celebrate this great progress!
**SECTION 4: ARMS (Crocheted separately)**
**PIECE INTRODUCTION**
We are moving forward at a steady pace! In this section of the workshop, we are going to crochet both of our doll’s arms, which we will work on independently. To faithfully recreate that iconic aesthetic of the King of Pop in *Thriller*, we will make an awesome asymmetrical detail: the **Right Arm** will represent his iconic and unmistakable white glove, while the **Left Arm** will feature his bare skin-colored hand.
Both arms are crocheted from the bottom up, starting with the hands (which we will design in a simplified and rounded way so they look perfect with the chenille yarn). Then, through clean color changes, we will transition towards the black sleeves of the pants and t-shirt, leaving them ready to attach to the torso and be partially covered by his wonderful red jacket. Let’s get to work!
**MATERIALS AND TECHNICAL REQUIREMENTS**
* **Chenille Yarns:** White (for the glove), Skin Color (for the left hand), and Black (for the sleeves).
* **Stuffing:** Good quality polyester fiberfill (keep in mind that we will only use it to softly stuff the lower half of each arm).
* **Stitch marker:** Your indispensable companion to avoid losing your way on any round.
**ROUND-BY-ROUND INSTRUCTIONS**
**PART A: RIGHT ARM (The White Glove)**
We will start this little arm with our **White** yarn to shape the legendary glove.
* **Round 1 (Magic Ring):** With **White** yarn, crochet 6 sc inside your magic ring. **[Total: 6 sc]**
* **Round 2 (Increases):** Crochet 1 inc in each of the 6 stitches of the previous round. **[Total: 12 sc]**
* **Round 3 to Round 5 (3 straight rounds for the hand):** Crochet 12 sc in a regular way in each of these rounds. **[Total: 12 sc per round]**
* **Round 6 (Wrist shaping):** Crochet (2 sc, 1 dec) and repeat this sequence a total of 3 times. **[Total: 9 sc]**
*A little workshop trick:* Right when you are about to make the last single crochet of this round, make the color change to **Black** (closing the last loop of the stitch with the black strand). You can now cut the white yarn with peace of mind.
* **Round 7 (Glove edge in BLO):** With your new **Black** yarn, crochet 9 sc taking only the back loop (BLO). **[Total: 9 sc]**
*A design note:* Crocheting in BLO on this round will create a beautiful flat ridge that perfectly simulates the edge of the white glove and the beginning of the black sleeve.
*Stuffing instruction:* Take advantage of this moment to insert a little polyester fiberfill inside the white hand. Do it moderately to prevent the hand from losing that slender and stylized shape we are looking for.
* **Round 8 to Round 18 (Straight section of the sleeve – 11 rounds):** Crochet 9 sc in each round working in a normal way (taking both loops of the stitch). **[Total: 9 sc per round]**
*Stuffing advice:* Keep stuffing the little arm very lightly only up to Round 12. From Round 13 to Round 18, **DO NOT add any stuffing**. This is super important so that the upper part of the sleeve remains flat and flexible; this will facilitate the character’s signature poses and achieve a clean seam against the torso.
* **Round 19 (Shoulder decrease):** Crochet 1 sc, work 1 dec, crochet 3 sc, make 1 dec and finish with 1 sc. **[Total: 7 sc]**
* **Round 20 (Flat closure):** Flatten the upper opening of the arm, aligning the stitches face-to-face. Crochet 3 sc going through both layers of the fabric at the same time to seal the piece. Cut the black yarn leaving a length of about 25 cm for when we have to sew the arm to the torso.
**PART B: LEFT ARM (Bare Hand)**
For this arm, we will start by using the **Skin Color** yarn to represent our character’s bare hand.
* **Round 1 (Magic Ring):** With **Skin Color** yarn, crochet 6 sc inside the magic ring. **[Total: 6 sc]**
* **Round 2 (Increases):** Crochet 1 inc in each of the 6 stitches of the previous round. **[Total: 12 sc]**
* **Round 3 to Round 5 (3 straight rounds for the hand):** Crochet 12 sc in each round in a regular way. **[Total: 12 sc per round]**
* **Round 6 (Wrist shaping):** Crochet (2 sc, 1 dec) and repeat the sequence a total of 3 times. **[Total: 9 sc]**
*Technical detail:* When making the last single crochet of this round, make the color change to **Black** (closing the last loop of the stitch with your black strand). Cut the skin color yarn.
* **Round 7 (Wristline in BLO):** With your **Black** yarn, crochet 9 sc taking only the back loop (BLO). **[Total: 9 sc]**
*Stuffing instruction:* Place a little polyester fiberfill in the skin-colored hand, taking care not to exceed the amount.
* **Round 8 to Round 18 (Straight section of the sleeve – 11 rounds):** Crochet 9 sc in a regular way in each round (taking the complete stitch). **[Total: 9 sc per round]**
*Stuffing advice:* Follow exactly the same guideline as the right arm: put a light stuffing up to Round 12 and leave the rest of the sleeve free of fiberfill to guarantee the drape and flexibility of the limb.
* **Round 19 (Shoulder decrease):** Crochet 1 sc, work 1 dec, crochet 3 sc, make 1 dec and finish with 1 sc. **[Total: 7 sc]**
* **Round 20 (Flat closure):** Flatten the upper opening of the arm, aligning the stitches face-to-face. Crochet 3 sc going through both layers of fabric at the same time to close the piece. Cut the black yarn leaving an approximate length of 25 cm for the final seam.
**EXPECTED RESULT AT THE END OF THE SECTION**
Excellent! Upon concluding this section, you will have **two arms of identical length (20 rounds high each)** ready.
The Right Arm will showcase that iconic and well-defined white glove at its lower end, while your Left Arm will feature a skin-colored hand in perfect harmony with the doll’s neck. Both little arms feature their black sleeves of a slender thickness of 9 stitches and end with a flat and sealed upper edge of 3 stitches, which will make it incredibly easy to achieve a super neat seam at shoulder height during the assembly phase. We almost have the entire structure ready!
**SECTION 5: HEAD AND EARS**
**PIECE INTRODUCTION**
We have reached one of the parts of the project with the most personality! In this section, we are going to crochet our doll’s head and ears completely independently.
We will begin the head from the crown, distributing increases very strategically to achieve that subtle oval shape that suits him so well. Its lower base hides a brilliant design secret: we will incorporate a super clean internal cavity or channel. It is calculated down to the millimeter to receive the 15-stitch post of the body that we already crocheted, without the need to use stuffing in that area. This guarantees that the head fits like a glove and will never wobble!
For their part, the ears are crocheted separately and you will see that they are slightly larger than usual; we do this on purpose to make sure they still look beautiful and well-placed when we graft his curly hair in the next section. Prepare your materials and let’s bring his face to life!
**MATERIALS AND TECHNICAL REQUIREMENTS**
* **Chenille Yarn:** Skin Color (for the head and ears).
* **Safety eyes:** 10 mm or 12 mm in diameter (choose the one you like best based on the expression you want to give him).
* **Stuffing:** High-density polyester fiberfill.
* **Cavity support:** A stitch marker and a little patience to keep the internal cavity completely clean and free of fiberfill.
* **Embroidery threads:** Black color (if you want to define the eyes more or make subtle eyelashes) and dark brown or black color (to shape his mouth and nose).
**ROUND-BY-ROUND INSTRUCTIONS: THE HEAD (In Skin Color)**
We will work in a continuous spiral from the crown toward the base. Remember to use a crochet hook suitable for your tension with the chenille yarn.
* **Round 1 (Crown):** Crochet a magic ring of 6 sc. **[Total: 6 sc]**
* **Round 2 (Increases):** Make 1 inc in each of the 6 stitches of the previous round. **[Total: 12 sc]**
* **Round 3 (Progression):** Crochet the sequence of (1 sc, 1 inc) about 6 times. **[Total: 18 sc]**
* **Round 4 (Progression):** Crochet (2 sc, 1 inc) and repeat it 6 times. **[Total: 24 sc]**
* **Round 5 (Progression):** Crochet (3 sc, 1 inc) and repeat the sequence 6 times. **[Total: 30 sc]**
* **Round 6 (Progression):** Crochet (4 sc, 1 inc) about 6 times in total. **[Total: 36 sc]**
* **Round 7 (Oval formation – start of straight sections):** Crochet (5 sc, 1 inc) and repeat it 6 times. **[Total: 42 sc]**
* **Round 8 to Round 14 (Straight rounds of height – 7 rounds):** Crochet 42 sc in a regular way in each of these rounds, without making any increases. **[Total: 42 sc per round]**
* **Round 15 (Cheek shaping):** Crochet 10 sc, then crochet (1 sc, 1 inc) repeated 3 times in the area that will be the right cheek, continue with 10 central sc, crochet (1 inc, 1 sc) repeated 3 times in the area of the left cheek, and finish with 10 sc. **[Total: 48 sc]**
* **Round 16 and Round 17 (Facial stabilization rounds):** Crochet 48 sc in a regular way in each of these two rounds. **[Total: 48 sc per round]**
**EXACT MOMENT FOR THE PLACEMENT OF EYES AND FACIAL FEATURES!**
I suggest taking a short pause here so we can prepare his face. It is much more comfortable and neat to work on the details at this time:
1. **Safety eyes:** Position the safety eyes between rounds 14 and 15. Make sure they are placed with an exact separation of 8 visible stitches between them, and that they are well-centered horizontally relative to the cheek increases you just crocheted in Round 15. Once you are happy with how they look, secure their washers very firmly inside.
2. **Nose embroidery:** With a small piece of skin-colored chenille yarn (or a thick cotton thread of the same shade), make 3 horizontal passes spanning about 2 stitches wide. Do this exactly one round below the eyes (on Round 16) and centered between both.
3. **Mouth embroidery:** Using your yarn needle and fine dark brown or black embroidery thread, embroider a thin, straight line about 2 stitches wide over Round 18. We want to give him an elegant, neutral, and mysterious expression.
* **Round 18 (First base reduction):** Crochet (6 sc, 1 dec) and repeat it a total of 6 times. **[Total: 42 sc]**
* **Round 19 (Second base reduction):** Crochet (5 sc, 1 dec) repeated about 6 times. **[Total: 36 sc]**
* **Round 20 (Third base reduction):** Crochet (4 sc, 1 dec) and repeat it 6 times. **[Total: 30 sc]**
* **Round 21 (Fourth base reduction):** Crochet (3 sc, 1 dec) about 6 times in total. **[Total: 24 sc]**
*A good stuffing tip:* Start stuffing the upper part of the head firmly with the polyester fiberfill. Shape the cheek area with love, pushing the stuffing with your fingers toward the walls of the fabric so those cute cheeks stand out.
**CONSTRUCTION OF THE INTERNAL SOCKET CAVITY**
Starting from the next round, we will begin structuring the “double bottom” or internal cavity that will receive the neck post. It is like crocheting a cylinder that projects toward the inside of the head. You will see that it is incredibly easy.
* **Round 22 (Formation of the internal cavity step in BLO):** Crochet the sequence of (2 sc, 1 dec) a total of 6 times taking only the back loop (BLO). **[Total: 18 sc]**
*A technical note from the workshop:* Crocheting in BLO on this round creates a kind of “hinge” or horizontal step. From here on, we will gradually push the fabric we continue to make toward the inside of the head to shape this receiving channel.
* **Round 23 to Round 29 (The internal wall of the socket channel – 7 straight rounds):** Crochet 18 sc in each of these rounds, working straight up. **[Total: 18 sc per round]**
*PAY CLOSE ATTENTION WHEN STUFFING!:* While you crochet these rounds, finish stuffing the sides of the head firmly on the outside of the cavity you are raising. It is of vital importance that the central channel (the 18 stitches you are crocheting) remains completely empty, clean, and free of fiberfill so that the neck post fits without any issues.
* **Round 30 (Closure of the internal cavity):** Crochet (1 sc, 1 dec) and repeat it about 6 times. **[Total: 12 sc]**
* **Round 31 (Final closure):** Make 6 decreases in a row. **[Total: 6 sc]**
Cut the yarn leaving a tail. With the help of your yarn needle, pass the yarn through the 6 front loops of the remaining stitches to close the fabric completely. Hide the remaining tail by weaving it inside the walls of the head.
Now, with your finger or the blunt end of a thick pencil, carefully push the 18-stitch crocheted channel toward the inside of the head. That’s it! You will have a perfect cylindrical opening of 7 rounds in depth.
**THE EARS (Make 2 independent pieces in Skin Color)**
We will crochet them with the same skin color yarn and hook that we used for the head.
* **Round 1 (Magic Ring):** Crochet 6 sc inside a magic ring, but **attention: DO NOT close the round**. **[Total: 6 sc]**
* **Round 2 (Shape into a half-moon):** Ch 1 to turn the work and turn the piece to crochet back. Make 1 inc in each of the 6 stitches. **[Total: 12 sc]**
* **Round 3 (Stabilization of the outer edge):** Ch 1 to turn and rotate your piece again. Crochet 12 slip stitches (sl st) along the curved edge; this will add a lovely firmness to the outline and prevent the ear from losing its shape.
Cut the yarn leaving a length of about 20 cm for when we have to sew them to the head.
**ASSEMBLY OF THE EARS**
* **Exact placement of the ears:** Pin your ears to the sides of the head. The upper edge of the ear should align horizontally with Round 14 of the head (that is, right at the level of the upper edge of the safety eyes). As for the horizontal distance, position them leaving exactly 6 single crochets backward from the outer corner of each eye. Sew the straight base of each ear with invisible and firm stitches with lots of patience.
**EXPECTED RESULT AT THE END OF THE SECTION**
Excellent work! Upon concluding this section of the workshop, you will have completed a **beautiful head with a super subtle oval shaping and well-defined cheeks**. Additionally, it will already have its safety eyes secured in place and its features embroidered in a clean and very neat way.
At the base of the head, you will notice that you have been left with a **clear internal cavity or channel of exactly 18 stitches in diameter and 7 rounds deep**, ready to be firmly attached over the body’s neck post. And, as if that weren’t enough, you already have his **two wide half-moon ears** sewn symmetrically to the sides, waiting to stand out with plenty of style from amidst the afro hairstyle we will add in the next section. Congratulations on this beautiful progress!
**SECTION 6: CURLY HAIR**
**PIECE INTRODUCTION**
Get ready for one of the most fun and coolest parts of the whole doll! In this section, we are going to create the iconic curly hairstyle of the King of Pop himself. To achieve this, we will first construct a base “cap” that will fit his little head like a glove. On this foundation, we will gradually crochet curly strands of different lengths to achieve that natural, fluffy, and characteristic afro volume from the unforgettable *Thriller* era.
To make the curls, we will use a beautiful and super simple technique: we will crochet chains and work back down making increases on them. You will see that, by doing this, the chenille yarn magically twists on its own, creating super voluminous and perfect ringlets without us having to use any other tool. Let’s fill him with curls!
**BASE CAP PATTERN (Black Color)**
This piece will be the invisible foundation that will support the entire hairstyle. We are going to work it in a continuous spiral using your **Black** yarn.
* **Round 1:** Crochet a magic ring of 6 sc. **[Total: 6 sc]**
* **Round 2:** Make 1 inc in each of the 6 stitches of the previous round. **[Total: 12 sc]**
* **Round 3:** Crochet the sequence of (1 sc, 1 inc) about 6 times. **[Total: 18 sc]**
* **Round 4:** Crochet (2 sc, 1 inc) and repeat it 6 times. **[Total: 24 sc]**
* **Round 5:** Crochet (3 sc, 1 inc) and repeat the sequence 6 times. **[Total: 30 sc]**
* **Round 6:** Crochet (4 sc, 1 inc) about 6 times in total. **[Total: 36 sc]**
* **Round 7:** Crochet (5 sc, 1 inc) and repeat it 6 times. **[Total: 42 sc]**
* **Round 8 to Round 10 (Straight rounds of height):** Crochet 42 sc in a regular way in each of these three rounds. **[Total: 42 sc per round]**
*Upon completing your Round 10, make a slip stitch in the next stitch to close in a neat way. Cut the yarn leaving a very long tail (about 50 cm, approximately), since we will use it to sew the cap to the head later on.*
**DISTRIBUTION OF THE CURLS ON THE CAP**
I am going to tell you a great design secret so that the hair looks spectacular: since chenille yarn is chunky and heavy, if we were to crochet a curl in every stitch of the base, the hair would end up excessively heavy and awkward to handle. To avoid this and achieve a super fluffy, natural, and moving afro volume, we will systematically skip base stitches while we crochet the curls:
* **Crown Zone (Rounds 1 to 3):** Here we will crochet **Short Curls (S)**. In the 6 stitches of Round 1, crochet a curl in each stitch. Then, in Rounds 2 and 3, crochet following the sequence of: (1 Short Curl, skip 1 base stitch) around the entire round. **[Total: 21 Short Curls in this zone]**
*How to crochet the Short Curl (S):* Ch 12 and work back down crocheting 2 sc in each chain starting from the second chain from the hook.
* **Middle Head Zone (Rounds 4 to 6):** In this section we will crochet **Medium Curls (M)**. Follow the sequence of: (1 Medium Curl, skip 1 base stitch) in all the stitches of these three rounds. **[Total: 45 Medium Curls in this zone]**
*How to crochet the Medium Curl (M):* Ch 18 and work back down crocheting 2 sc in each chain starting from the second chain from the hook.
* **Lower and Side Zone (Rounds 7 to 10):** Here we will use **Long Curls (L)**. To give it a beautiful drape, we will crochet ringlets only on Round 7 and on Round 10 (which is our final edge) following the sequence of: (1 Long Curl, skip 1 base stitch). We will leave Rounds 8 and 9 completely empty (without crocheting curls), as they will be covered naturally by the curls falling from the upper rounds. **[Total: 42 Long Curls in this zone]**
*How to crochet the Long Curl (L):* Ch 24 and work back down crocheting 2 sc in each chain starting from the second chain from the hook.
And that’s it! Following this strategic distribution, we will achieve a total of **108 curls** perfectly distributed. You will get that ideal afro density, with lots of movement and super light thanks to the air between each curl.
**BANGS AND SIDEBURNS**
To ensure the hair integrates perfectly with the facial features, we will work on these two very characteristic details of the singer:
**Bangs (Make 3 strands)**
* **Placement:** Attach your black yarn directly in the center of the front edge of Round 10 of the cap.
* **Instructions:** Crochet 3 independent chains of 8 stitches long each. On each of them, work back down crocheting 2 sc in each chain. At the end, you will see how these cute strands fall gently over our doll’s forehead.
**Sideburns (Make 2 independent pieces)**
* **Instructions:** Crochet a chain of 5 stitches. Work back down crocheting 2 sc in each chain. Cut the yarn leaving a tail for sewing.
* **Placement:** Sew each of the sideburns to the sides of the cap, positioning them right in the zone where they align with the upper part of the ears we sewed in the previous section.
**HAIR ASSEMBLY**
1. **Positioning:** Position the base cap on your amigurumi’s head. Make sure the front part is well-centered over the forehead, with the bangs falling in place.
2. **Sewing:** With the help of your yarn needle and the long strand we left when finishing the cap, sew the entire edge to the head with invisible and firm stitches. Check that the bangs are well-positioned before making the final stitches.
3. **Arranging the curls:** It’s time to play hairdresser! Style and arrange the curls with your own fingers, moving them gently from the center outward. You will see how the short curls on the crown provide a nice height, while the long ones at the nape and sides give it that very special eighties drape and volume.
4. **Securing details:** If while arranging the curls you notice that a small piece of skin color shows and you don’t like it, don’t worry! Simply take a nearby curl and, with a needle and black thread, make a small invisible stitch at its base to secure it to the head and cover the gap. You do not need to sew down all the curls; let most of them float freely to maintain that very fluffy and natural silhouette.
**EXPECTED RESULT**
The result is a true beauty! When you finish this section, you will have completed a black, dense head of hair, with an impeccable structure and full of movement.
Thanks to the use of chain curls in three different sizes, your doll will sport an afro hairstyle with a natural and super fluffy volume that covers the entire head completely. The delicate bangs over the forehead and the sideburns at the sides will frame his face ideally, achieving that legendary eighties look with a finish worthy of a crochet professional. How proud to see him take shape!
**SECTION 7: THRILLER JACKET (Independent Garment)**
**PIECE INTRODUCTION**
The time has come to crochet the true star of the wardrobe! In this section, we will bring to life the iconic red jacket that the King of Pop immortalized in the famous *Thriller* music video.
We will design it as a completely independent garment so that you can dress it over your doll’s torso. You will see that it is perfectly adapted to the properties of chenille yarn, reducing unnecessary volume to achieve a super fitted, stylized, and very flattering fit. In addition, we will incorporate its high neck in black, the waistband, the cuffs, and those emblematic black “V” shaped stripes on the chest that make it recognizable at first glance. Get your crochet hooks ready because this piece is a total joy!
**SPECIFIC MATERIALS**
* **Chenille Yarn:** Red color (for the main body of the jacket) and Black color (to crochet the waistband, the collar, the cuffs, and the decorative stripes).
* **Crochet Hook:** 3.5 mm or 4.0 mm. Super important: make sure to use the same hook size you chose to crochet the body; this will guarantee that the garment fits perfectly.
* **Tools:** A wide-eyed yarn needle (essential for joining the shoulders and sewing the details) and a fine sewing needle with black sewing thread.
**JACKET BODY PATTERN**
We will crochet this piece by working in rows back and forth, moving from the bottom up. At the end of each row, remember to crochet 1 turning chain to give height (which does not count as a stitch) and turn your work to continue.
**Part A: Bottom Waistband (In Black Color)**
* **Row 1:** Ch 27. Starting in the second chain from your hook, crochet 26 sc. **[Total: 26 sc]**
* **Row 2:** Ch 1, turn and crochet 26 sc. When working the last stitch of this row, change color to **Red** (closing the last loop with the new strand) and cut the black yarn. **[Total: 26 sc]**
**Part B: The Torso (In Red Color)**
* **Row 3 to Row 8 (6 straight rows of height):** With **Red** yarn, ch 1, turn, and make 26 sc in each of these rows. **[Total: 26 sc per row]**
**Part C: Separation for Armholes and Shoulders (In Red Color)**
To naturally create the lateral openings through which the arms will pass, we are going to divide the fabric and work three upper panels independently:
**1. Right Front**
* **Row 9:** Ch 1, turn, and crochet only 5 sc. We will leave the remaining stitches of Row 8 unworked for now. **[Total: 5 sc]**
* **Row 10:** Ch 1, turn, and make 5 sc. **[Total: 5 sc]**
* **Row 11 (Shoulder reduction):** Ch 1, turn, crochet 3 sc, and make 1 dec. **[Total: 4 sc]**
* **Row 12:** Ch 1, turn, and crochet 4 sc. Cut the yarn leaving a long tail of about 15 cm to use for sewing the shoulders.
**2. Red Back**
Return to the unworked stitches of Row 8. Skip 2 stitches (these will form the first armhole opening) and attach your **Red** yarn to the next available stitch.
* **Row 9:** Ch 1, and crochet 12 sc across the back, leaving the remaining stitches of the row unworked. **[Total: 12 sc]**
* **Row 10 to Row 12:** Ch 1, turn, and make 12 sc in each row. **[Total: 12 sc per row]**
* Cut the red yarn and make an invisible fasten off to secure the work.
**3. Left Front**
Now we position ourselves at the final stitches of Row 8. We will skip 2 stitches from the end of the Back (which correspond to stitches 20 and 21). Attach your **Red** yarn to stitch number 22 (the next available stitch of Row 8) to crochet in the direction of the outer left edge of the panel, working the final 5 sc of the section.
* **Row 9:** Ch 1, and make the final 5 sc of the section. **[Total: 5 sc]**
* **Row 10:** Ch 1, turn, and make 5 sc. **[Total: 5 sc]**
* **Row 11 (Shoulder reduction):** Ch 1, turn, make 1 dec, and finish by crocheting 3 sc. **[Total: 4 sc]**
* **Row 12:** Ch 1, turn, and crochet 4 sc. Cut the yarn leaving a tail of about 15 cm long for sewing.
**SHOULDER ASSEMBLY AND DIRECT SLEEVES**
**Step 1: Shoulder Seam**
With the help of your yarn needle and the 15 cm strands we left on the front panels, sew the 4 shoulder stitches of the Right Front to the first 4 stitches of the Back invisibly. Repeat the same process, joining the 4 shoulder stitches of the Left Front to the last 4 stitches of the Back.
You will see how great it looks! By doing this, you will have an open central neck of 4 stitches and two perfect openings on the sides for the sleeves.
**Step 2: The Sleeves (Crocheted directly on the armhole)**
To achieve a super clean, professional finish and avoid those thick, uncomfortable seams that sometimes make dressing the doll difficult, we will crochet the sleeves directly over the armhole openings:
* **Round 1:** With your **Red** yarn, attach to the lower underarm stitch of one of the armholes. Crochet 10 sc distributed evenly around the entire edge of the opening. From here on, we will work in a continuous spiral (don’t forget to place your stitch marker on the first one!). **[Total: 10 sc]**
* **Round 2 to Round 10 (9 red rounds):** Crochet 10 sc in each round in a regular way. **[Total: 10 sc per round]**
* **Round 11 (Cuff in BLO):** Change color to **Black** in the last step of the last stitch. Crochet 10 sc taking only the back loop (BLO). **[Total: 10 sc]**
* **Round 12 (Ribbed cuff):** Crochet 10 sc in the normal way, taking both loops of the stitch. **[Total: 10 sc]**
* To finish, make 1 sl st in the next stitch to close, cut the yarn, and hide it carefully on the inside of the sleeve. Repeat this entire process on the other armhole to crochet the second sleeve.
**BLACK FINISHES AND DETAILS**
**1. High Collar (Black Color)**
Attach your **Black** yarn to the upper corner of the right front neckline.
* **Row 1:** Crochet 12 sc distributed as follows: work 4 sc vertically along the side edges of Rows 9 to 12 of our Right Front, crochet 4 sc across the central unworked stitches left on the Back, and work the last 4 sc vertically along the side edges of Rows 12 to 9 of the Left Front. **[Total: 12 sc]**
* **Row 2 and Row 3:** Ch 1, turn, and make 12 sc. **[Total: 12 sc per row]**
Close with a slip stitch, cut the yarn, and hide all the tails super neatly inside the black collar using your yarn needle.
**2. Black “V” Stripes (Make 2 independent strips)**
* **Decorative strip:** With your **Black** yarn, crochet a chain of 14 ch. Starting in the second chain from your hook, work back down crocheting 13 slip stitches (sl st). Cut the yarn leaving a long tail of about 25 cm for sewing.
* **Placement on the jacket:** Thread the yarn tail into your yarn needle. Sew one end of each strip to each shoulder of the jacket (very close to the black collar). Then, bring the other end of both strips toward the exact center of the chest and sew them right over stitch number 13 of Row 5. By joining them there in a perfect vertex, you will see how the iconic “V” of the *Thriller* jacket is formed symmetrically and spectacularly.
**DRESSING INSTRUCTIONS AND FINAL CONFIGURATION**
1. Gently slide your doll’s arms inside the sleeves of the jacket. Since the upper part of the arms (which we crocheted in Section 4) is flat and flexible, you will see that they go in with total ease without the chenille yarn bunching or getting stuck.
2. Arrange the jacket with your hands over the doll’s shoulders. It is designed to remain subtly open at the front, allowing the white t-shirt (Section 3) to show underneath and maintain that very characteristic and legendary look of the character.
3. *My workshop advice:* I suggest subtly securing the jacket to the body by making a couple of invisible stitches with regular red thread on the inside of the fronts. This way, we ensure that the high collar and the lapels of the jacket maintain their impeccable drape and perfect position forever. A wonderful bit of sewing that makes all the difference!
**SECTION 8: MICROPHONE**
**PIECE INTRODUCTION**
We have reached the crowning glory of our project! In this final section, we are going to crochet our doll’s star accessory: a classic hand microphone, super stylized and ready for his big live performances.
To make it perfect and very durable, we will crochet it continuously from the top down, starting from the grey mesh of the head toward the black handle. This way, we will avoid making seams that could weaken the accessory or cause it to bend. Thanks to a simple internal reinforcement and the exact proportion of its stitches, the microphone will maintain a straight and flawless line, fitting completely naturally into that right hand that we crocheted with its iconic white glove. Let’s get to work with this last detail!
**SPECIFIC MATERIALS**
* **Chenille Yarn:** Dark Grey or Silver Grey (for the head or grille of the microphone) and Black (for the handle).
* **Crochet Hook:** 3.5 mm or 4.0 mm.
* **Structural reinforcement:** A pipe cleaner folded in half or a piece of thick plastic-coated wire exactly 8 cm long.
* **Stuffing:** A pinch of polyester fiberfill to give body to the head of the microphone.
**COMPLETE MICROPHONE PATTERN**
We will crochet this piece in a continuous spiral from the top down. As I always remind you in our workshop, place your stitch marker in the first stitch of each round to avoid losing your way.
**Part A: The Grille (In Grey Color)**
* **Round 1 (Magic Ring):** With **Grey** yarn, crochet 6 sc inside your magic ring. **[Total: 6 sc]**
* **Round 2 (Increases):** Make 1 inc in each of the 6 stitches of the previous round. **[Total: 12 sc]**
* **Round 3 and Round 4 (Straight rounds of the grille):** Crochet 12 sc in a regular way in each of these two rounds. **[Total: 12 sc per round]**
* **Round 5 (Grille base reduction):** Crochet the sequence of (2 sc, 1 dec) a total of 3 times. Right when finishing the last step of your last stitch, change color to **Black** (closing the last loop with the new strand) and cut the grey yarn. **[Total: 9 sc]**
*Time to stuff the grille!:* Insert a small tuft of polyester fiberfill inside the grey head to give it a nice volume and firmness. Try not to overstuff so that the chenille fabric does not stretch open and show the fiberfill.
**Part B: The Handle (In Black Color)**
From this moment on, we will continue crocheting straight up with our **Black** yarn.
* **Round 6 (Start of the handle in BLO):** With **Black** yarn, crochet 9 sc taking only the back loop (BLO) of Round 5. **[Total: 9 sc]**
*A beautiful visual detail:* This round in BLO will create a very marked horizontal ridge that will cleanly separate the grey spherical head from the straight body of the black handle.
* **Round 7 and Round 8 (Grip sections):** Crochet 9 sc in a regular way, taking both loops of the stitch as you usually do. **[Total: 9 sc per round]**
*The internal reinforcement trick!:* Upon completing Round 8, it is the exact moment to insert our folded pipe cleaner or the 8 cm plastic-coated wire inside the piece, pushing it gently toward the head we already stuffed. **Attention: DO NOT add polyester fiberfill inside the black handle**. The rigidity of the wire or pipe cleaner is more than enough to keep the handle firm, thin, and perfect for the gloved hand to wrap around it easily.
* **Round 9 to Round 14 (Handle body – 6 straight rounds):** Crochet 9 sc in a regular way in each of these rounds, working around our exposed internal support. **[Total: 9 sc per round]**
* **Round 15 (Bottom closure):** Crochet the sequence of (1 sc, 1 dec) a total of 3 times taking both loops of the stitch. Doing it in a regular way will provide greater firmness to the end and prevent the chenille yarn from suffering or getting damaged when rubbing against the rigid support. **[Total: 6 sc]**
**FINISHING AND ATTACHMENT INSTRUCTIONS**
**1. Closing the bottom end**
* Upon completing your Round 15, make 1 slip stitch in the next stitch to secure the tension. Cut the black yarn leaving a tail of about 20 cm.
* Thread your yarn needle with the remaining black yarn. Pass it only through the front loops of the 6 remaining stitches and pull firmly and gently to close the handle opening completely.
* Insert the needle right through the center of the closure you just made, bring it out through any side of the black handle, tie a very discreet knot, and weave the yarn tail inside the fabric before cutting it flush.
**2. Permanent attachment to the right hand (White Glove)**
If you want your doll to hold the microphone with the strength of a true artist and never drop it while you have him on display, I suggest following these simple steps:
* Position the microphone vertically on the palm of the right hand (the one with the white glove).
* Use a fine needle with regular common white sewing thread (or a very thin strand of white cotton yarn) so that the seam completely blends into the glove.
* Make 3 to 4 invisible and very firm stitches going through the back of the palm of the white glove and wrapping around the black handle of the microphone from behind. Tension the thread gently so that the doll’s hand closes slightly around the accessory, taking care not to deform the fluffy volume of our chenille yarn.
* Finish with a very hidden knot between the glove and the microphone and hide the remaining tail inside the hand. I assure you it will look display-case ready!
**SECTION 9: ASSEMBLY AND FINAL DETAILS**
**PIECE INTRODUCTION**
We have reached the final stretch of our workshop! In this last section of the pattern, we will finally bring our doll to life by joining each of the pieces we crocheted with so much love in the previous stages.
A neat, well-symmetrical, and orderly assembly is the great secret to achieving a professional finish, which captures all the essence, magic, and dynamism of the unique King of Pop. Patiently follow these detailed step-by-step instructions to ensure the structure remains very firm, achieving a flawless presentation worthy of your display case or collection. Let’s bring him to life!
**STEP-BY-STEP ASSEMBLY INSTRUCTIONS**
I recommend strictly following this assembly order so that it is much more comfortable for you to sew and manipulate the doll without other pieces getting in your way:
**1. Joining the Head to the Body (Post and Socket System)**
* **Procedure:** Take the head (which we crocheted in the Head and Ears section) and locate that cylindrical opening of the internal cavity in BLO. Now, fit the piece by firmly pushing the head downward, inserting the body’s neck support post inside the cavity until the skin color of the neck is well covered. This way, we will join the base perfectly.
* **Alignment:** Before making any stitches, look at him from the front. Make sure the eyes are facing perfectly forward, in a natural and very straight position.
* **Sewing:** With your yarn needle and a strand of skin-colored yarn, work an invisible seam joining the stitches of Round 22 of the head (the outer part of the BLO step) with the stitches of the body’s neck (Round 18). Work firm stitches around the entire circumference and, when finished, weave the remaining tail inside the torso. You will see that it remains super firm without any wobbling!
**2. Checking the Ears**
* **Procedure:** Check the alignment of the ears (which we worked on in the Head and Ears section). If you decided to leave their sewing for this final phase, this is the moment to position them symmetrically on the sides of the head.
* **Sewing:** Use the 20 cm strand we left when crocheting each ear to sew its straight base flat and very firmly against the head.
**3. Positioning and Adjusting the Hair**
* **Procedure:** Place the black hair base cap (from the Hair section) over the head, covering the crown and the nape of the neck very well. Align it carefully so that the 3 strands of the bangs fall over the forehead completely naturally.
* **Sewing the Cap:** With your yarn needle and the long black strand we left at the base of the cap, sew the entire lower edge to the head with invisible stitches all around its contour. This will guarantee that the hair does not shift out of place.
* **Styling the Curls:** Work your stylist magic! Arrange the curls with your fingers: position the shortest curls on the crown to give that fluffy upward volume, the medium ones on the sides, and the long ones at the back for the drape.
* **Securing Curls:** I suggest making a couple of small, invisible stitches with regular black sewing thread to secure some of the medium curls around the ears so they stand out gracefully, also ensuring that the skin color of the head does not show between the loops.
**4. Sewing the Arms to the Torso**
* **Procedure:** Position both arms (which we made in the Arms section) at the sides of the body. We must sew them at exactly the same height, over Round 16 of the torso (just one round below the skin-colored neck line).
* **Orientation:** Align the **Right Arm** (the one with the white glove) so that the simulated thumb or curvature points forward, as it must be prepared to hold his microphone. Align the **Left Arm** (the skin-colored hand) with the palm facing slightly toward the thigh.
* **Sewing:** Using the 25 cm black strand from each arm, sew the flat upper 3-stitch edge firmly to the torso. Secure the stitches very well so that the arms lay flat at the sides and drape with total elegance, preventing them from sticking up awkwardly.
**5. Dressing and Adjusting the Thriller Jacket**
* **Procedure:** Very gently, slide the doll’s hands and arms through the sleeves of the jacket (which we crocheted in Section 7). Slide it slowly; you will see that the black cuffs of the jacket should settle neatly right over the BLO ridge of the doll’s wrists.
* **Arranging:** Position the jacket over his shoulders. Fold the black high collar outward and make sure the front falls open at the chest in a “V” shape, allowing that beautiful white t-shirt underneath to show off.
* **Securing:** To ensure the lapels of the jacket permanently maintain that highly characteristic position, I advise making a small and discreet invisible stitch with regular red sewing thread, joining the inner lapels of the jacket directly to the white chest area.
**6. Placing the Microphone (Right Hand)**
* **Procedure:** Take our microphone (from Section 8) and fit the black handle inside the palm of his right hand (the one with the white glove). Let the bottom end of the handle protrude subtly below the hand.
* **Fixed Option (The one I recommend most for display):** Thread your fine needle with white sewing thread and make 3 or 4 very discreet stitches joining the glove to the black handle. This way, it will remain permanently and super securely fixed.
* **Detachable Option:** If you prefer to be able to remove and place it, carefully fold the simulated fingers of the white glove around the black handle. Thanks to the flexibility of the pipe cleaner or internal wire we placed inside the microphone, it will act as a perfect holding clamp.
**7. Final Details and Embroidery**
* **Face:** Give his expression a final look. Verify that the embroidered nose (Round 16, 2 stitches wide) and mouth (Round 18, 2 stitches wide) maintain their neutral, thin, and elegant line. Pass a soft brush or a lint roller to remove any residue of chenille from the face.
* **Jacket:** Make sure the black “V” stripes on the chest are taut and firmly sewn over the red body in the correct diagonal (from each shoulder to the exact center of Row 5).
**💡 PROFESSIONAL ADVICE FOR WORKING WITH CHENILLE**
When pulling on the strands to tighten the seams of your pieces, do so very gently and progressively. Chenille yarn is super fluffy and soft, but precisely because of that texture, it can shed its fibers (lose fluff) or even snap if subjected to excessive friction against the eye of the yarn needle.
*If you notice that you need to make a seam that requires a lot of strength or tension, I recommend using a regular cotton thread of the same color instead. It’s a lifesaver workshop trick that will keep your pieces intact!*
The King of Pop Amigurumi: A Final Bow
You Did It
The King of Pop once said that the greatest performance is the one that comes straight from the heart. And that is exactly what you have just completed. Every magic ring, every invisible decrease, every carefully placed curl was an act of dedication — a small tribute sewn stitch by stitch to one of the most extraordinary artists the world has ever known.
More Than a Doll
What sits in your hands right now is more than yarn and fiberfill. It is a handmade celebration of a legacy that continues to inspire millions of people around the world. The Thriller jacket, the lone white glove, the signature microphone pose — you recreated all of it with nothing but a hook, some thread, and your own patience and skill.
Share the Magic
Now it is time to show your work. Share it, gift it, display it proudly. The crochet community thrives on creativity and passion, and your finished piece deserves to be seen. Tag your photos, inspire other makers, and keep the spirit of the greatest entertainer alive — one amigurumi at a time.
The Music Never Stops
And neither should you. Keep creating.
💬 Found Something? Let Us Know!
Hey there, fellow maker! 🧶
This pattern was crafted with a whole lot of love, late nights, and more than a few cups of coffee — but that does not mean it is perfect. Crochet patterns are living documents, and sometimes a stitch count slips through, a round gets mislabeled, or an instruction that made perfect sense in our heads turns out to be a little confusing in practice.
If at any point while working through this pattern you notice something that does not add up — a stitch count that feels off, a step that seems to be missing, or an instruction that left you scratching your head — please do not stay silent! Drop a comment below and let us know exactly where you got stuck and what seemed unclear.
Your feedback is not just welcome here. It is genuinely invaluable. Every comment you leave helps us make this pattern cleaner, clearer, and more enjoyable for every maker who comes after you.
There are no silly questions and no wrong observations. You are the ones actually working this pattern with your hands, and that makes your experience the most important quality check of all.
Together we make it better — stitch by stitch. 🩷

Spanish version of this pattern
Here’s another design from the King of Pop
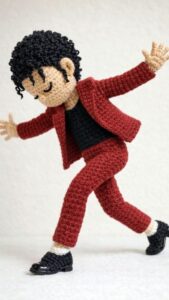
Video tutorial for knitting another design inspired by the King of Pop
Easy and quick knitting pattern for Michael found on Etsy
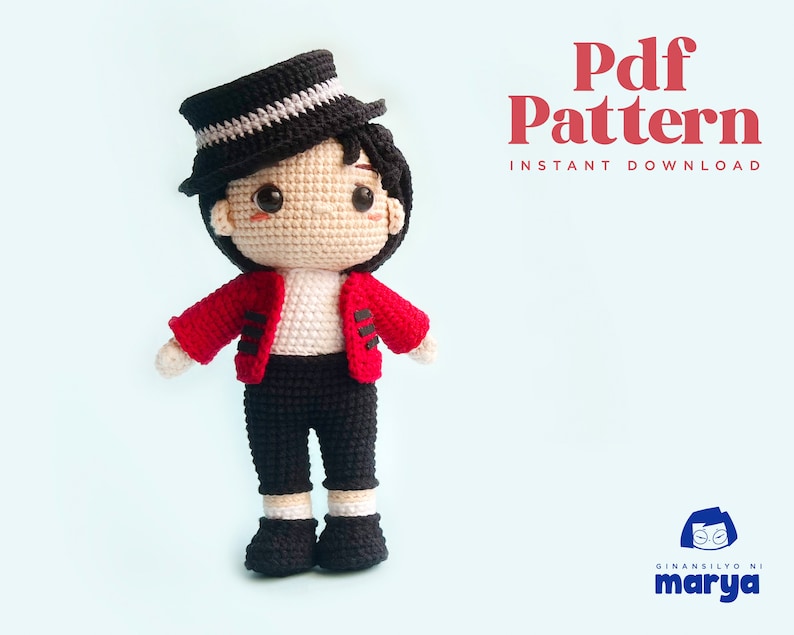
Affiliate Disclaimer:
“This post may contain affiliate links. If you purchase through these links, I may earn a small commission at no extra cost to you. This helps support the creation of free crochet patterns and tutorials. Thank you for your support!”
Discover more crochet patterns, free downloads, and premium PDFs on Ko-fi.
where did you find those eyes? those are perfect
The ears for the Michael Jackson King of Pop do not look like your picture. Could there be a mistake on your pattern? It says magic ring ch 1, 5 sc do not close, leave as a half moon. Your picture looks like there is more rows. Please help.
Thank you,
Donna Landreth
Hi Donna,
Thank you so much for pointing that out and for taking the time to compare the pattern with the photo.
You were absolutely right. The original ear instructions were too simple and did not accurately match the ears shown in the finished doll. I have since reviewed and corrected the pattern, and the updated version now includes a more detailed ear that better reflects the final design.
Thank you again for your careful feedback. It helps me improve my patterns and make them easier for everyone to follow.
Happy crocheting!
Hilando Ideas