
Meet your Architect Doll, a stylish amigurumi project designed for crochet lovers who enjoy detailed and character-driven creations. This pattern brings a professional architect to life with charming accessories like a rolled blueprint, ruler, and tailored blazer, all carefully crafted to enhance realism and personality. Perfect for intermediate crocheters, the design focuses on balanced proportions, clean construction, and clear step-by-step instructions that make the process smooth and enjoyable. You’ll work through spiral rounds, simple shaping, and color changes while building a polished miniature figure. Ideal for gifting or display, this architect doll is a creative and rewarding addition to any amigurumi collection.
Meet Your Architect Doll
Creating your very own Architect Doll is a delightful journey into the world of amigurumi. This project combines creativity, attention to detail, and a love for miniature crafting. Perfect for intermediate crocheters, this doll captures the essence of a professional architect with accessories like a rolled blueprint, ruler, and stylish blazer. By following this pattern, you will bring to life a charming, fully dressed figure that can become a unique gift or a proud display piece.
Why You’ll Love This Project
The Architect Doll is designed to be engaging yet manageable. Each part—from the head and body to the intricate accessories—is carefully planned to ensure a satisfying crafting experience. The pattern emphasizes realistic proportions and professional details, giving the doll a polished, miniature look. Working in spiral crochet rounds and using color changes adds both challenge and fun, helping you improve your skills while enjoying the process.
Perfect for Gifting or Display
Whether you’re creating it as a thoughtful gift for a friend who loves architecture or adding it to your own collection, the Architect Doll is sure to impress. Its compact size and professional attire make it a standout piece on any shelf or desk. This pattern also encourages customization, allowing you to choose hair colors, accessory styles, and even minor outfit changes to make your doll uniquely yours.
—
📏 **Final Height:** 28–30 cm
🧶 **Skill Level:** Intermediate
🧵 **Stitching:** Spiral (do not join rounds)
🪝 **Hook:** 2.5 mm
🧵 **Yarn:** DK / #3
👀 **Eyes:** 12 mm safety eyes, black
—
🧶 **MATERIALS**
**Body/Base**
• Skin-colored yarn (light beige)
• 12 mm safety eyes
• Fiberfill stuffing
• Tapestry needle
• Stitch marker
• Scissors
Guide to useful tools for crocheting
**Clothing & Accessories (Architect)**
• Blazer: gray
• Blouse: white
• Skirt: dark gray
• Shoes: black
• Hair: dark brown
• Helmet: white + golden yellow band
• Rolled blueprint: white + blue
• Ruler: gray
• Pencil: yellow
• Details: black / blue
📌 **ABBREVIATIONS**
AM = magic ring · sc = single crochet · inc = increase · dec = invisible decrease · ch = chain · sl st = slip stitch
🟤 **HEAD (skin)**
R1: AM 6 = 6
R2: inc x6 = 12
R3: (sc, inc) x6 = 18
R4: (2 sc, inc) x6 = 24
R5: (3 sc, inc) x6 = 30
R6: (4 sc, inc) x6 = 36
R7–R12: sc x36
👉 Place eyes between R8–R9, spacing: 7 sc
👃 Embroider nose between R9–R10
R13: (4 sc, dec) x6 = 30
R14: (3 sc, dec) x6 = 24
R15: (2 sc, dec) x6 = 18
R16: (sc, dec) x6 = 12
Stuff firmly
**NECK CAVITY**
Leave the 12 sc open
R17–R21: sc x12 (5 rounds)
Fold these 5 rounds inward, creating a cylindrical cavity
Secure with invisible stitches from inside
Fasten off and hide yarn
⚫ **LEGS (make 2)**
R1: AM 6 (skin – foot)
R2: inc x6 = 12
R3–R15: sc x12 (13 rounds in spiral – leg in skin color)
Stuff lightly
Do not close; leave open for joining
**Note:** About 8 of these 13 rounds will be visible; 5 will be covered by the skirt
🔗 **JOINING LEGS**
Join both legs with 3 ch (skin) between them
Crochet in spiral around:
• 12 sc (leg 1)
• 3 sc (joining chain)
• 12 sc (leg 2)
• 3 sc (joining chain)
= 30 sc
🟡 **BODY (bottom-up)**
Continue from the leg join in skin color:
R1–R3: sc x30 (3 rounds in skin – transition from legs to waist)
**WAIST**
R4: sc in BLO x30 (BLO round – free loops will be used for skirt)
🔻 Switch to blouse color (white)
R5: (4 sc, inc) x6 = 36 (increase for torso)
R6–R11: sc x36 (6 rounds in white – torso/blouse)
Stuff body firmly
R12: (4 sc, dec) x6 = 30 (decrease toward neck)
🔻 Switch to skin color
R13: (sc, dec) x6 = 24 (decrease toward neck)
**INSERTION SPIKE**
R14: (2 sc, dec) x6 = 18
R15: dec x9 = 9 (reduce to 9 sc for spike)
R16–R20: sc x9 (5 rounds for cylindrical spike)
Stuff firmly and compactly
Do not close
**VISIBLE NECK**
R21: (sc, inc) x4 = 13 (expand from spike for visible neck)
R22: sc x13
Stuff lightly
Fasten off, leaving yarn to sew to head
👗 **SKIRT (worked in the waist BLO loops)**
In the R4 round where you worked “sc in BLO,” the free loops remain at the base
Insert hook into these free loops and pick up 30 sc
Work in spiral (dark gray):
R1–R8: sc x30 (8 rounds – skirt)
Stuff lightly
Fasten off
🟡 **ARMS (make 2 – slimmer to fit into sleeves)**
R1: AM 6 (skin)
R2: inc x4 = 10 (10 sts – slim but proportional)
R3–R6: sc x10 (4 rounds – longer and thinner)
Stuff lightly (only upper part; forearm nearly empty)
Close flat, leaving yarn to sew
👞 **SHOES (make 2)**
R1: AM 6 (black)
R2: inc x6 = 12
R3: (sc, inc) x6 = 18
R4–R6: sc x18
R7: sc in BLO x18
Stuff lightly
Close and sew to each foot (bottom of each leg)
💇♀️ **HAIR**
**Base:**
R1: AM 6
R2: inc x6 = 12
R3: (sc, inc) x6 = 18
R4: (2 sc, inc) x6 = 24
R5–R6: sc x24
Sew centered on head
**Hairstyle:**
• Loose wavy hair or elegant low half-ponytail with volume
• Color: dark brown
⛑️ **CONSTRUCTION HELMET**
R1: AM 6 (white)
R2: inc x6 = 12
R3: (sc, inc) x6 = 18
R4: (2 sc, inc) x6 = 24
R5: (3 sc, inc) x6 = 30
R6–R12: sc x30
R13: (4 sc, dec) x6 = 24
R14: (3 sc, dec) x6 = 18
Stuff firmly
R15: (sc, dec) x6 = 12
Close gently
Sew on head, covering generously
**HELMET BAND (golden yellow)**
R1: ch 32 (golden yellow)
R2: sc x31
Fasten off and sew around helmet as reinforced band
🧥 **BLAZER WITH SLEEVES (worked separately)**
**BLAZER BODY (worked in rows)**
Ch 25 (gray – body circumference)
R1: sc in BLO x24
R2–R8: sc x24 (7 rows)
Stuff lightly
Fasten off, leaving yarn to sew
**BLAZER SLEEVES (make 2)**
R1: AM 6 (gray)
R2: inc x6 = 12
R3–R5: sc x12
Do NOT stuff – leave hollow to insert arm
Fasten off, leaving yarn to sew
**ASSEMBLY OF BLAZER**
1. Wrap blazer body around doll torso
2. Sew ends at back or side
3. Insert arms into hollow sleeves
4. Sew sleeves around arms with invisible stitches
5. Embroider 2 golden buttons on front
6. Embroider lapels or edges with black yarn to define
7. Secure blazer firmly to body with invisible stitches
📐 **ARCHITECT ACCESSORIES**
**ROLLED BLUEPRINT**
R1: ch 14 (white)
R2–R6: sc x13 (work in 13 remaining ch after the first closing ch)
Fasten off
Roll gently and sew with white thread
Embroider blue grid lines (3–4 horizontal, 2–3 vertical)
Note: This accessory goes in left hand, highly visible
📏 **RULER**
R1: ch 16 (gray)
R2–R3: sc x15
Fasten off
Embroider measurement marks with black yarn (mark every 2 stitches like a real ruler)
Add numbers or small lines to simulate measurements
Note: Goes in right hand, prominent and visible
✏️ **PENCIL (optional – accent accessory)**
**Pencil Body**
R1: ch 12 (yellow) – longer
R2: sc x11
Fasten off
**Pencil Tip**
R1: AM 4 (dark brown)
R2: sc x4
R3: dec x2 = 2
Close at tip
**Assembly:**
• Sew sharp tip to one end of pencil body
• Embroider small black line near tip to simulate sharpened mark
• Position pencil upright in right hand (next to ruler) or alternative left hand
Note: Optional accessory but recommended for architect effect
👜 **PURSE / BAG**
R1: AM 6 (black)
R2: inc x6 = 12
R3: (sc, inc) x6 = 18
R4–R6: sc x18
R7: dec x6 = 12
Stuff lightly
R8: dec x6 = 6
Close
**Details:**
• Embroider small golden rectangle on front (~1 cm) simulating clasp or designer plate
• Sew bag to left side of body (between blazer and skirt)
• Position so visible and not interfering with arms
Note: Completes professional architect look
🪡 **FINAL ASSEMBLY (STEP-BY-STEP)**
1. Prepare head: ensure cavity is properly folded inward
2. Insert spike: place neck spike into head cavity
3. Secure head: stitch invisibly from outside firmly
4. Attach hair to head
5. Place helmet on hair
6. Add golden yellow helmet band
7. Sew blazer onto body, aligned centrally
8. Insert arms into hollow blazer sleeves
9. Sew sleeves around arms with invisible stitches
10. Attach skirt (already worked from waist BLO loops)
11. Attach shoes to feet
12. Sew purse to side of body (over blazer, left side)
13. Attach rolled blueprint to left hand
14. Attach ruler to right hand
15. Embroider smile and cheeks with light pink yarn
💡 **IMPORTANT NOTES**
• Skirt is worked in waist BLO loops, not sewn separately
• Arms are inserted INTO hollow blazer sleeves, NOT sewn directly to body
• Arm/sleeve proportion: Arms (10 sc) fit perfectly in sleeves (12 sc), leaving ~2 st space for flexibility and movement
• Ensure accessories (blueprint, ruler, purse) are secure and visible
• Helmet must be centered and secure
• Helmet band gives professional safety detail
• Neck spike must be firmly stuffed for secure attachment
• All golden details (purse clasp, helmet band, blazer buttons) complete professional look
Congratulations on Your Architect Doll
You’ve completed your Architect Doll, and what a rewarding journey it has been! From crafting the head and body to assembling the professional accessories, every stitch has contributed to bringing this miniature architect to life. This project highlights not only your crochet skills but also your attention to detail and creativity.
Enjoy the Details
The charm of the Architect Doll lies in its thoughtful design. The blazer, skirt, helmet, and miniature tools add personality and realism, making the doll a true representation of an architect at work. Each accessory can be positioned and adjusted, allowing you to showcase the doll in various settings—whether on a desk, shelf, or as part of a display collection.
Tips for Display and Care
To preserve your Architect Doll, keep it out of direct sunlight to maintain yarn colors, and handle accessories gently to avoid distortion. The doll’s compact size makes it perfect for gifting or collecting, and it’s also a fantastic conversation piece for architecture enthusiasts or crochet lovers alike.
Looking Ahead
Completing this pattern opens the door to customizing more dolls with different outfits, professions, or hair colors. Your Architect Doll can inspire new projects, from additional figures to themed dioramas. Celebrate your accomplishment, and enjoy the sense of pride that comes with creating a fully dressed, detailed amigurumi doll from scratch.
💌 **Dear Crafters,**
We are thrilled that you are bringing this **Architect Doll** to life! We know that sometimes patterns can have small mistakes or unclear instructions, and your feedback is incredibly valuable.
If you notice any errors, confusing steps, or inconsistencies while crocheting, please let us know. Even the tiniest detail counts, and every observation helps us improve the pattern for everyone. Your input ensures that all crafters can enjoy a smooth and fun experience while creating this professional miniature doll.
Remember, crochet is as much about creativity as it is about following instructions. Feel free to personalize your **Architect Doll**—choose hair colors, adjust accessories, or make slight modifications to the outfit. This is your opportunity to make the doll uniquely yours!
Thank you for being part of this project. Your contributions make our patterns better, more precise, and more enjoyable for everyone. Happy crocheting!

Spanish version of this pattern
Here’s another pattern for a backpack doll
Video tutorial for knitting the basic body for amigurumi dolls
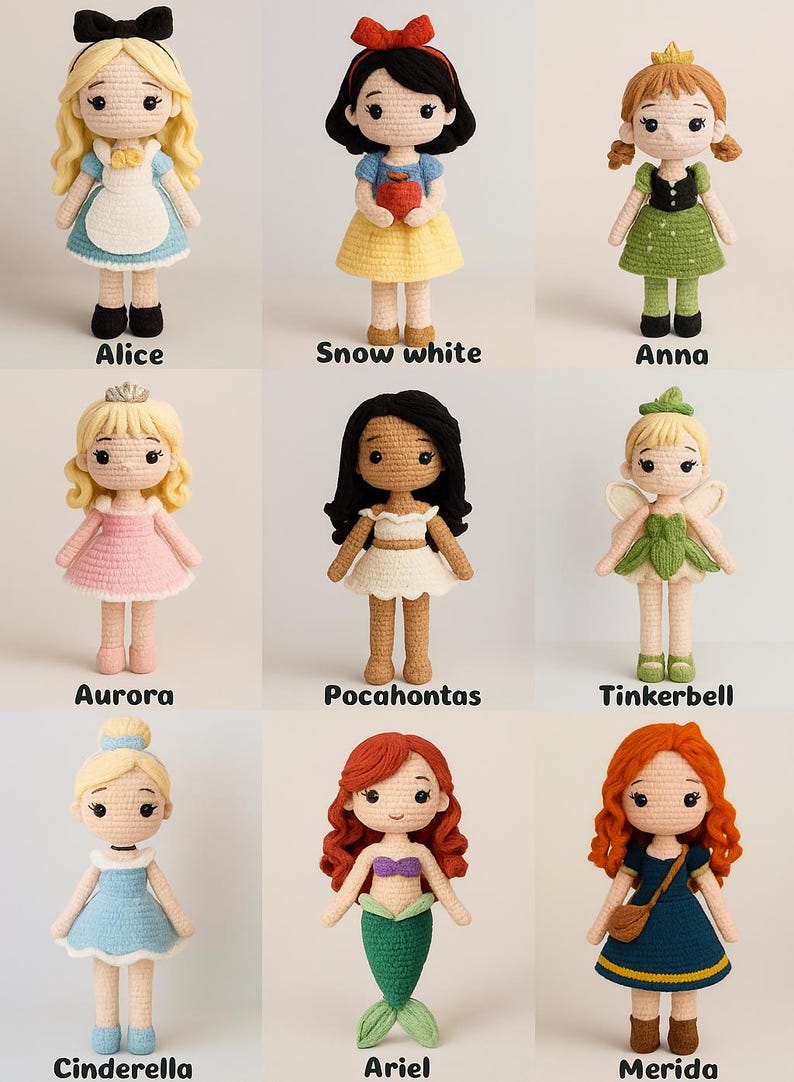
Pack of patterns for crocheting amigurumi princesses found on Etsy
Affiliate Disclosure:
This post contains affiliate links. If you purchase through them, I may earn a small commission at no extra cost to you. Thank you for supporting my work!
Discover more crochet patterns, free downloads, and premium PDFs on Ko-fi.