
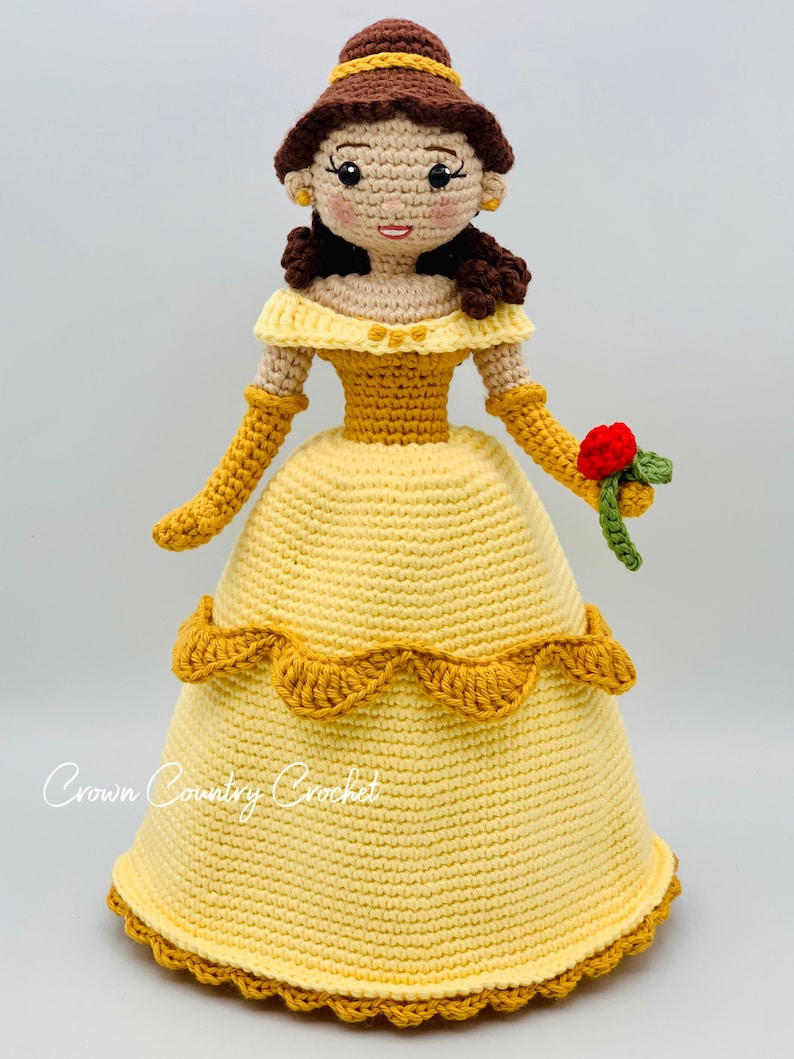
Create your own Princess Bella amigurumi with this step-by-step crochet pattern designed to help you craft a beautifully detailed princess doll. This tutorial guides you through making a classic crochet figure with a delicate silhouette, high waist dress, and elegant hairstyle, resulting in a harmonious and charming amigurumi perfect for gifts, decoration, or collection.
Princess Bella Amigurumi Pattern
This is a project designed for those who enjoy creating special pieces filled with detail. This doll is not just another amigurumi: it is designed to replicate the elegance of a classic princess dress, featuring a delicate silhouette, high waist, and an elaborate hairstyle that frames the face.
The goal of this pattern is for you to achieve a harmonious result even if you have no prior experience making human dolls.
🧶 **A Project to Enjoy**
Throughout the crochet process, you will build the entire figure in a single piece, which facilitates assembly and improves stability. The dress is worked directly onto the body and then complemented with layers and draping that create a volume effect without adding excessive weight. Each step was organized so you can progress in an orderly fashion without confusion, allowing you to focus on the fun part: seeing the princess take shape in your hands.
💛 **More Than Just an Amigurumi**
This Princess Belle is ideal as a gift, decoration, or a collector’s piece. Thanks to her chibi-style proportions and embroidered details, she conveys a sweet and elegant expression. Take your time, prepare your materials, and enjoy the process: crocheting her is as rewarding as seeing her finished.
Project information
Doll size
The finished doll will measure approximately [XX cm], depending on yarn weight, hook size, and the tension used.
Difficulty level
Intermediate.
The pattern combines basic stitches with increases, decreases, working in BLO and FLO, constructing garments directly on the body, skirt draping, and assembly and finishing techniques.
Estimated crocheting time
The required time may vary considerably depending on each person’s experience, tension, and the level of detail applied to the hair and finishes.
Main materials
* Skin-color amigurumi yarn.
* Yellow yarn for the dress.
THE BEST YARNS FOR AMIGURUMI
* Dark yellow yarn for the main skirt layer.
* Red yarn for the rose.
* Green yarn, optional, for the rose stem and leaf.
* Silicone fiberfill for stuffing.
* Crochet hook suitable for the yarn weight.
* Tapestry needle.
* Stitch marker.
* Pins for positioning the pieces.
Guide to useful crochet tools
Optional materials
* Safety eyes or materials to embroider the eyes.
* Small pearls or beads to decorate the dress and hide the drape fastenings.
* Flexible material to reinforce the neck, properly protected and without exposed edges.
Abbreviations and stitches
ch: chain
sc: single crochet
hdc: half double crochet
dc: double crochet
sl st: slip stitch
inc: increase
dec: decrease
BLO: back loop only
FLO: front loop only
MR: magic ring
Note: The number in parentheses at the end of each round indicates the total stitch count you should have upon finishing it.
Before starting: tips for achieving a good result
Maintain firm and even tension
The fabric should remain compact and without visible gaps between stitches. If the stuffing shows through the fabric, try using a smaller crochet hook.
Stuff progressively
Add stuffing little by little as you go. Distribute it toward the edges and compact small amounts to avoid gaps or deformations.
Pay special attention to the neck
The neck must provide enough stability to support the head. Check for firmness before permanently closing the head, and use the indicated support if you decide to include it.
Control the weight of the skirt
The different layers add volume to the dress. If you use additional decorative elements, try to keep them lightweight so as not to alter the balance of the doll.
Check stitch count at the end of each round
On rounds with increases or decreases, always verify that the count matches the number indicated in parentheses before continuing.
Mind eye placement
Before permanently securing them, use pins to check their height and symmetry. Look at the head straight on before doing the final placement.
Distribute the hair gradually
The hair requires balanced distribution around the face and the back of the head. It is not necessary to use the exact same number of strands in every design: the yarn weight and the visual outcome will determine the required amount.
Shape the skirt before permanently fixing the drapes
Check the doll from the front while working the folds. The six drapes should be visually balanced and at similar heights.
Check posture before finishing
Before doing the final fastenings, position the arms, rose, and hair, and view the doll from different angles. This allows you to correct small deviations before securing the pieces.
Do not rush the finishing touches
The final result depends as much on the precision of the stitches as on assembly, stuffing, piece placement, and the distribution of the hair and dress.
Frequently asked questions about the pattern
Is this Princess Belle pattern free?
Yes. The pattern is available for free and contains step-by-step instructions to make the doll and its main decorative elements.
What difficulty level is this pattern?
It is an intermediate-level project, mainly due to the number of pieces, the construction of the dress, and the required finishing touches.
What type of yarn can I use?
You can use a yarn suitable for amigurumi, keeping in mind that the yarn weight and crochet hook size will directly influence the final dimensions of the doll.
Can I change the colors of the dress?
Yes. You can adapt the colors to your liking without altering the structure of the pieces.
Is the skirt worked directly on the body?
Yes. The bases of the different layers are prepared during body construction, and the skirt layers are subsequently worked using the front loops that were left free.
Is it necessary to use a neck support?
The pattern considers a reinforcement to provide stability to the neck. Its necessity will also depend on the final size of the doll, stuffing, and fabric firmness.
Can I change the size of the doll?
Yes, but changing the yarn weight or hook size will alter the dimensions of the entire project. To maintain the design proportions, it is recommended to use the same yarn weight and hook size across all pieces.
Is the gala rose necessary?
It is not essential to complete the structure of the doll, but it is part of the design’s decorative details and completes the princess look.
Section 1: Shoes and Feet Base
We will crochet the shoes in yellow/gold. The base is worked in an oval shape to create the foot, and subsequently, the front part is progressively reduced to form the volume of the shoe.
Make 2 pieces.
Shoe
Starting chain: 7 ch (6 working ch + 1 turning ch).
R1: Starting in the second chain from the hook: 4 sc, 3 sc in the last ch, 3 sc along the other side of the chain, 2 sc in the last ch.
Total: 12 sc
R2: 1 inc, 3 sc, 3 inc, 3 sc, 2 inc.
Total: 18 sc
R3: (2 sc, 1 inc) × 6
Total: 24 sc
R4: 24 sc in BLO.
Total: 24 sc
This BLO round marks the transition between the base and the walls of the shoe.
R5: 24 sc.
Total: 24 sc
R6: 9 sc, 3 consecutive dec in the front part of the shoe, 9 sc.
Total: 21 sc
The three decreases must remain grouped in the front area to begin closing the toe cap.
R7: 8 sc, 3 consecutive dec in the front part of the shoe, 7 sc.
Total: 18 sc
The shoe finishes with 18 single crochet. This will be the stitch count used to subsequently start each leg.
Recommendations
Place a stitch marker at the beginning of each round to precisely monitor the round.
Stuff the front part of the shoe lightly, keeping enough space so the piece retains its shape.
Do not fully stuff the shoe before starting the leg; stuffing will be added progressively during the leg work.
If you wish to use a rigid sole, cut it slightly smaller than the base of the shoe and ensure it has no sharp edges.
Do not add or remove stitches to correct the marker position. If the start of the round shifts, first check the tension and the actual position of the first stitch.
Result: Each shoe finishes with 18 sc. This amount will allow starting the next section with 18 stitches per leg, establishing a direct transition between the shoe and the leg.
Section 2: Legs
We will crochet 2 pieces in skin color. The leg starts directly over the final 18 stitches of the shoe.
Leg — make 2
Continue crocheting over the 18 stitches of the shoe.
R8: 18 sc in BLO.
Total: 18 sc
This round is worked in BLO to create a defined transition between the shoe and the leg.
R9: 18 sc.
Total: 18 sc
R10: (7 sc, 1 dec) × 2
Total: 16 sc
The two decreases consume the 18 available stitches from the previous round and are distributed opposite each other to slightly reduce the width of the leg and maintain a balanced shape.
R11–R26: 16 sc in each round.
16 rounds in total.
Total: 16 sc
Leg Finishing
* Leg 1: fasten off and cut the yarn.
* Leg 2: do not cut the yarn. We will continue directly from here to perform the joining of both legs.
Stuffing
Start stuffing progressively from R12. Insert small amounts of stuffing and distribute them into the shoe and along the leg.
The leg should remain firm and stable, but not excessively rigid, to maintain an even appearance and avoid distorting the stitches.
Preparation for Joining
Before starting the join, check that both legs are facing the same direction and that the shoes are aligned.
Do not add extra stitches to correct the position. The joining will be calculated specifically from the final 16 stitches of each leg, so any adjustment must be resolved through the starting position of the join and not by arbitrarily modifying the stitch count.
Section 3: Leg Join and Torso Base
In this section we will join the two legs to begin forming the body. Each leg finishes with 16 stitches, so we will retain a clean join of 38 stitches without needing to add adjustment stitches.
Joining the legs
* Leg 2 must keep the yarn attached upon finishing R26. Leg 1 must be fastened off.
* Before starting, place both legs with the shoes facing the same side and check that they are aligned.
R27 — Join
From the last stitch of Leg 2:
1. Ch 3.
2. Join with 1 sc to the first stitch of the inner side of Leg 1. This sc counts as the 1st st of Leg 1.
3. Crochet 15 sc around the remaining stitches of Leg 1, completing 16 sc on this leg.
4. Crochet 3 sc along the first side of the joining chains.
5. Crochet 16 sc around the entire perimeter of Leg 2.
6. Crochet 3 sc along the other side of the joining chains.
Total: 38 sc
Exact breakdown of the round
16 sc (Leg 1) + 3 sc (Side A chains) + 16 sc (Leg 2) + 3 sc (Side B chains) = 38 sc.
R28–R30
Crochet 38 sc in each round.
Total: 38 sc per round (3 rounds in total).
These three rounds form the first section of the torso after joining the legs.
Stuffing
Stuff progressively as you advance. Pay special attention to the crotch area to prevent a hollow space between both legs.
The stuffing should be firm and uniform, but without exerting so much pressure that it deforms the stitches or spreads the legs apart.
Check before continuing
Upon finishing R30, check:
* Both legs must be correctly aligned.
* The shoes must point in the same direction.
* The join between the legs must be centered.
* You must have exactly 38 stitches.
* No stitches should have been added or removed during the join.
Section 4: Waist and Dress Structure
In this section we will begin shaping the torso and will prepare the bases for the four layers of the skirt. The rounds worked in BLO will leave the front loop free to subsequently crochet each ruffle.
R31 — Base of Ruffle 1
38 sc in BLO.
Total: 38 sc
This round leaves the front loop free to work the first layer of the skirt later.
R32
(17 sc, 1 dec) × 2
Total: 36 sc
The two decreases slightly reduce the diameter of the torso.
R33 — Base of Ruffle 2
36 sc in BLO.
Total: 36 sc
The front loop remains free to work the second layer of the skirt later.
R34
36 sc.
Total: 36 sc
R35 — Base of Ruffle 3
36 sc in BLO.
Total: 36 sc
This round leaves the front loop available again for the third layer of the skirt.
R36 — Waist
(7 sc, 1 dec) × 4
Total: 32 pb
The four decreases progressively reduce the width of the torso to define the waist.
R37
32 sc.
Total: 32 sc
R38 — Base of Main Skirt
(6 sc, 1 dec) × 4 in BLO.
Total: 28 sc
This round defines the structural base of the main skirt. It is worked entirely in BLO, including the decreases, leaving the front loops of the 28 stitches free to work the fourth layer of the skirt later.
R39
28 sc.
Total: 28 sc
R40
(5 sc, 1 dec) × 4
Total: 24 sc
R41
24 sc.
Total: 24 sc
R42
(2 sc, 1 dec) × 6
Total: 18 sc
R43
(4 sc, 1 dec) × 3
Total: 15 sc
From this round onward, the upper part of the torso begins, which will continue toward the neck.
R44–R46
15 sc in each round (3 rounds in total).
Total: 15 sc per round
These three rounds form the visible section of the neck.
R47–R52
15 sc in each round (6 rounds in total).
Total: 15 sc per round
These six rounds form the neck extension (support spike) that will later be inserted inside the head.
R53
(1 sc, 1 dec) × 5
Total: 10 sc
R54
5 dec.
Total: 5 sc
Close the final 5 stitches with a tapestry needle passing through the front loop of each stitch and fasten off securely.
Torso stuffing and support
Stuff the torso progressively as you advance. The body must remain firm and maintain a uniform shape, especially around the waist and neck.
If an internal rigid support for the neck is used, for example a silicone glue stick or pipe cleaner, it must be well centered and stable before closing the piece.
Section 5: Skirt 1 — Lower Layer
The first layer originates from the front loops (FLO) left free in R31 of Section 4. This layer must provide the greatest length of the skirt and drape lightly around the feet.
Color: Yellow
Joining points: 38 free FLO loops from R31.
R1
Crochet 2 dc in each of the 38 available FLO loops.
Total: 76 dc
R2
(1 dc, 1 dc inc) × 38
Total: 114 dc
R3–R5
Crochet 114 dc in each round (3 rounds in total).
Total: 114 dc per round
These three rounds provide the main length of this layer. Maintain even tension so the skirt retains a fluid drape.
R6 — Wavy bottom edge
(1 sl st in the next stitch, skip 1 stitch, 5 dc in the next stitch) repeat 38 times around the entire round.
Result: 38 shell-shaped fans perfectly distributed over the hem.
Tips and recommendations
Keep the 5 dc groups evenly spaced to prevent the scalloped edge from curling.
If you notice that the lower layer is too stiff, you can use a hook 0.5 mm larger exclusively for the skirt layers, which will give greater looseness and fluidity to the double crochet stitches.
Section 6: Skirt 2 — Middle Layer
The second layer originates from the front loops (FLO) left free in R33 of Section 4. It is worked with the doll upside down so that the ruffle flares outward.
Color: Yellow
Joining points: 36 free FLO loops from R33.
R1
Crochet 2 dc in each of the 36 available FLO loops.
Total: 72 dc
R2
(1 dc, 1 dc inc) × 36
Total: 108 dc
R3–R4
Crochet 108 dc in each round (2 rounds in total).
Total: 108 dc per round
These two rounds provide a slightly shorter length than Skirt 1, allowing the edge of the lower layer to remain visible and creating the tiered effect of the dress.
R5 — Wavy bottom edge
(1 sl st in the next stitch, skip 1 stitch, 5 dc in the next stitch) × 36.
Repeat the motif 36 times around the entire round.
Total: 36 shell-shaped fans, perfectly distributed over the hem.
Tips and recommendations
Maintain relaxed tension to prevent the double crochet stitches from gathering.
The layer should flare out gently to preserve the cascade effect.
Do not add or remove stitches upon finishing the round: 36 motifs × 3 stitches consumed = 108 exact stitches from the previous round.
Section 7: Skirt 3 — Top Layer of Ruffles
The third layer originates from the front loops (FLO) left free in R35 of Section 4. This layer will be slightly shorter than the previous two, allowing the lower ruffles to remain visible.
Color: Yellow
Joining points: 36 free FLO loops from R35.
R1
Crochet 2 dc in each of the 36 available FLO loops.
Total: 72 dc
R2
(1 dc, 1 dc inc) × 36
Total: 108 dc
R3
Crochet 108 dc around.
Total: 108 dc
R4 — Wavy bottom edge
(1 sl st in the next stitch, skip 1 stitch, 5 dc in the next stitch) × 36.
Repeat the motif 36 times around the entire round.
Total: 36 shell-shaped fans, evenly distributed over the 108 stitches of the previous round.
Tips and recommendations
This layer has one fewer round of double crochet stitches than Skirt 2, so it should be shorter.
Maintain even tension so the fans open correctly.
Do not add or remove stitches upon finishing the round: 36 motifs × 3 stitches consumed = 108 exact stitches.
Section 8: Skirt 4 — Main Layer
This layer originates from the front loops (FLO) left free in R38 of Section 4. It is the main layer of the dress and is worked in dark yellow.
Color: Dark yellow
Joining points: 28 free FLO loops from R38.
R1
Crochet 2 dc in each of the 28 available FLO loops.
Total: 56 dc
R2
(1 dc, 1 dc inc) × 28
Total: 84 dc
R3
(2 dc, 1 dc inc) × 28
Total: 112 dc
R4–R9
Crochet 112 dc in each round (6 rounds in total).
Total: 112 dc per round
These six rounds provide the necessary length for the main layer to partially cover the lower ruffles, keeping the lighter layers visible.
R10 — Upper edge of the drape
Crochet 112 sc around.
Total: 112 sc
This round of single crochet provides a firmer and more defined edge that will serve as a reference to construct the six skirt drapes later.
Tips and recommendations
Maintain even tension during the double crochet rounds so the skirt retains a smooth drape.
Do not overtighten R10, as it will be necessary to work over this edge later to form the drapes.
Check that you have exactly 112 stitches upon finishing R10 before starting the next stage.
Section 9: Draping of Skirt 4
Now that Skirt 4 finishes with 112 sc in R10, we will build over this edge the 6 drapes that characterize the main layer of the dress.
To maintain a clean and reproducible structure, we will use a vertical gathering system secured with stitches.
Division of the skirt
R10 has 112 stitches. Divide the edge into 6 sections using markers, distributed as follows:
* 4 sections of 19 stitches.
* 2 sections of 18 stitches.
Total: (4 × 19) + (2 × 18) = 112 stitches.
To establish the distribution, consider each marker as the first stitch of a section. In this way, the six sections contain exactly 19, 19, 19, 19, 18, and 18 stitches, without overlap.
Place the six markers evenly around the hem. The two 18-stitch sections must be in opposite positions to correctly complete the 112 stitches.
If you want two of the drapes to face front, place their respective markers symmetrically relative to the front center axis.
Formation of the drapes
Each of the 6 marked stitches will be a gathering point. The fabric will gather vertically from R10 up to approximately R2 of Skirt 4.
For each of the 6 marked stitches:
1. Locate the marked stitch in R10.
2. With a tapestry needle and a strand of the same color, start at that stitch and work upward to approximately R2.
3. In each round between R10 and R2, take a small horizontal stitch in the same vertical column of fabric. The stitches should catch only the skirt layer, without going through the entire volume of the fabric.
4. Leave the ends of the strand unsecured initially.
5. Pull gently on the strand to progressively gather the fabric between R10 and R2.
6. Adjust the gather until forming a defined, uniform vertical fold with a natural drape.
7. Secure the fold on the wrong side with several firm stitches, ensuring the gather maintains its position.
8. Repeat the procedure on the other five marked stitches.
The 6 gathering points should remain evenly distributed around the skirt, forming six vertical folds.
Decoration
Once the six drapes are secured, sew a small pearl or decorative bead to the upper part of each gather.
The bead helps hide the securing stitches and provides the ornamental finish for the main layer.
Tips and recommendations
Before permanently securing the gathers, stand the doll up and check the distribution of the six folds around the entire dress.
Keep all six gathers at a similar height to preserve symmetry.
Do not pull excessively on the strand: the fabric should form a defined fold, but retain enough slack to maintain a natural drape.
Pay special attention to ensure the two front drapes are balanced relative to the central axis of the body.
Do not add or remove stitches in R10: the 112 sc are used in their entirety to establish the distribution of the six drapes.
Verify that the gathers do not excessively compress the skirt or alter the circular shape of the hem.
Section 10: Arms
The arms are worked in Skin color and remain relatively narrow to maintain the stylized proportions of the doll.
Arm Crochet Instructions
Work 2 pieces in Skin color.
**R1:** Magic ring of 6 sc. (8)
**R2–R15:** 8 sc in each round. (8)
These are 14 straight rounds.
**R16:** 8 sc. (8)
**R17:** (2 sc, 1 dec) × 2. (6)
Fasten off and cut the yarn, leaving a long enough tail to sew the arm to the body.
Stuffing
Stuff the first few rounds, corresponding to the hand, firmly enough to retain its shape.
As you progress toward the upper part of the arm, use less stuffing. The upper area should remain more flexible to allow the arm to fall naturally along the body.
It is not necessary for the arm to be rigid.
Optional Articulation
If you wish to place the arms in a specific pose, especially so that one hand can reach the chest, you can insert a pipe cleaner or appropriately covered wire inside.
This option is purely decorative and does not alter the stitch count or the rounds of the pattern.
Joining to the Body
The arms are sewn to both sides of the body, approximately at the height of R40–R41.
Before permanently securing them:
* Check that both arms are at the same height.
* Face the hands forward or slightly toward the body.
* Verify that the arms are balanced relative to the central axis.
* Ensure the seam is firm, especially at the top of the arm.
Section 11: Neckline Detail — Off-the-Shoulder Collar
This piece creates the upper trim of the dress around the shoulders and arms, forming an off-the-shoulder neckline effect.
Piece Crochet Instructions
Work in Yellow color.
**Starting chain: 45 ch.**
The chain should surround the upper body and pass over the outside of both arms. The measurement of 45 chains is an initial reference; before continuing, check that the piece can comfortably wrap around the shoulders without being overly tight.
**R1:** 1 hdc in each chain.
Fasten off, leaving a long tail for assembly.
Assembly on the Doll
Place the piece around the shoulders, over the outside of the arms, forming the top edge of the dress.
Distribute the piece evenly and check that both sides are at the same height.
Once positioned, sew the piece to the body and at necessary contact points to keep it stable.
Central Gathering
To achieve the gathered neckline:
1. Locate the front center of the piece.
2. Using a tapestry needle and the same yarn color, make several gathering stitches in that area.
3. Gently pull the yarn to obtain the desired cinch.
4. Secure the gather on the inside so it maintains its shape.
The gather should be sufficient to define the neckline without overly closing the front opening.
Final Check
Before permanently securing the piece:
* Check that the shoulders remain exposed.
* Verify that both sides have a similar drape.
* Ensure the trim does not compress the arms.
* Center the gather relative to the front axis of the body.
Section 12: Head
The head is worked in Skin color, starting from the crown. The construction uses progressive increases to form a rounded head and subsequently decreases to close the lower portion and create the cavity where the neck will be inserted. This sequence corresponds to the original pattern structure.
Head Formation
**R1:** Magic ring of 6 sc. (6)
**R2:** 6 inc. (12)
**R3:** (1 sc, 1 inc) × 6. (18)
**R4:** (2 sc, 1 inc) × 6. (24)
**R5:** (3 sc, 1 inc) × 6. (30)
**R6:** (4 sc, 1 inc) × 6. (36)
**R7:** (5 sc, 1 inc) × 6. (42)
**R8:** (6 sc, 1 inc) × 6. (48)
**R9:** (7 sc, 1 inc) × 6. (54)
**R10:** (8 sc, 1 inc) × 6. (60)
Head Height
**R11–R22:** 60 sc in each round. (60)
These 12 rounds maintain the maximum diameter and provide the necessary height for the face.
safety eyes can be placed approximately between R16 and R17.
Decreases
**R23:** (8 sc, 1 dec) × 6. (54)
**R24:** (7 sc, 1 dec) × 6. (48)
**R25:** (6 sc, 1 dec) × 6. (42)
**R26:** (5 sc, 1 dec) × 6. (36)
**R27:** (4 sc, 1 dec) × 6. (30)
**R28:** (3 sc, 1 dec) × 6. (24)
**R29:** (2 sc, 1 dec) × 6. (18)
Cavity Formation
**R30:** 18 sc in BLO. (18)
This BLO round creates a clearly defined directional change at the lower part of the head.
**R31–R36:** 18 sc in each round. (18)
These 6 rounds form the inner tube of the cavity, intended to receive the neck support spike.
Safety Eyes
With the 60 stitches of the central rounds, safety eyes can be placed approximately between R16 and R17.
The original source suggests an approximate spacing of 10–12 stitches between both eyes. This measurement should be visually adjusted depending on the size of the eyes used and the fabric tension.
Stuffing and Stability
Stuff the head firmly and evenly as you progress through the decreases, taking care to preserve a rounded shape.
The lower cavity must remain defined to allow insertion of the neck spike.
Section 13: Hair — Grafting Technique and Styling
The hair is constructed using strands of yarn grafted directly onto the head, creating a sufficiently dense base along the contour and crown, while the rest is distributed more sparsely. This is the technique outlined in the original pattern.
Preparation of Strands
Cut the hair strands to approximately twice the desired final length. This will leave enough length to style them, shape the waves, and create the updo later.
Work with the same type of yarn you will use for the hair.
Grafting Map
Distribute the strands following these three areas:
**Contour line:** Graft the strands stitch by stitch around the face, following the hairline. This area should be sufficiently covered to prevent the head from showing through when styling the hair back.
**Crown:** Graft the strands forming a path around the first 3–4 top rounds of the head.
**Rest of the head:** It is not necessary to cover every stitch. Distribute the strands in alternating rounds or approximately every two stitches, depending on yarn weight. When styling the hair, the strands will cover the remaining spaces.
Styling Backward
Once the strands are placed, bring all the hair toward the back of the head using your fingers or a wide-tooth comb.
Do not pull the strands too tightly. The hair should retain some volume to allow forming the side waves later.
If any area needs extra stability, you can make small invisible stitches with thin yarn of the same color to hold the hair in position.
Forming the Waves
To create the side waves:
1. Separate a small section of approximately 2–4 strands, depending on yarn weight.
2. Twist the section on itself until the yarn itself begins to curl.
3. Without stretching it, guide the section toward the back, forming a soft curve over the side of the head.
4. At the point where you want to define the curve, make an invisible stitch that discreetly secures the section to the head.
5. Repeat the procedure with the remaining sections.
The goal is to achieve waves with volume and movement, not completely straight sections.
Finishing the Ends
The ends of the side sections can be integrated into the back updo or left to cascade in a small spiral.
If the yarn used holds its twist well, you can temporarily wrap a section around a thin cylindrical object and let it rest until it adopts the desired shape.
Final Updo
Bring all the hair toward the upper back of the head and secure it with a strand of the same color.
The volume of the yarn itself will help form the bun or updo.
For a more delicate finish, let one or two thin strands fall on each side of the face.
Recommended Volume Distribution
* **Front:** hair closer to the head.
* **Temples:** greater volume to frame the face.
* **Back:** concentrate the hair to form the updo.
* **Sides:** preserve some visible waves to maintain the formal hairstyle look.
Section 14: The Gala Rose
The rose is worked as a strip of petals that is subsequently coiled onto itself to form a compact, voluminous flower. The original sequence uses a 21-stitch chain and two rows of double crochet increases.
Material
* Deep red yarn, or the chosen shade for the rose.
* Crochet hook suitable for the yarn weight.
* Tapestry needle.
* Optional: green yarn for the stem and leaf.
Rose
**Starting chain:** 21 chains.
**Row 1:** Starting in the second chain from the hook, 2 dc in each chain across.
**Total: 40 dc**
The first chain is not worked; the remaining 20 chains receive 2 dc each: 20 × 2 = 40.
**Row 2:** 3 dc in each of the 40 stitches.
**Total: 120 dc**
This second row considerably increases the volume of the strip, creating the necessary amount of fabric to form the petals when coiled.
Formation of the Rose
Do not cut the yarn immediately.
Begin coiling the strip onto itself from one of its ends.
Keep the bottom aligned relatively flat while the top opens to form the petals.
Continue coiling until you achieve the shape of a rose.
With the tapestry needle and the remaining tail, sew the base of the flower firmly to hold all the turns in position.
Shape the petals with your fingers until achieving a balanced form.
Stem and Leaf — Optional
If you wish to include a stem:
1. Attach the green yarn at the base of the rose.
2. Chain 10.
3. To form a leaf, work along the return of the chain:
**(1 sc, 1 hdc, 1 dc, 1 hdc, 1 sc)**
4. Work the sequence into the same chain stitch.
Attaching the Rose to the Doll
The rose is placed in one of the hands.
Position the flower in the hand, tilted slightly toward the chest.
Using yarn of the same color, make invisible stitches to discreetly join the rose to the hand.
If it includes a stem, you can also secure the stem toward the body.
Check that the flower is not loose and cannot fall between the folds of the skirt.
The attachment should remain discreet and not deform the hand or the flower.
🌼 **Project Finished**
Upon completing your **Princess Belle Amigurumi Doll**, you will notice that every small detail adds to the final result. From the eye placement to the drape of the dress, everything contributes to her personality and expression. Don’t worry if you feel you need to rearrange the hair or slightly adjust the arms at first: amigurumi dolls are ultimately “modeled” with your hands. Take a few minutes to style the curls, arrange the skirt, and center the rose; that final adjustment is what truly brings her to life.
🧵 **Personalize Your Princess**
One of the best parts of this project is making it unique. You can vary the dress shade, add small embroidered pearls, change the hair color, or even modify the size by using a different yarn. This same pattern allows for many versions: from a delicate room decoration to a special, completely handmade gift.
💛 **To Keep Her Beautiful**
Your **Princess Belle Amigurumi Doll** is designed primarily as a decorative piece. Try to keep her in a dry place and, if cleaning is needed, use only a slightly damp cloth without submerging her in water. Keep her away from direct sunlight to preserve the colors and the dress’s sheen. With these simple care steps, you can enjoy her for many years, always remembering the time and love you invested in crocheting her.
💌 **To the Crocheter**
Thank you for choosing to crochet this **Princess Belle Amigurumi Doll**. Every handmade doll is unique, and that is the most beautiful part of amigurumi: you aren’t just following a pattern; you are creating a piece with your own style, your stitch tension, and your personal touches.
If at any step you feel something doesn’t look exactly as you hoped, don’t worry. In doll making, a huge part of the final result appears during assembly: arranging the stuffing, adjusting the arm positions, styling the curls, and centering the skirt make a massive difference. Take your time in these stages because that is where she truly “comes to life.”
We recommend reading the entire pattern before starting, preparing your materials, and moving forward calmly. Marking rounds, testing eye placement before securing them, and checking her posture on a flat table will help you achieve a better result. If you find any step confusing, a potential error, or a way to improve the explanation, we would love for you to share it in the comments. Your observations help improve the pattern and assist other crocheters in the community.
We hope you enjoy the process as much as the final result! 🧶💛

Spanish version of this pattern
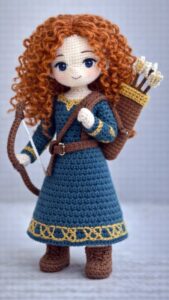
Here’s another pattern for an archer princess.
Video tutorial for crocheting Cinderella amigurumi
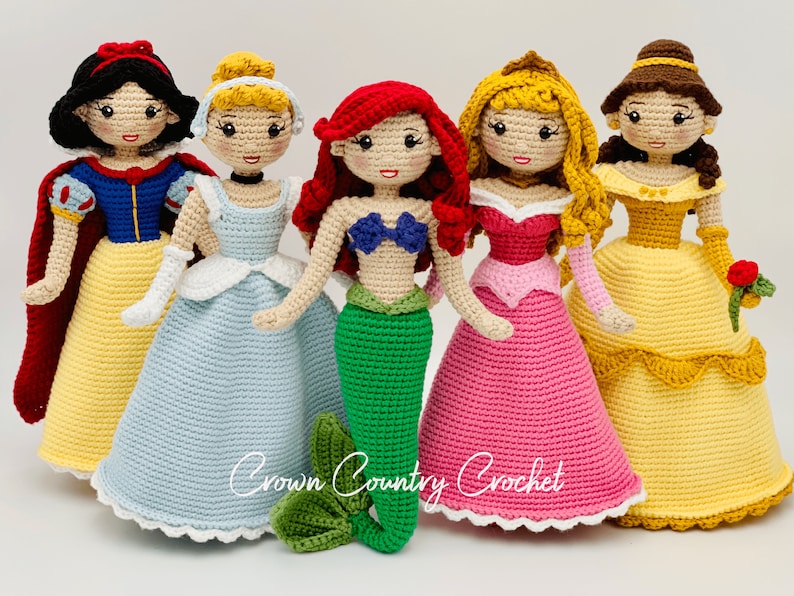
Pattern for another design of the Beautiful Princess Amigurumi
This page contains affiliate links. If you make a purchase through these links, we may earn a small commission at no additional cost to you.
We only recommend products and materials that we personally use and trust to help you achieve the best results with the Princess Bella Amigurumi Pattern. Your support helps us continue to create high-quality crochet patterns and tutorials for the crafting community.
Thank you for supporting our work!
Discover more crochet patterns, free downloads, and premium PDFs on Ko-fi.
gostaria de saber o tamanho dos olhos obrigada
Os olhos podem ser feitos com fio fino, formando um círculo de 12 pontos baixos, mas isso vale apenas se você quiser uma boneca totalmente artesanal, toda feita de crochê; neste caso, a boneca tem olhos de plástico de 12 mm, que lhe dão um olhar mais expressivo.
I’m not sure when this pattern was published, but your picture of Belle is beautiful. I’m currently working on the top portion of the dress. (the darker color). (haven’t started hair yet) I looked ahead of where I am, and do not see a section for the soft yellow part of the dress. I’ve spent so much time on this so far, im nor sure what happened, or where it is. can you help?? thank you!
Hi! Thank you so much for your kind words about Belle 😊 I really appreciate it.
I want to let you know that you’re absolutely right to feel confused — I’ve recently noticed that this pattern has some errors and unclear sections (including the part you mentioned about the soft yellow dress).
To avoid any frustration or wasted effort, I recommend pausing your work for now. I’m currently rewriting and correcting the entire pattern to make everything clear and complete.
As soon as the updated version is ready, I’ll make it available so you can continue with confidence and without guessing steps.
Thank you for your patience, and I’m really sorry for the inconvenience. I’ll make sure it’s worth the wait!
You already have the corrected pattern